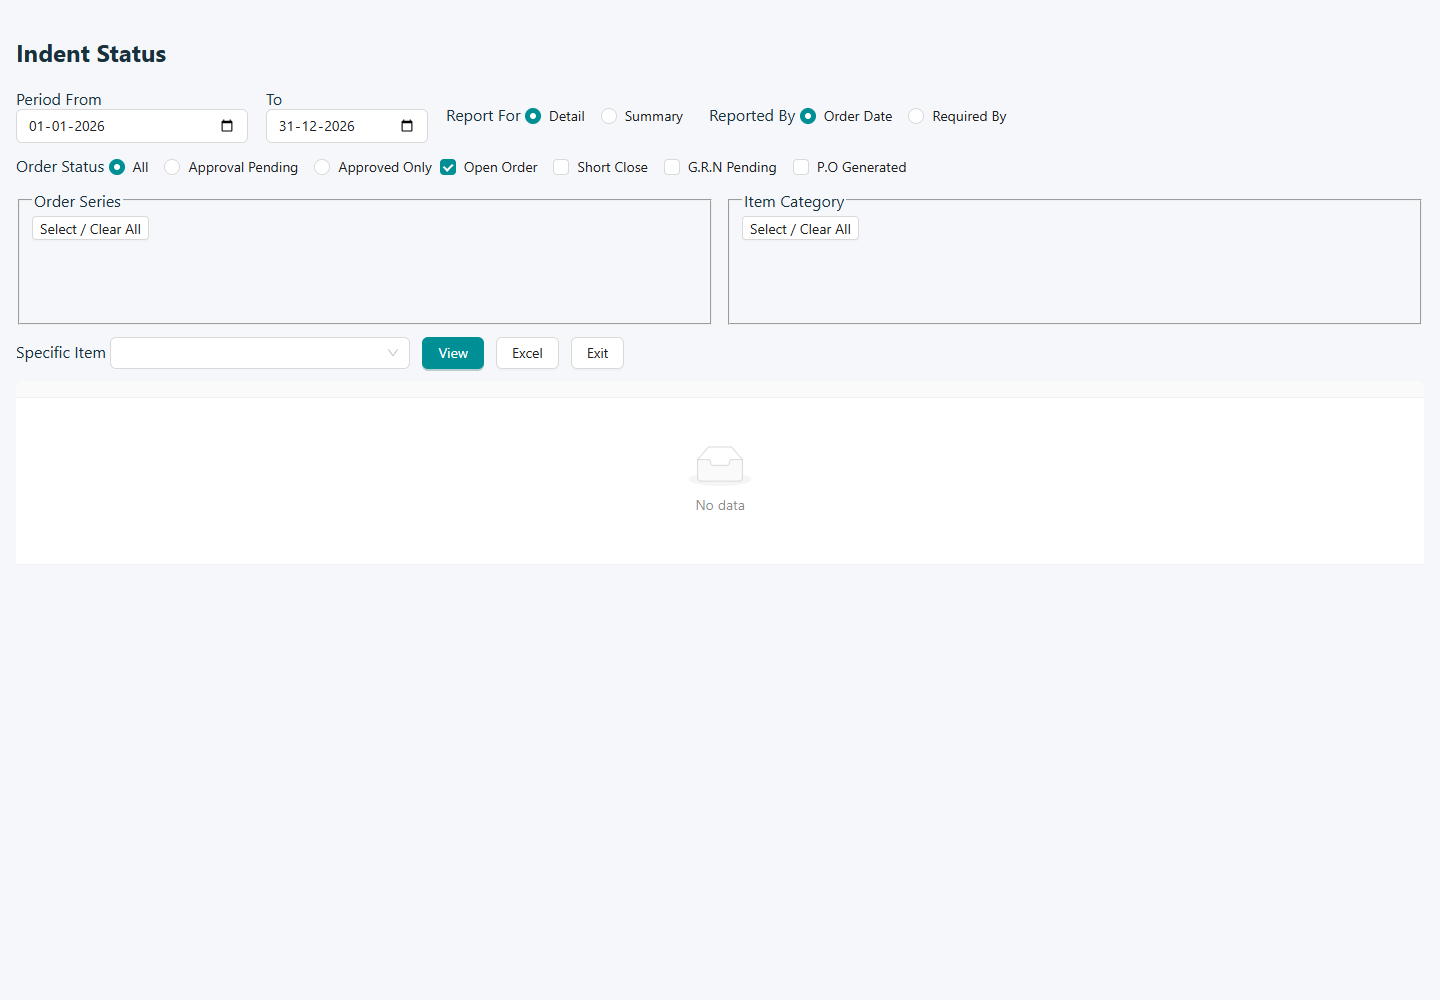
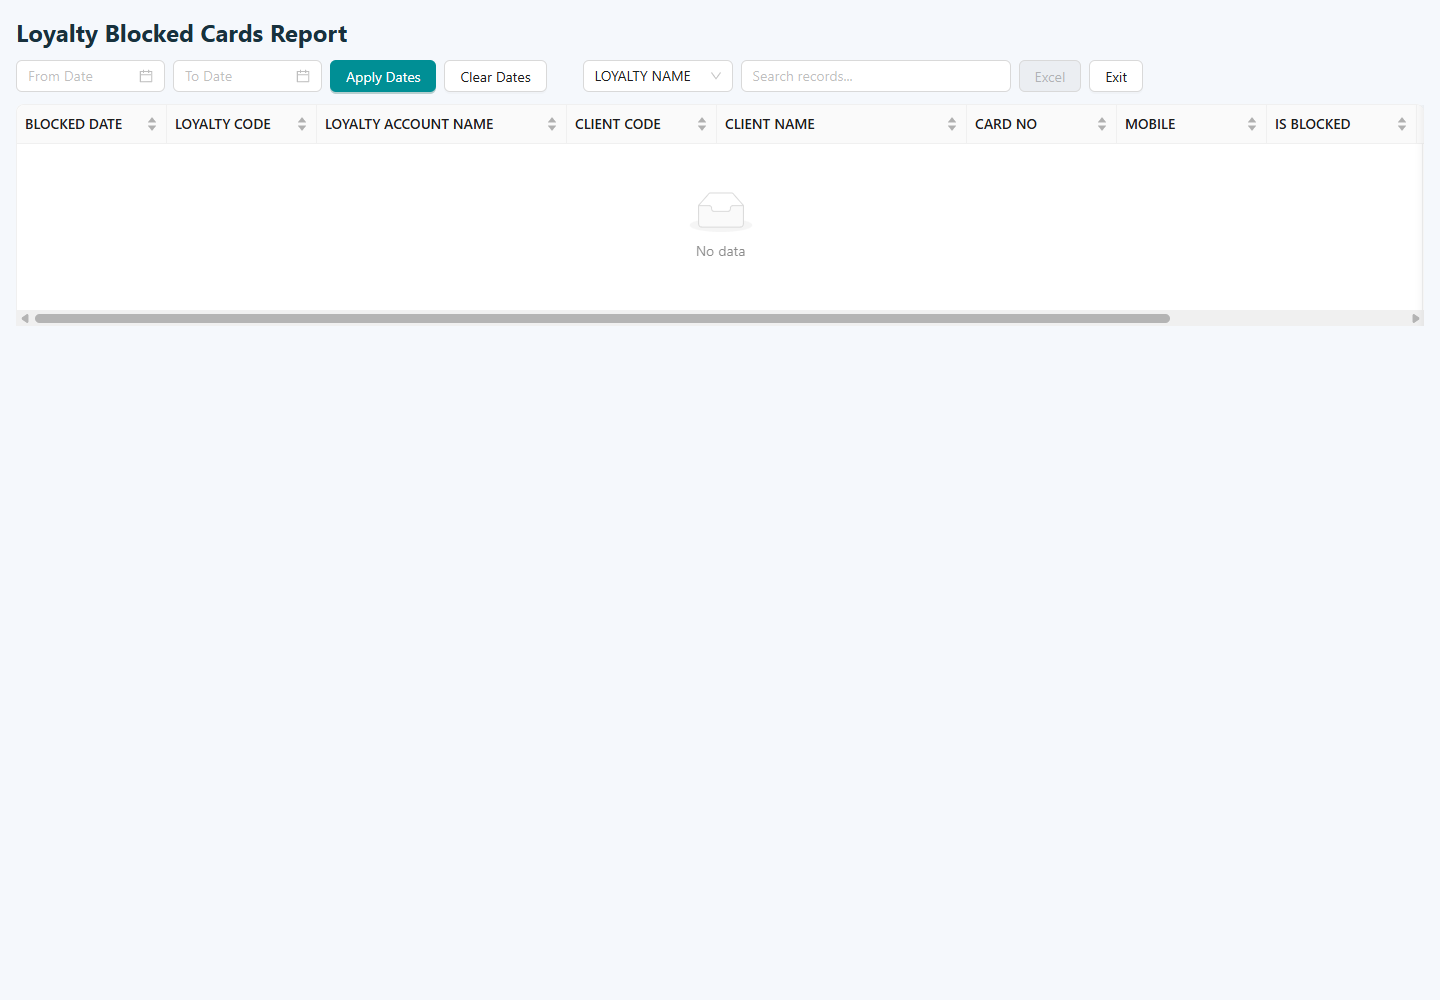
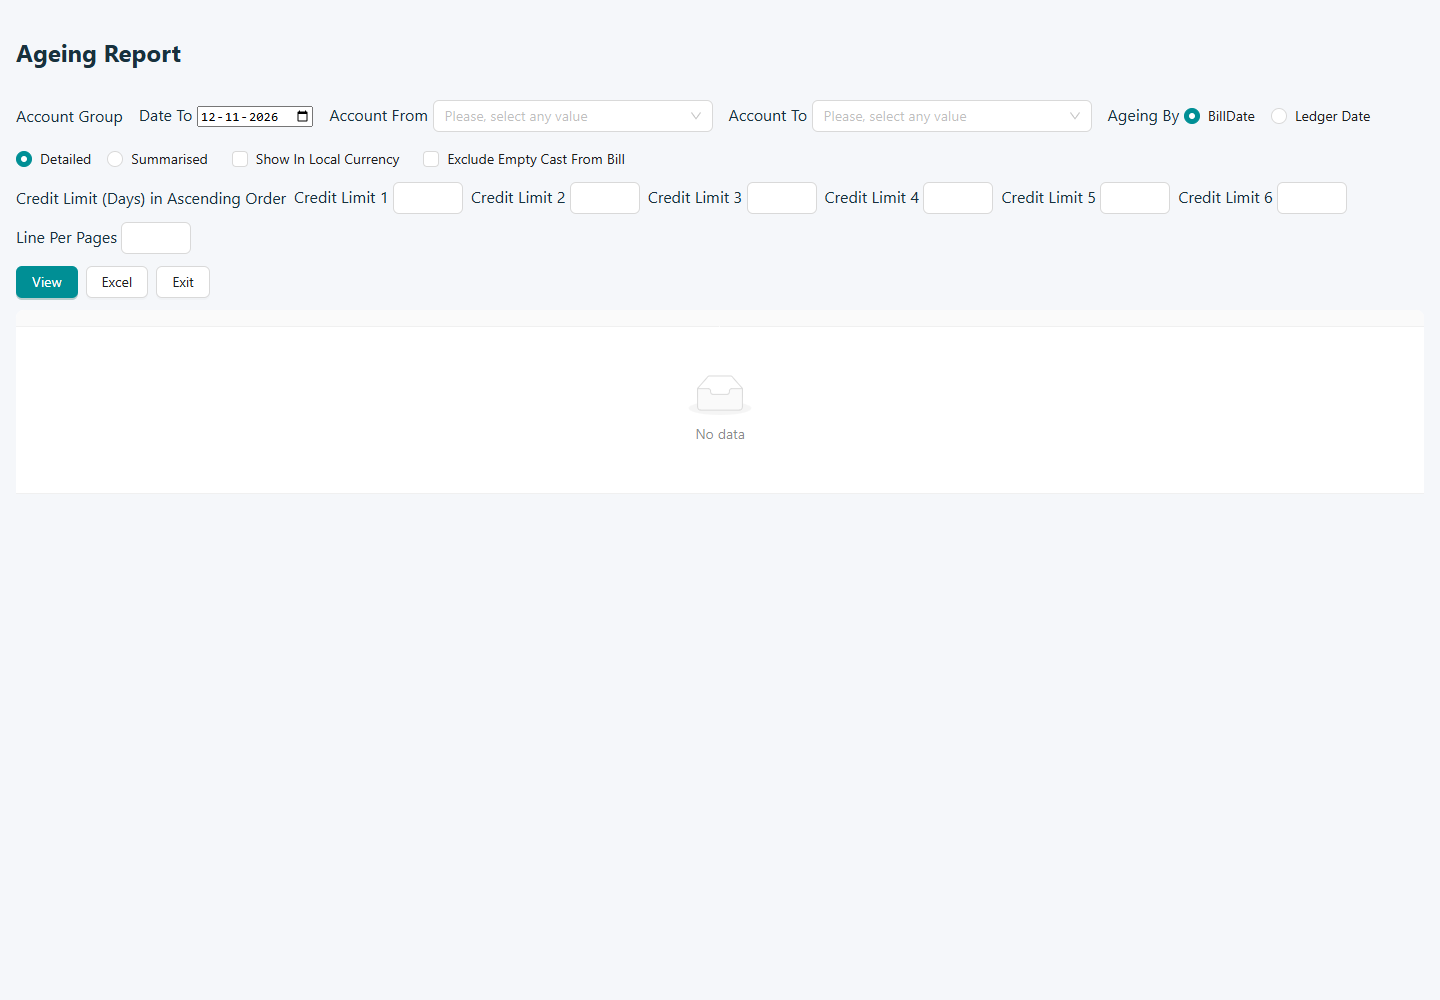
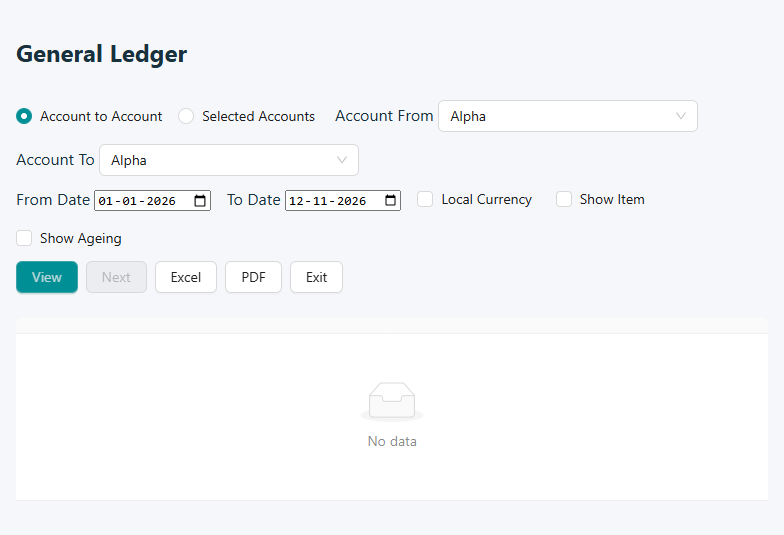
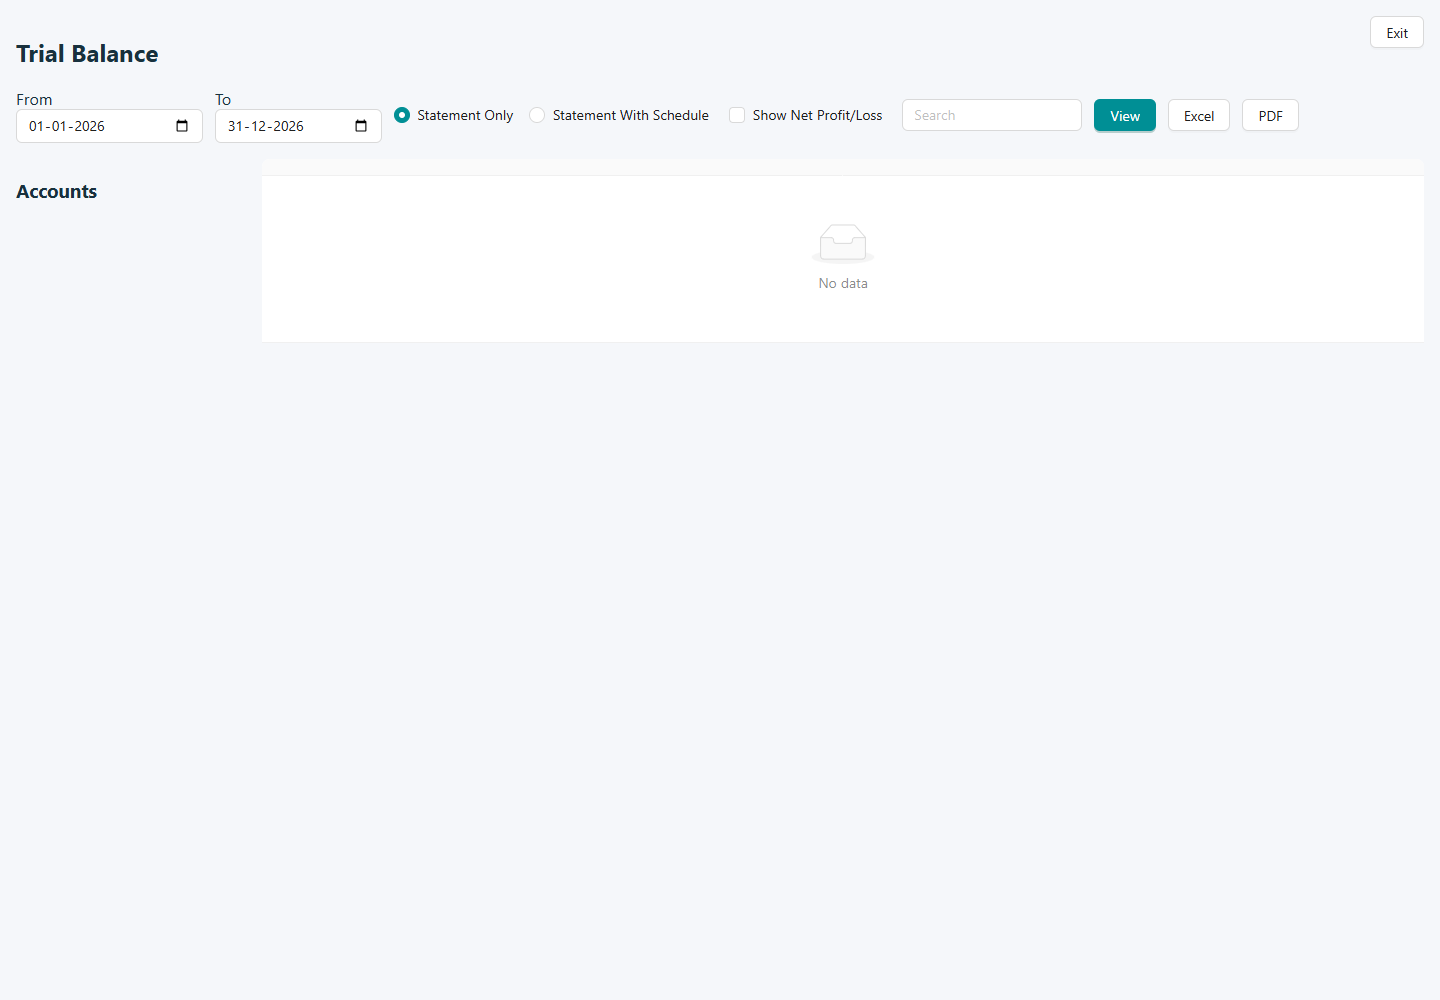
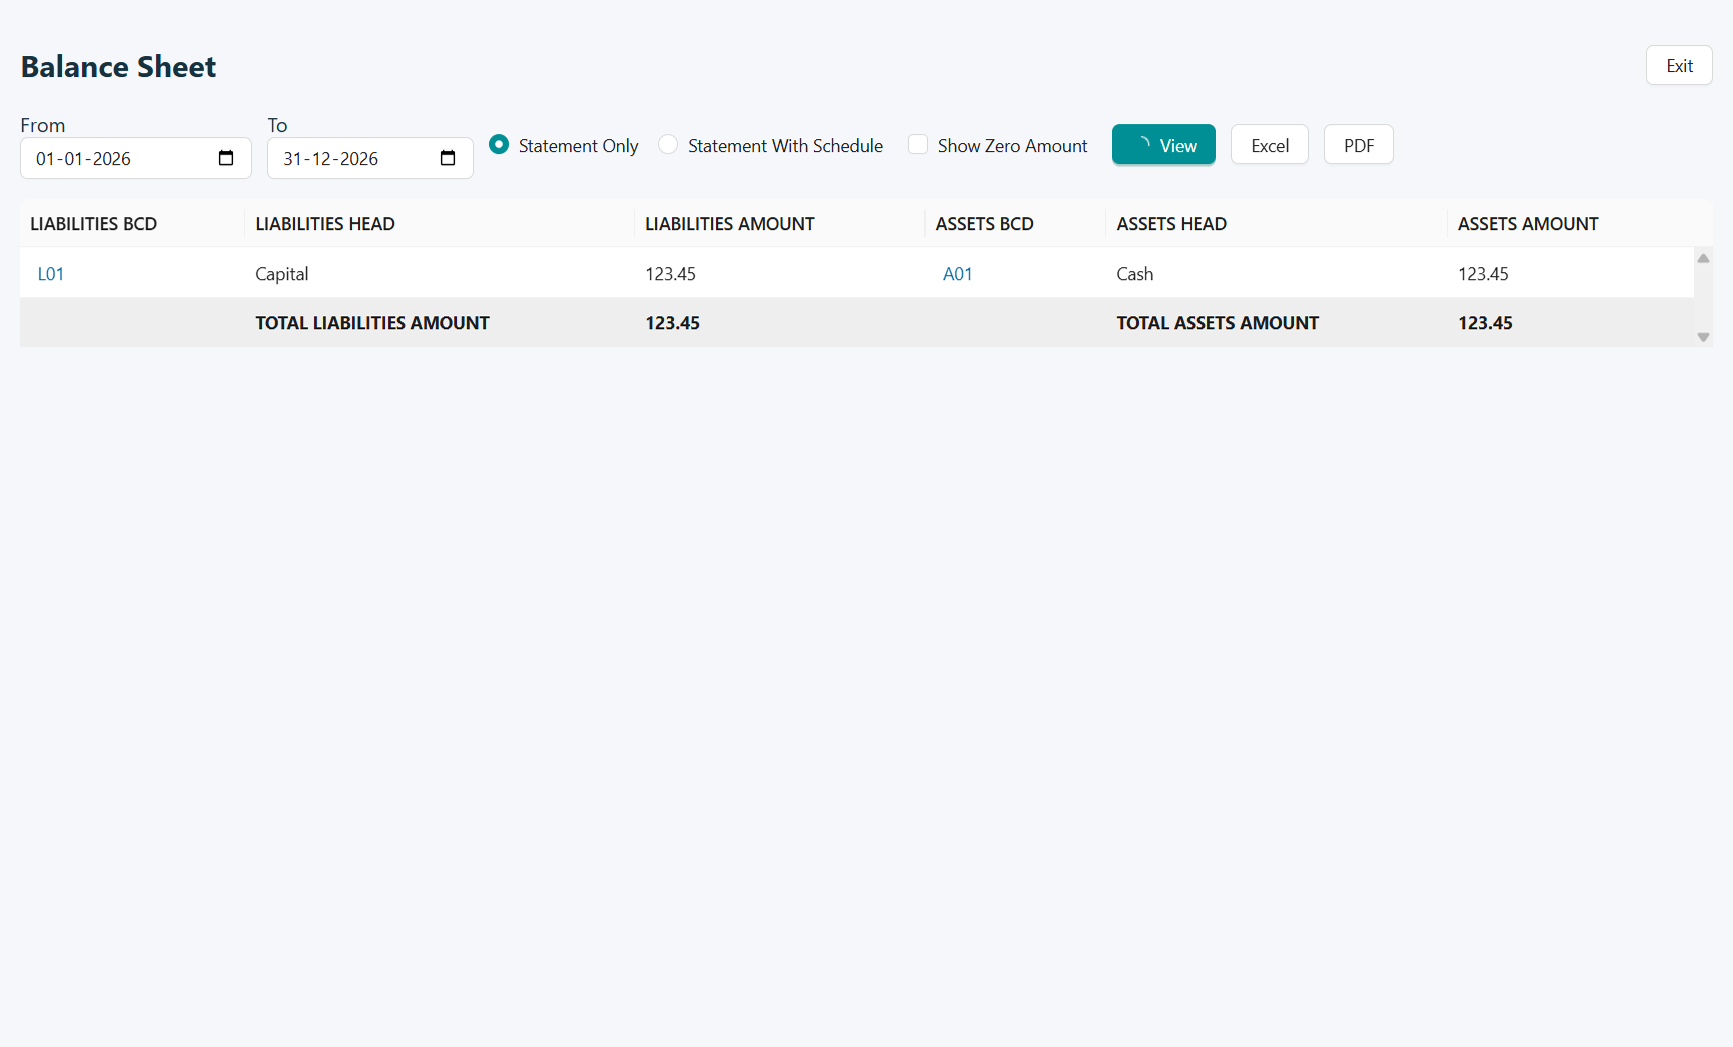
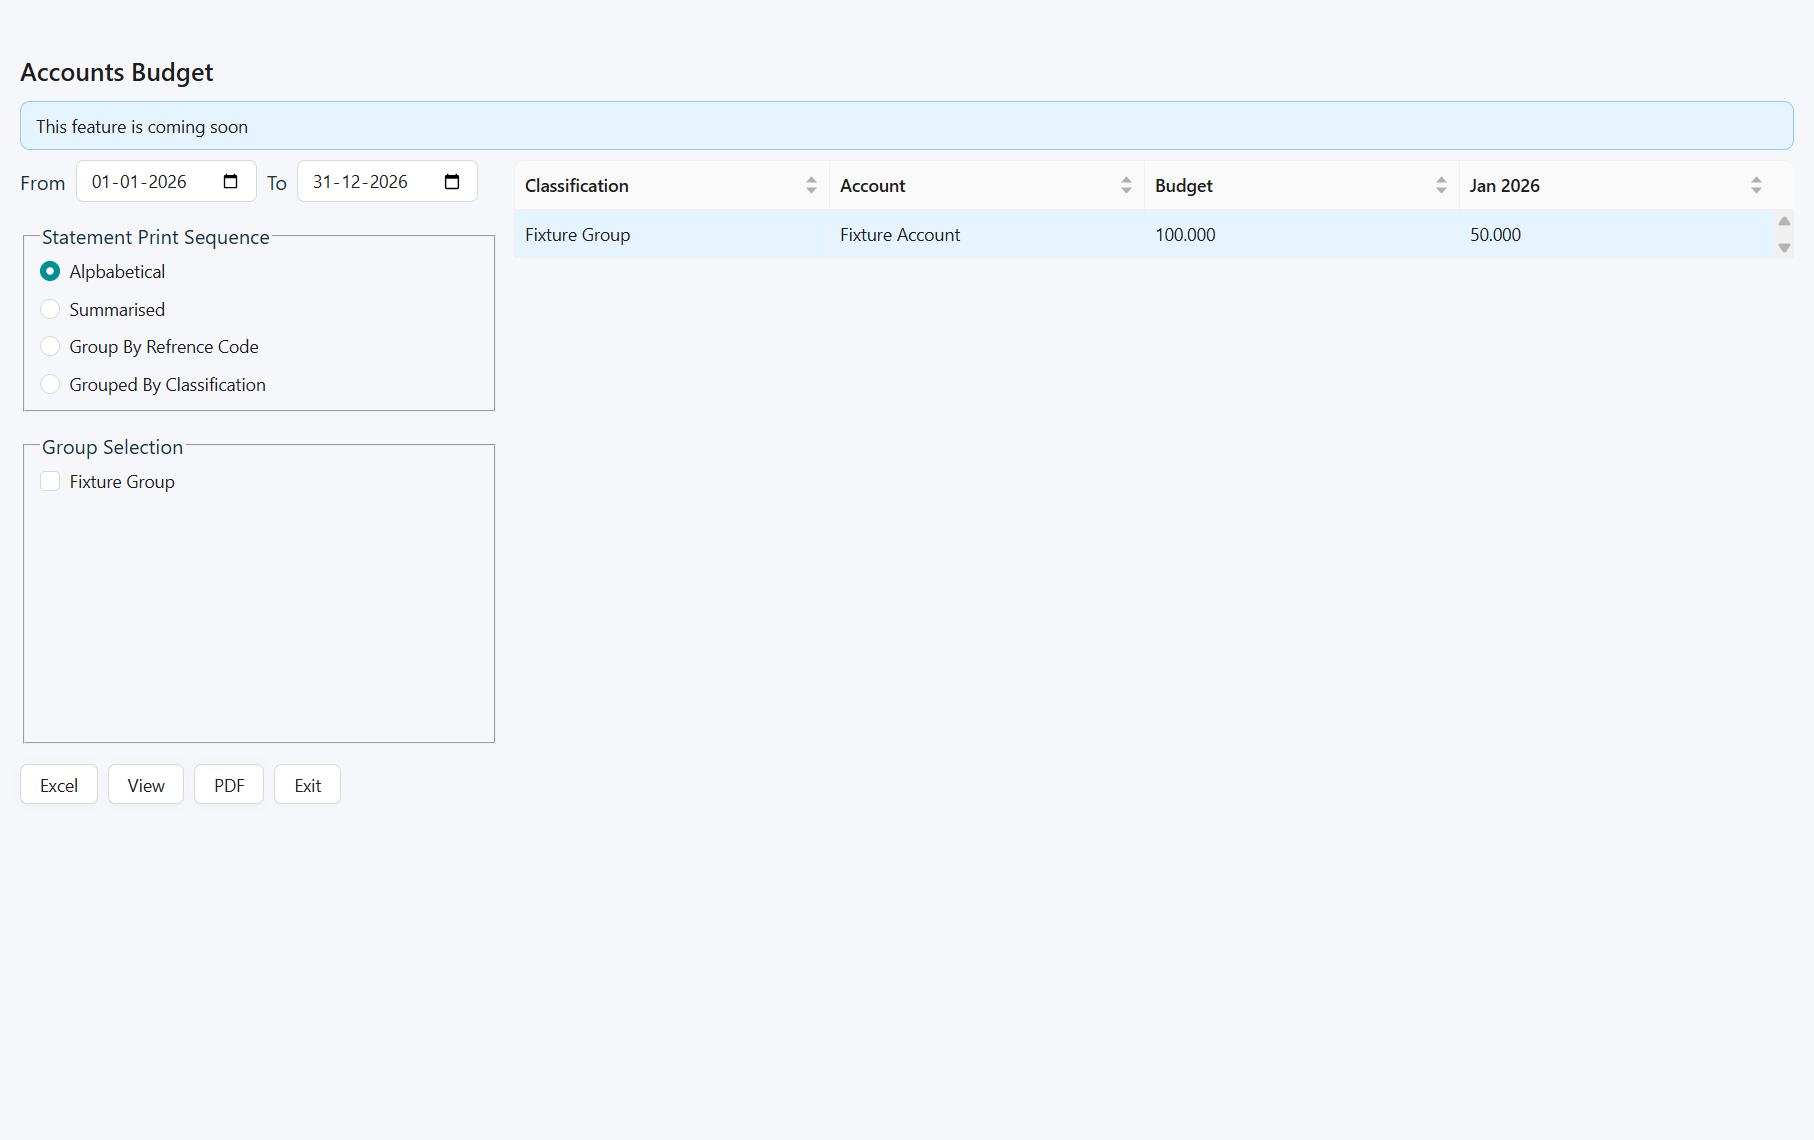
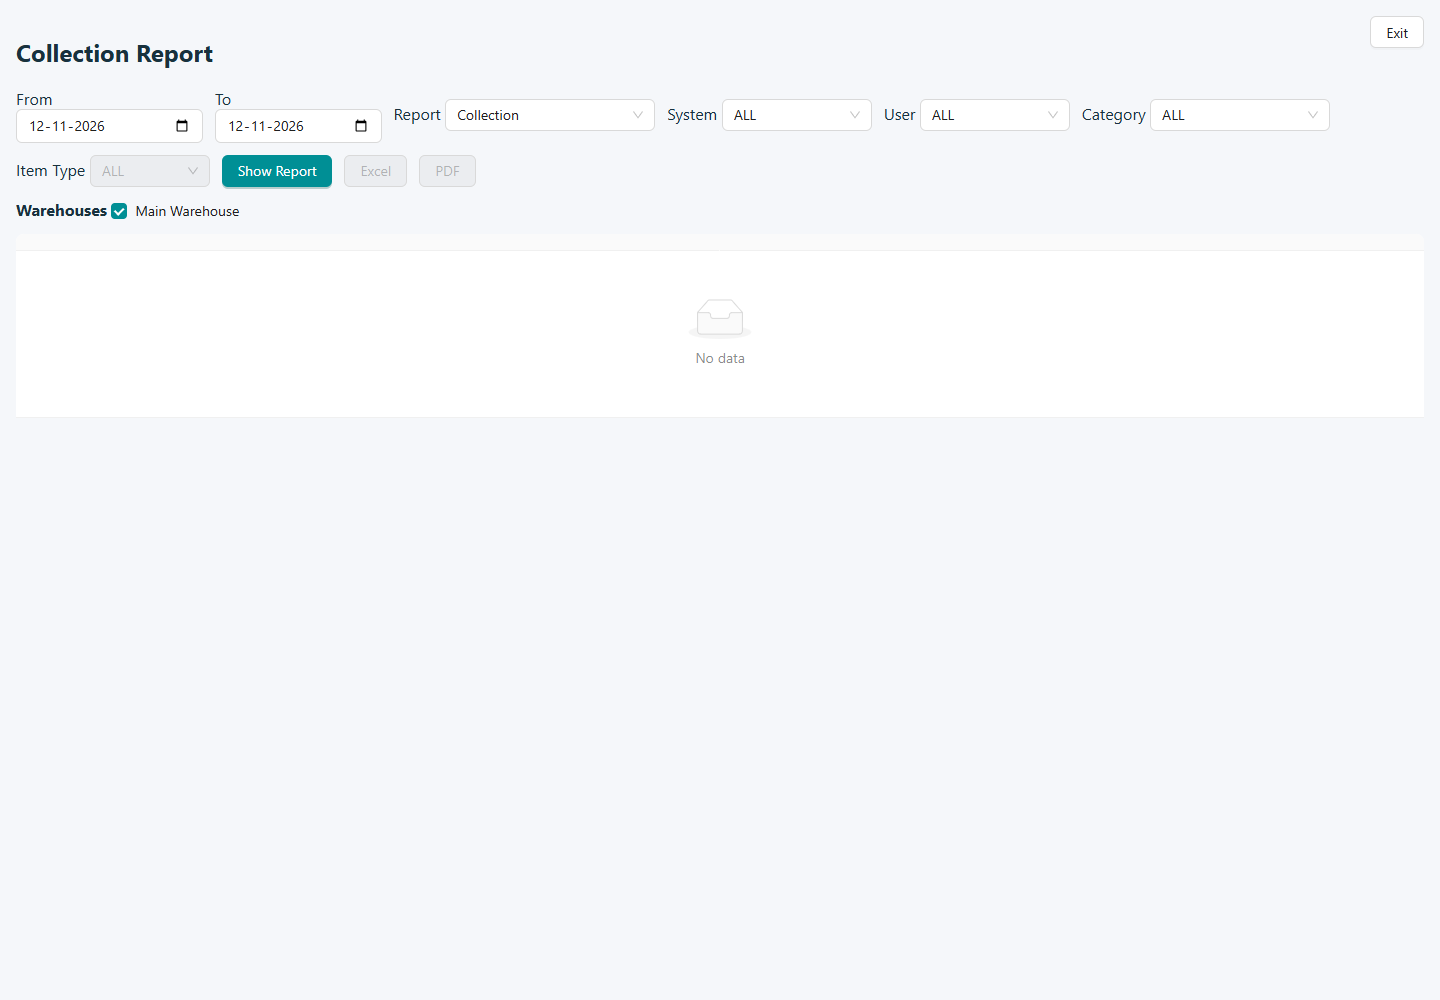
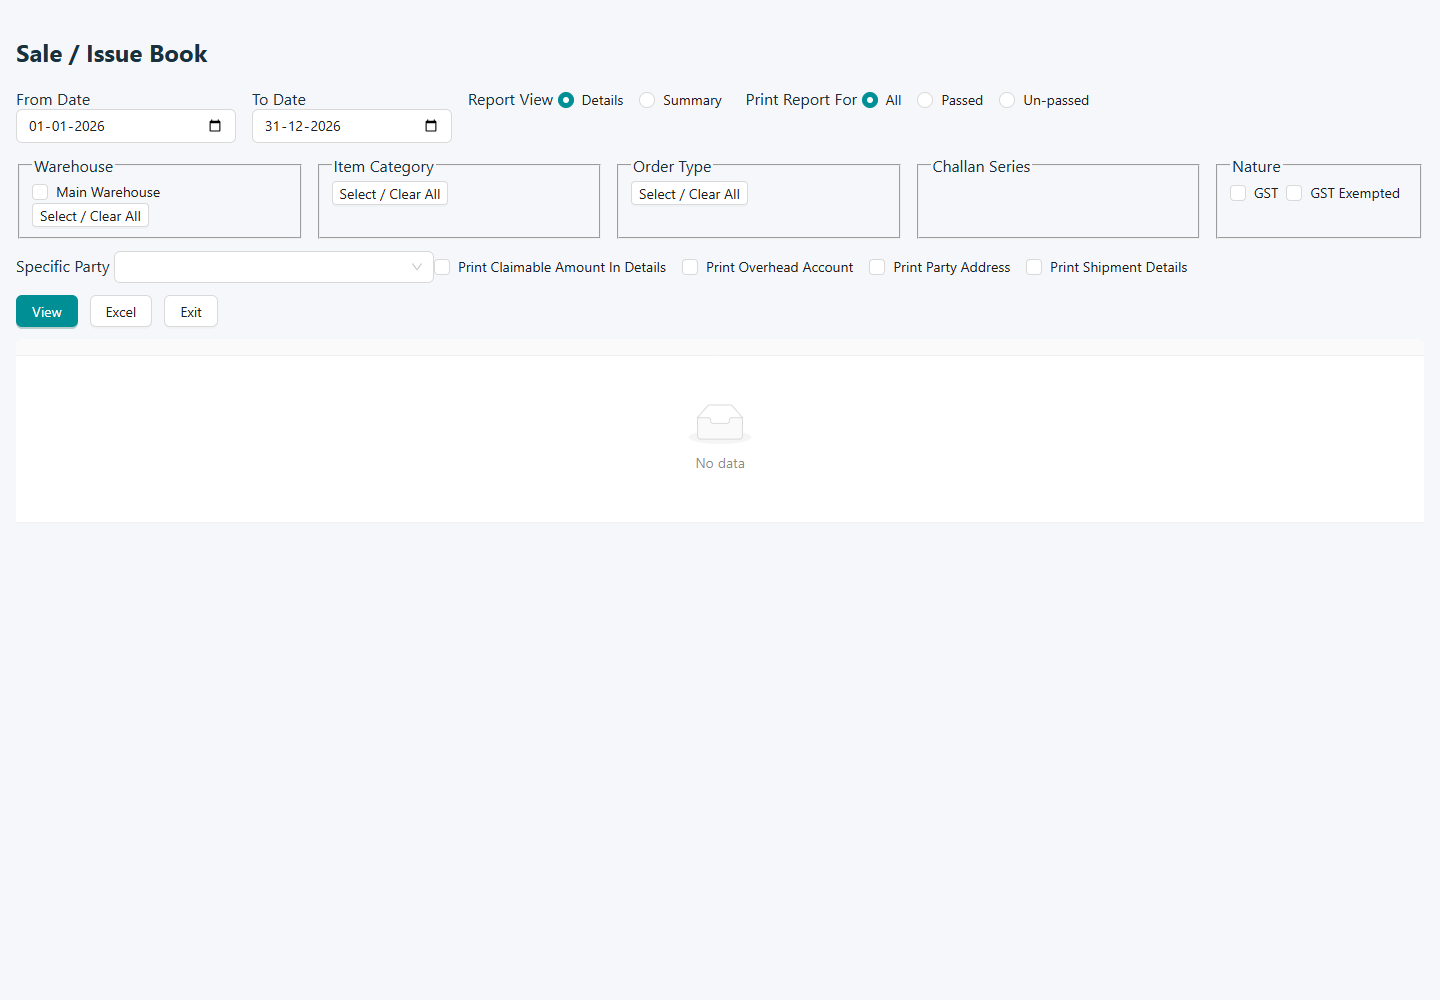
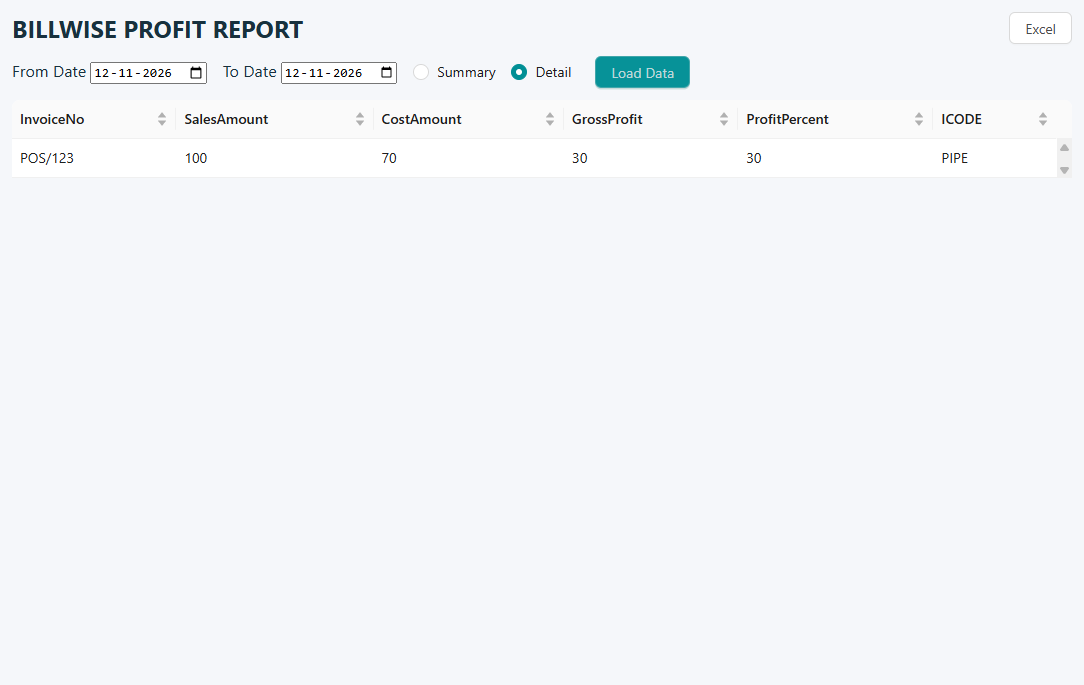
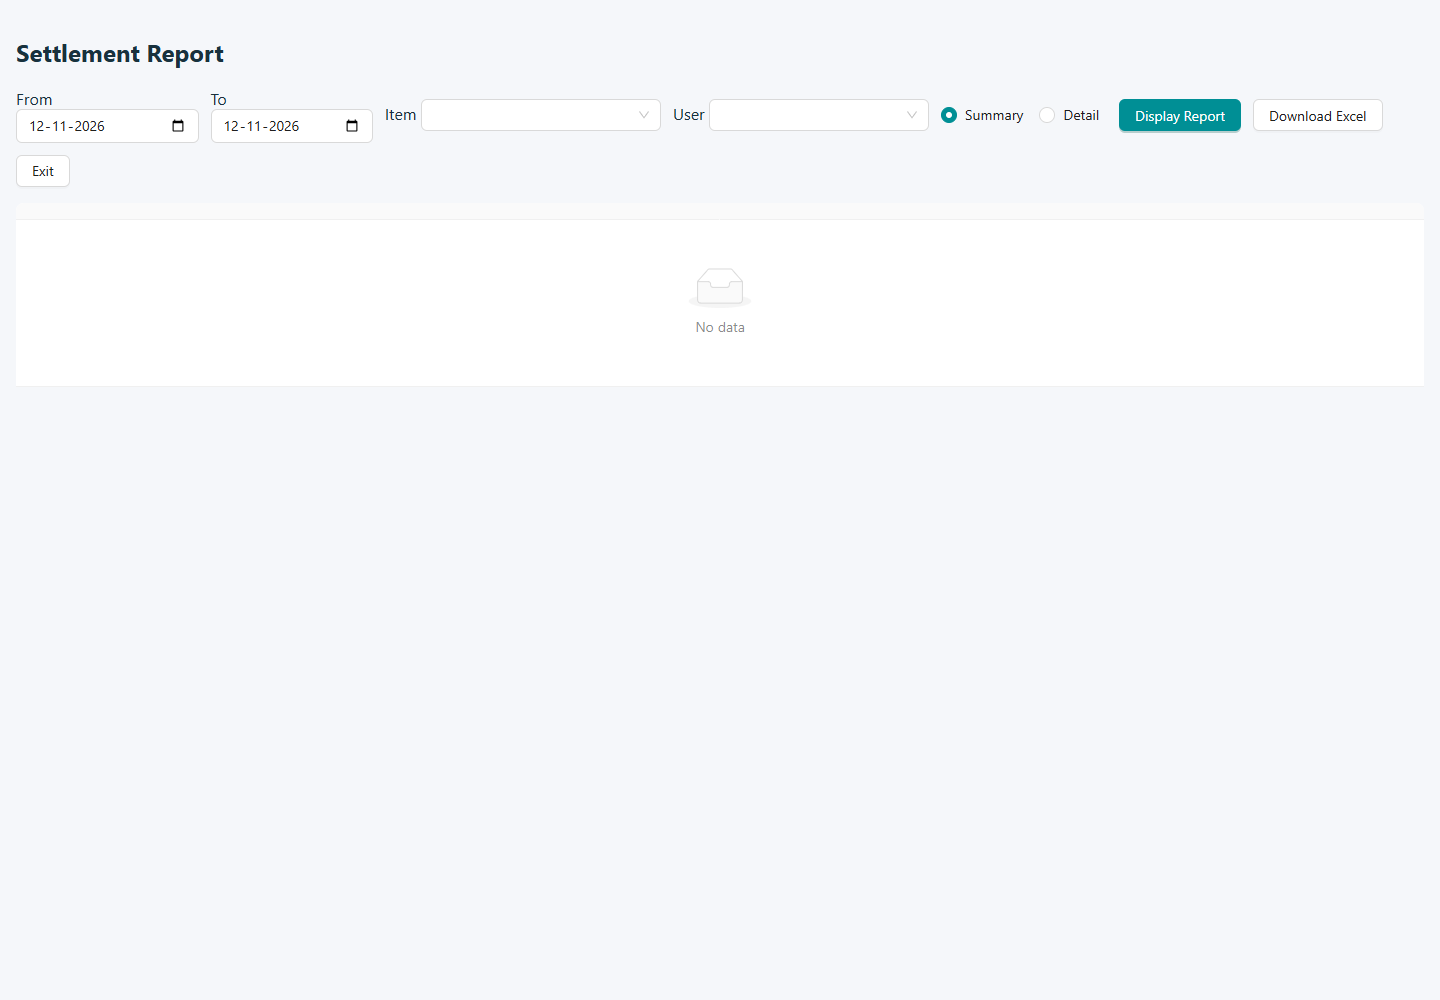
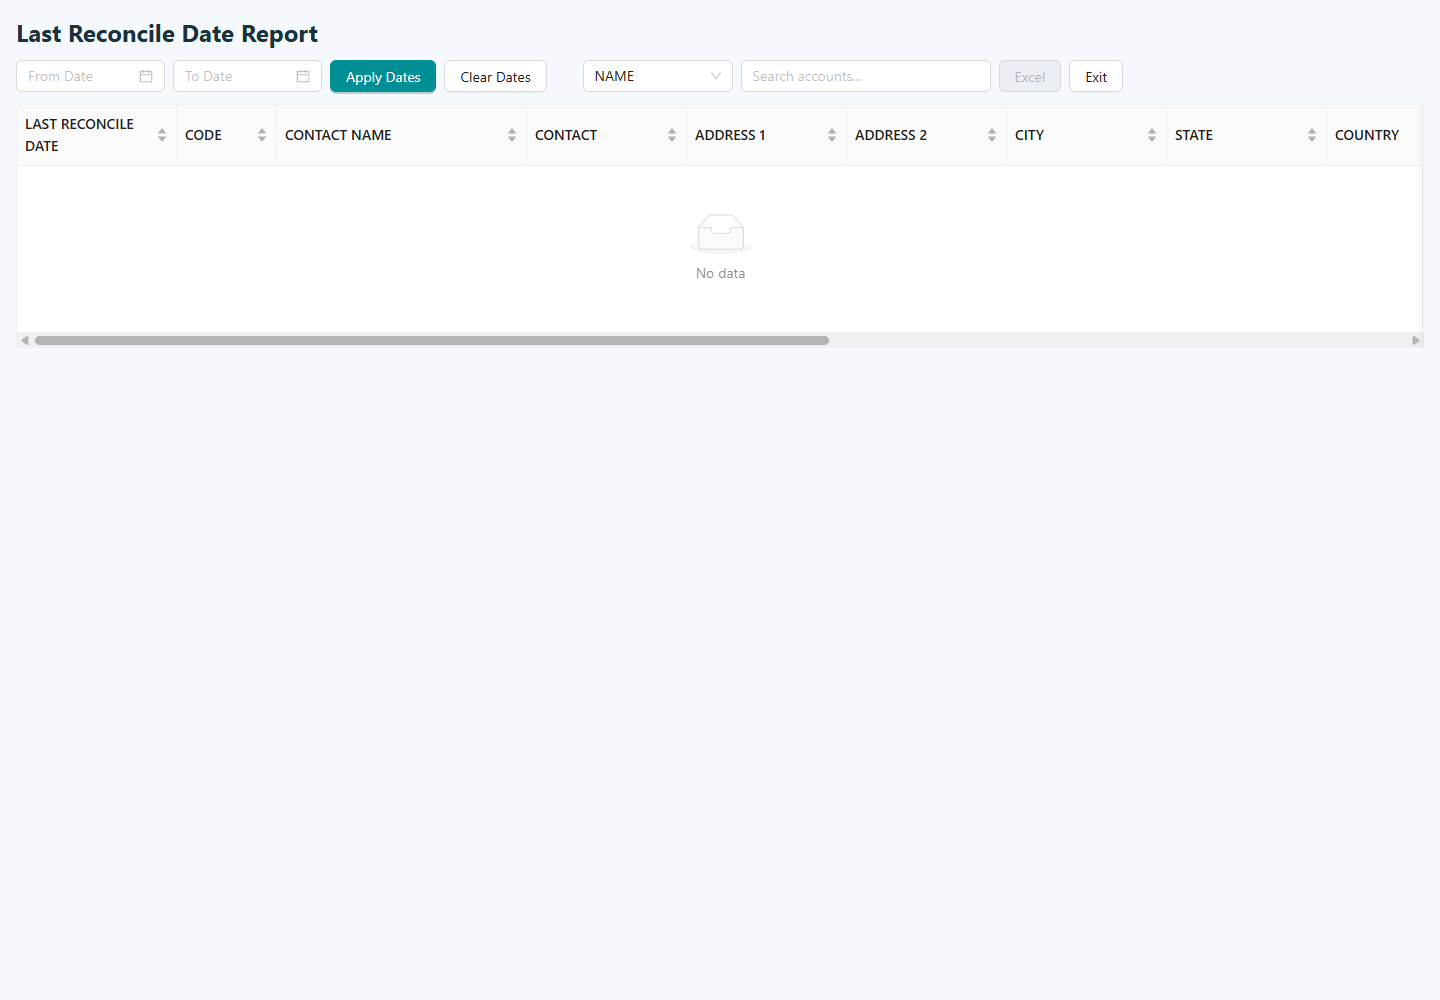
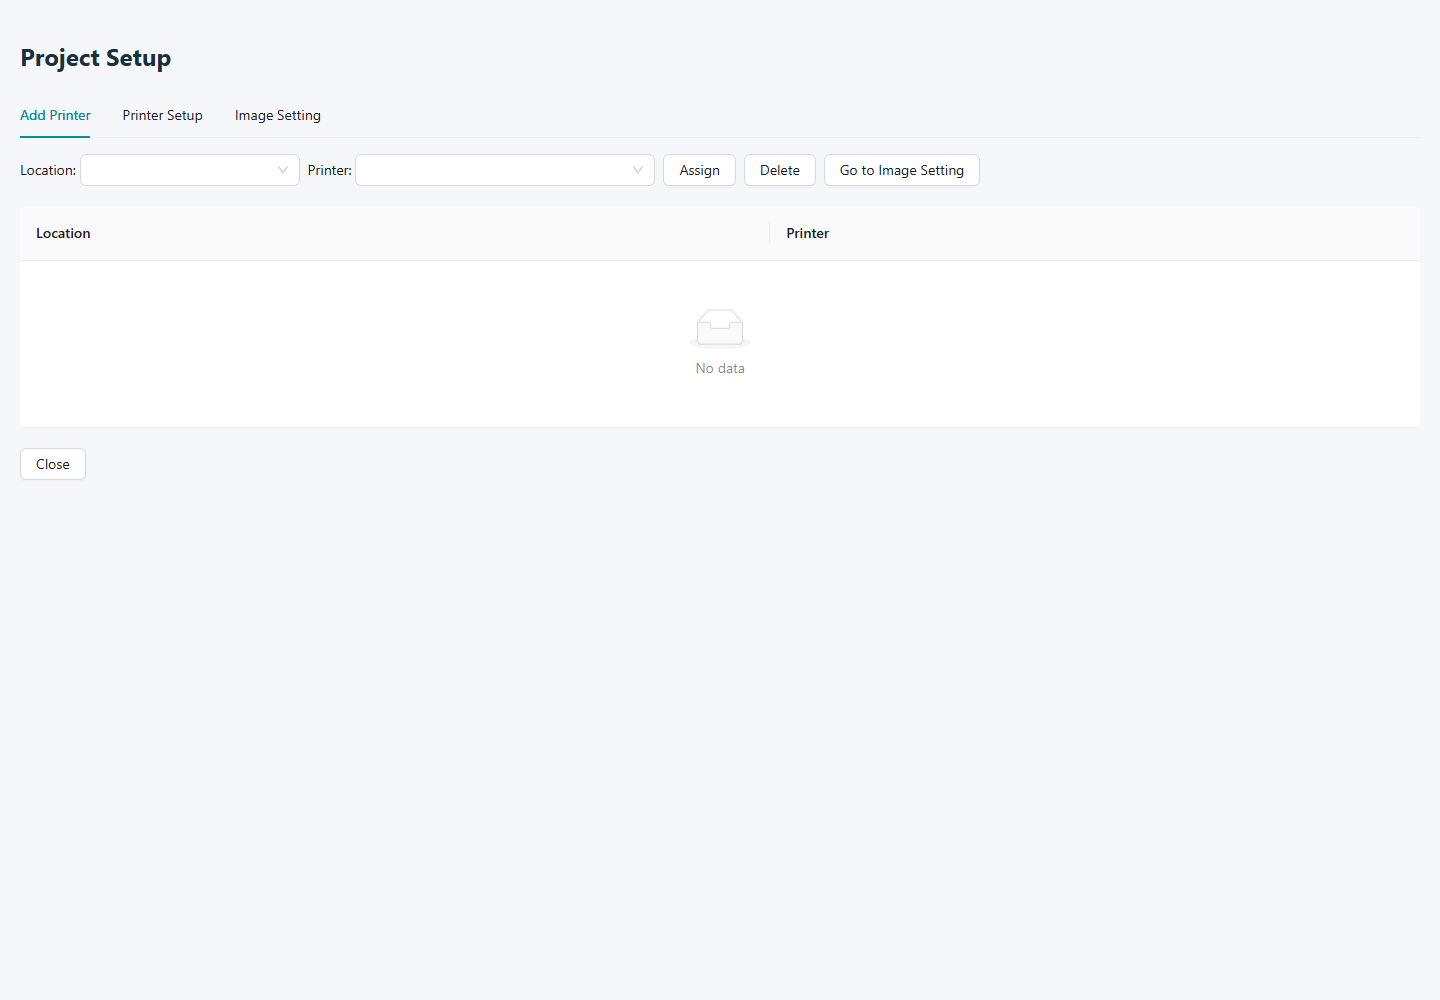
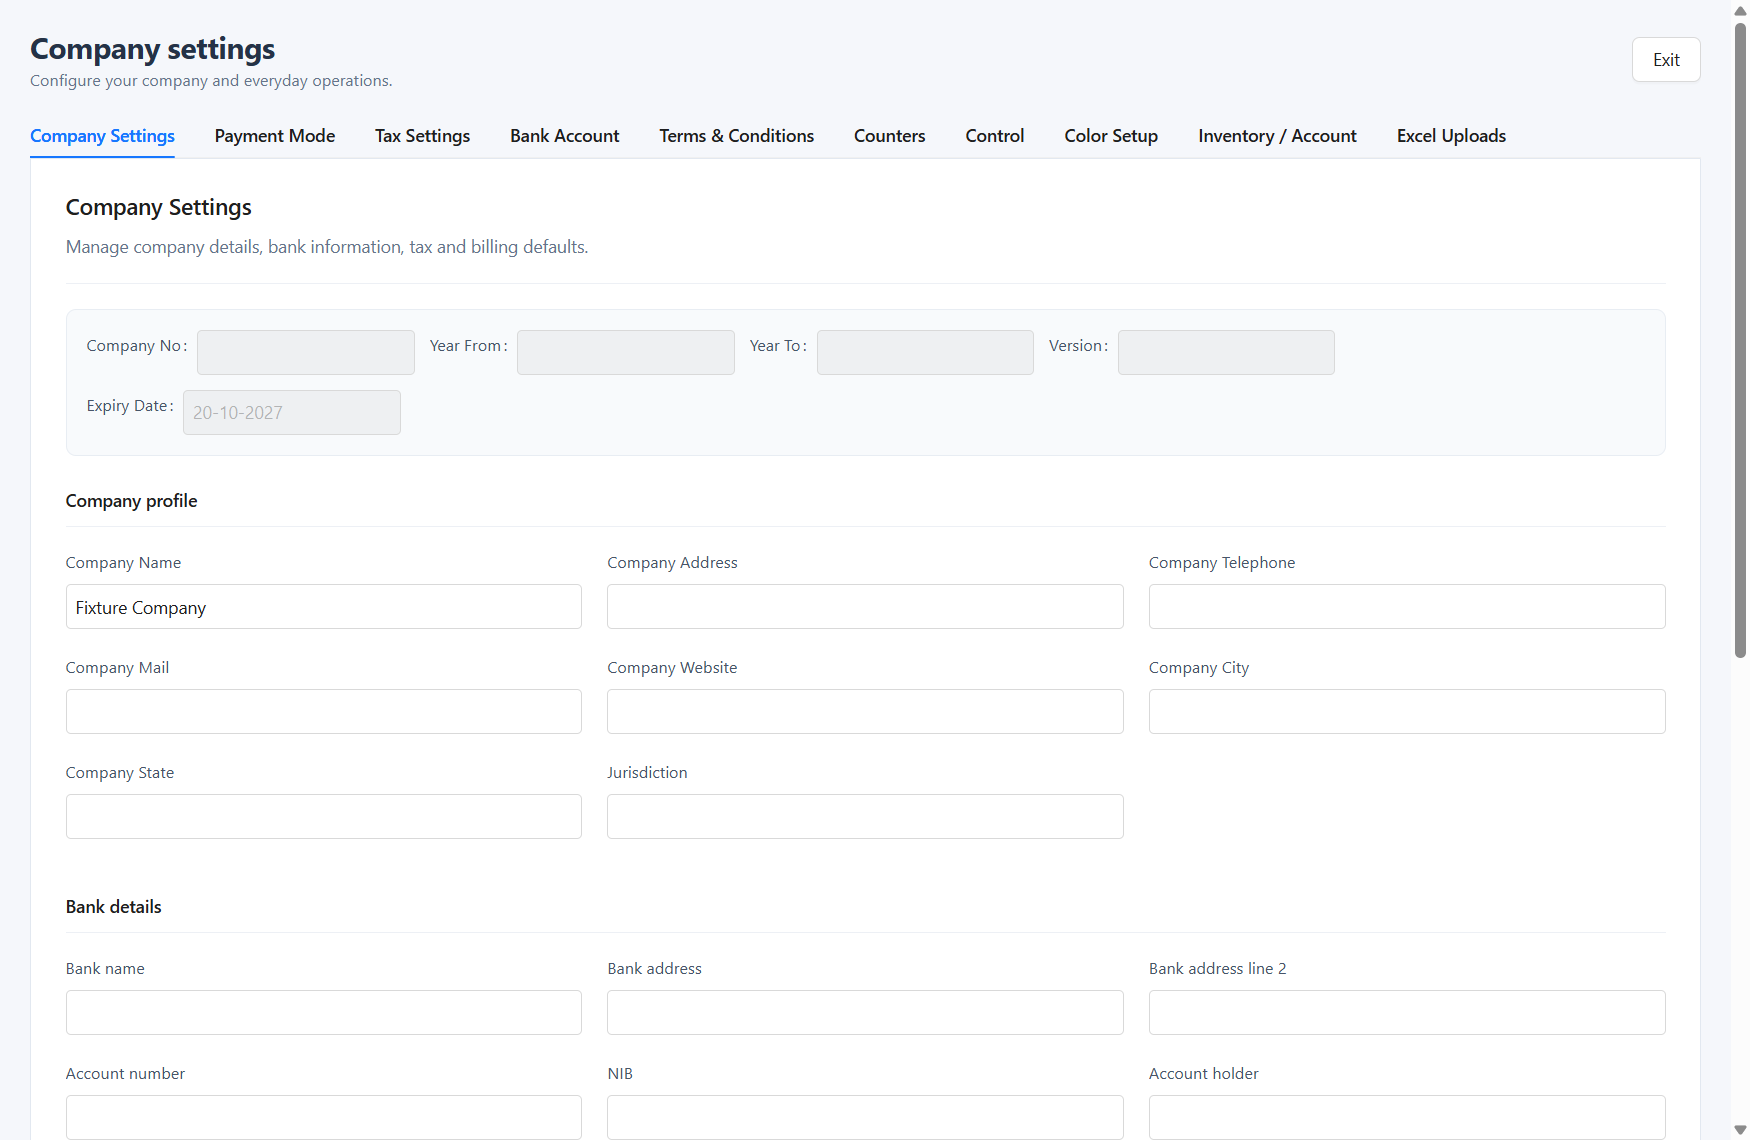
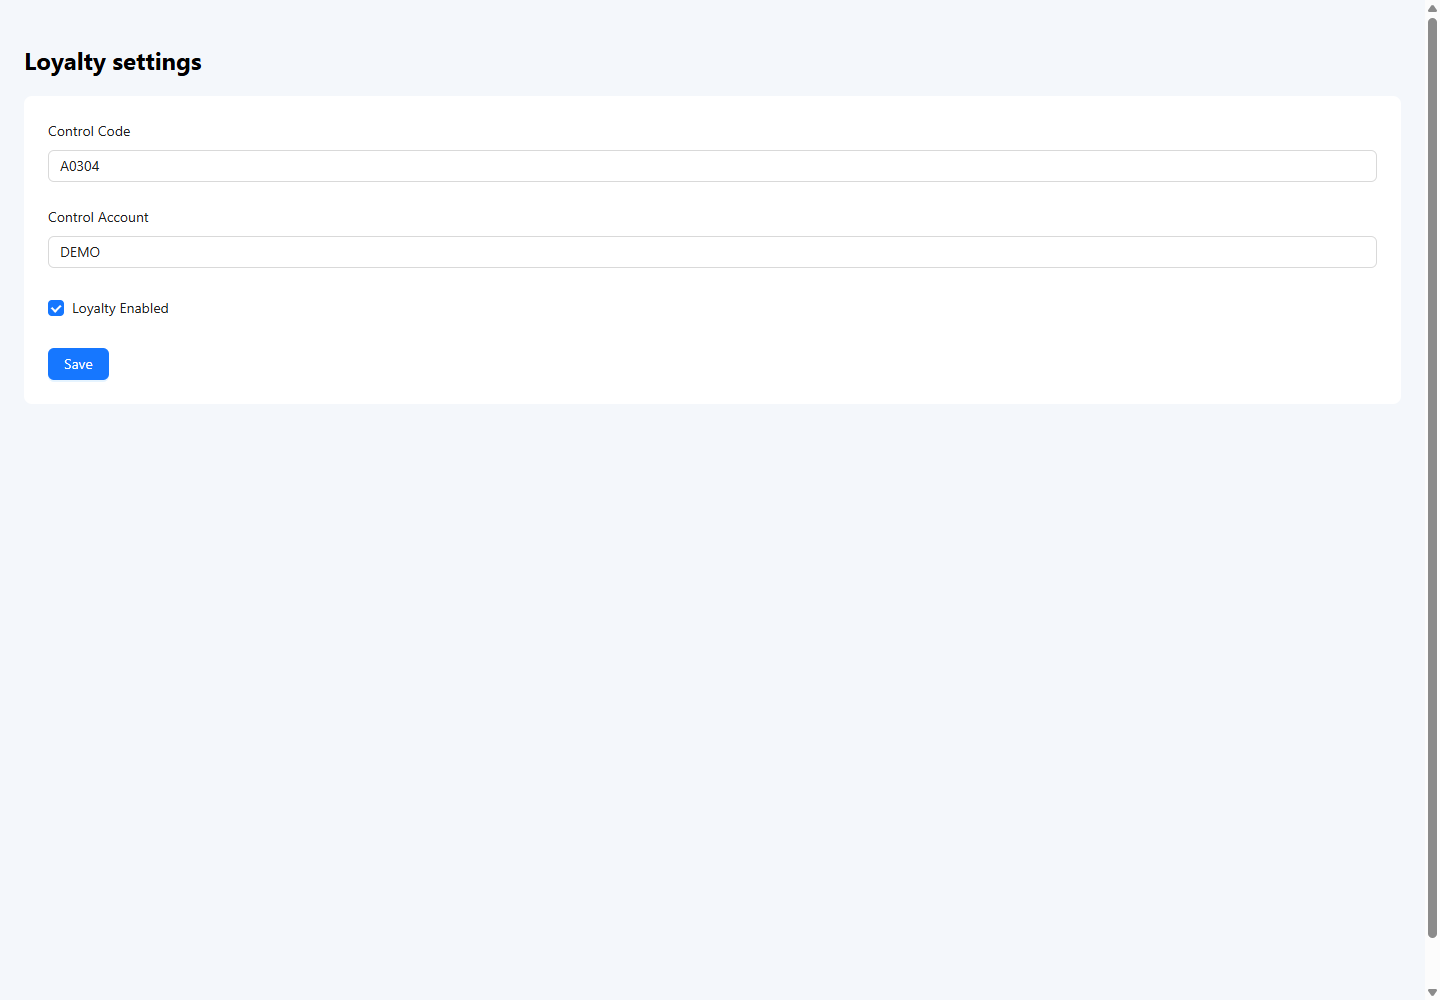
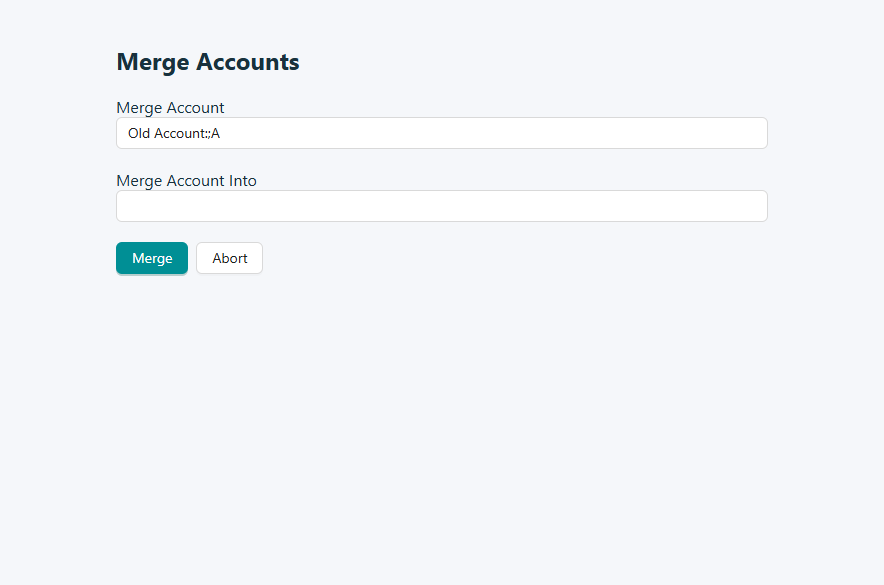
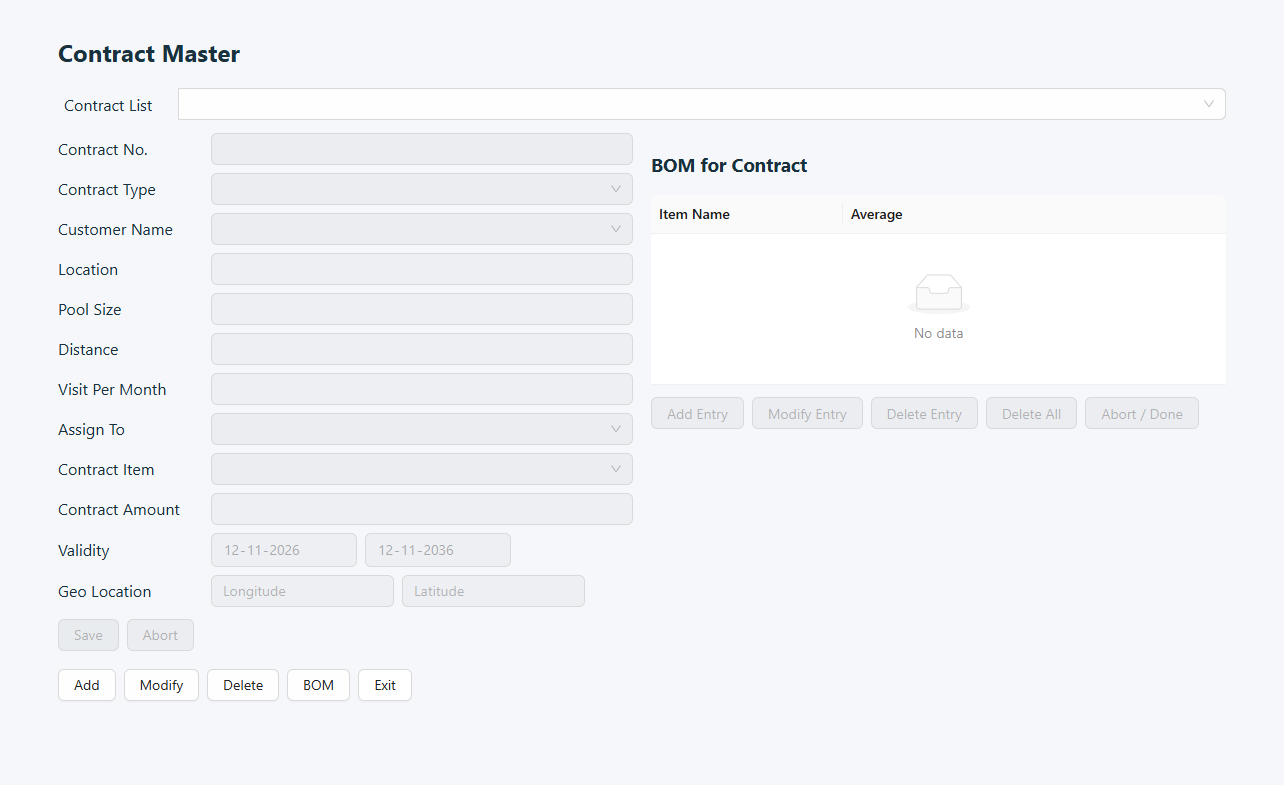
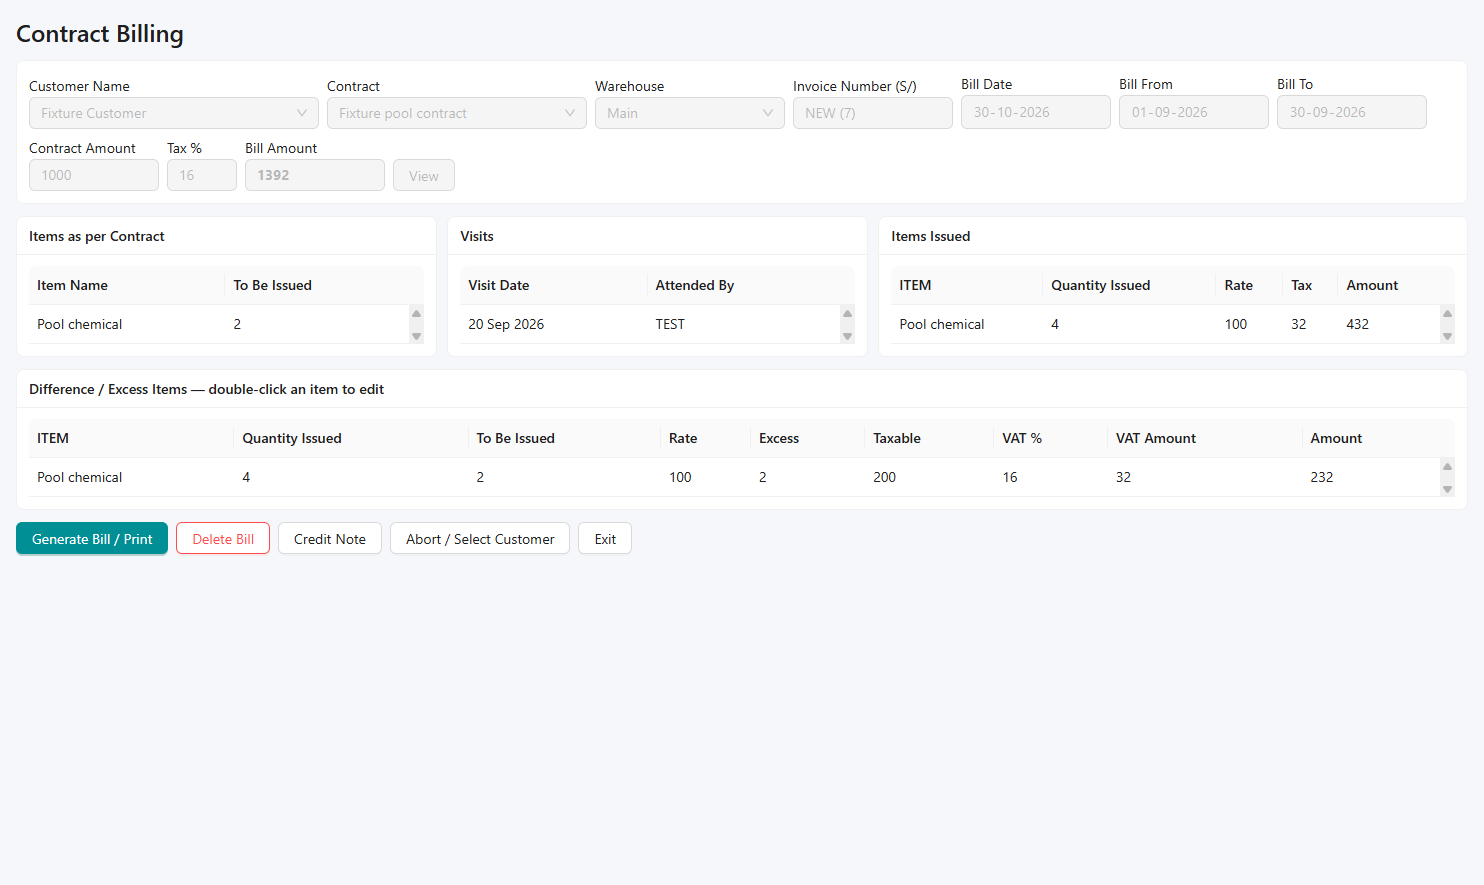
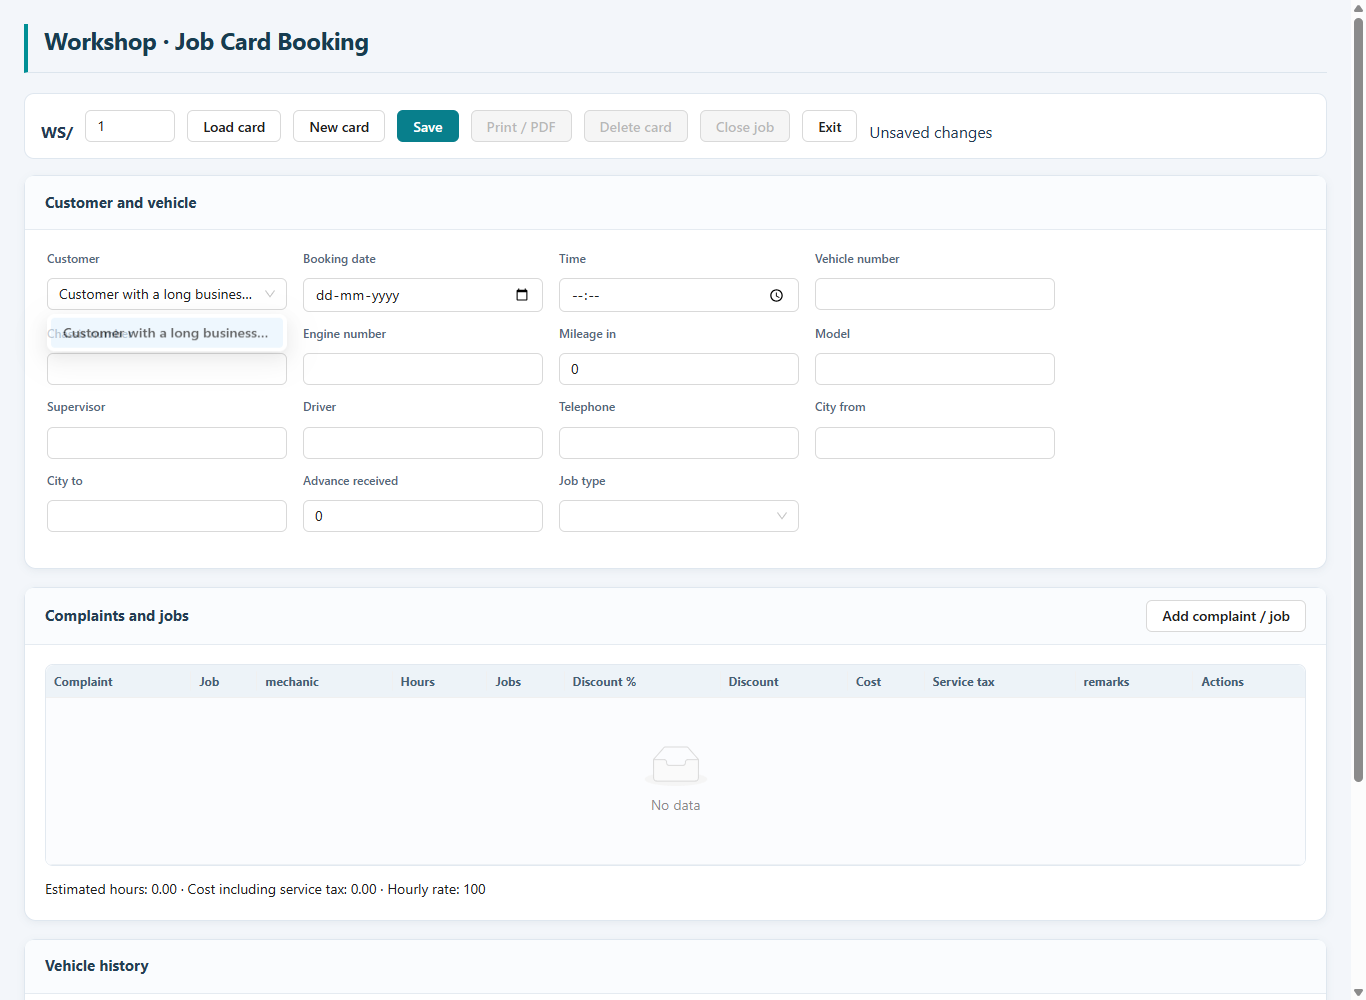
Sign in to the correct company, check the financial year, then open the required screen from the dashboard menu. Menu names and available actions depend on your company features and user rights.
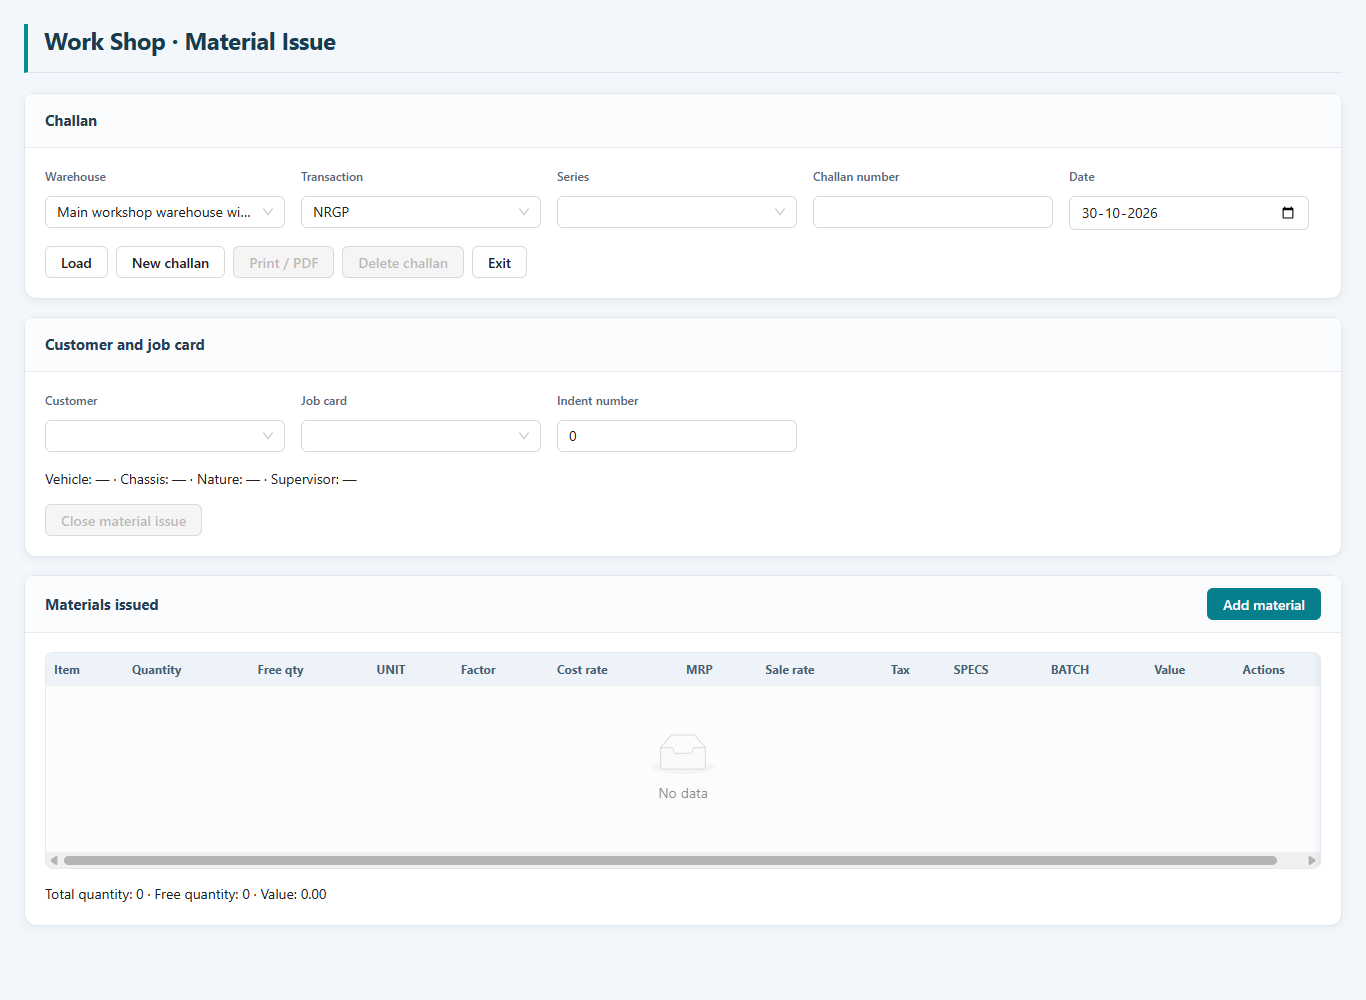
Sections and forms follow the dashboard menu sequence. Shared screens are documented once under their principal menu; related dialogs follow their parent form. Follow the controls available in your installed build. Screenshots are example captures with demonstration data; company settings and permissions can change the fields shown. Every form includes an example screenshot. Some examples show the initial screen before records are selected.
Works offline · No sign-in required to read
Common controls
New / Add starts an entry; Modify / Edit changes a selected record; Save stores changes. Reports generally require filters followed by View, Search or the screen's equivalent. Print and Excel export are available only where the form provides them.
Review dates, accounts, warehouses, quantities and totals before saving, posting, approving or releasing. Some screens save individual rows or payments immediately. Cancel or closing a form may not undo saved work.
Typical work sequences
Sales: Account / Item setup → Counter Sale or order → Payment → Receipt. Purchasing: Supplier / Item setup → Purchase Order → Goods Purchased → Payment. Production: Bill of Materials / Planning → Indent → Quality checks → Finished Goods Receipt → Posting. Accounts: Voucher entry → Ledger review → Trial Balance / Financial Statements.
These are orientation sequences; use the stages enabled for your company. If a form is missing, check company features and user permissions. If a save fails, read the message and check whether the document already exists before retrying.
No matching forms. Try a shorter term or clear the search.
Getting started
Getting started
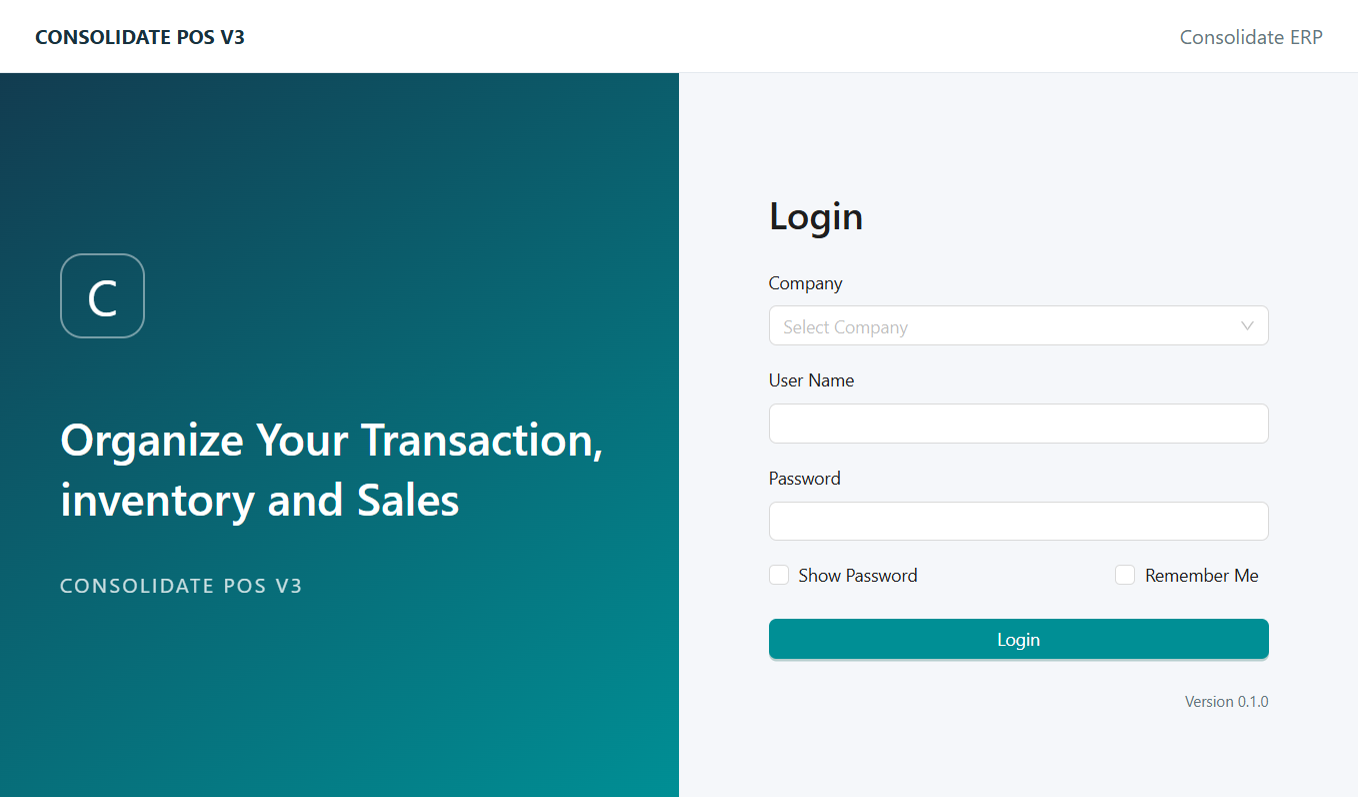
Sign in
Goal
Start a session in the correct company.
Your login determines which company records and menu options you can access. Use your assigned account so that entries are recorded against the correct user.
Key Rules
The selected company determines which records and permissions are loaded.
Use the credentials assigned to you.
Validations
Application checks and checks to make before continuing:
Select a company and enter both username and password.
Resolve connection or sign-in errors before continuing.
Open: Application startup
How to use
Select your company.
Enter your username and password, then sign in.
Check the company and financial year before entering transactions.
Sign in · Example screen. Click to view full size. Sample data and layout may differ from your company.
Getting started
Company connection settings
Goal
Configure the companies available at sign in.
This screen connects the application to the company database. Connection values should come from the person responsible for your ERP installation.
Key Rules
Company connection details are managed from the login screen.
Use the connection settings supplied for that company.
Validations
Application checks and checks to make before continuing:
Check company identification, server/database and authentication details.
Confirm the connection can be opened before attempting to sign in.
Open: Company Settings on the sign-in screen
How to use
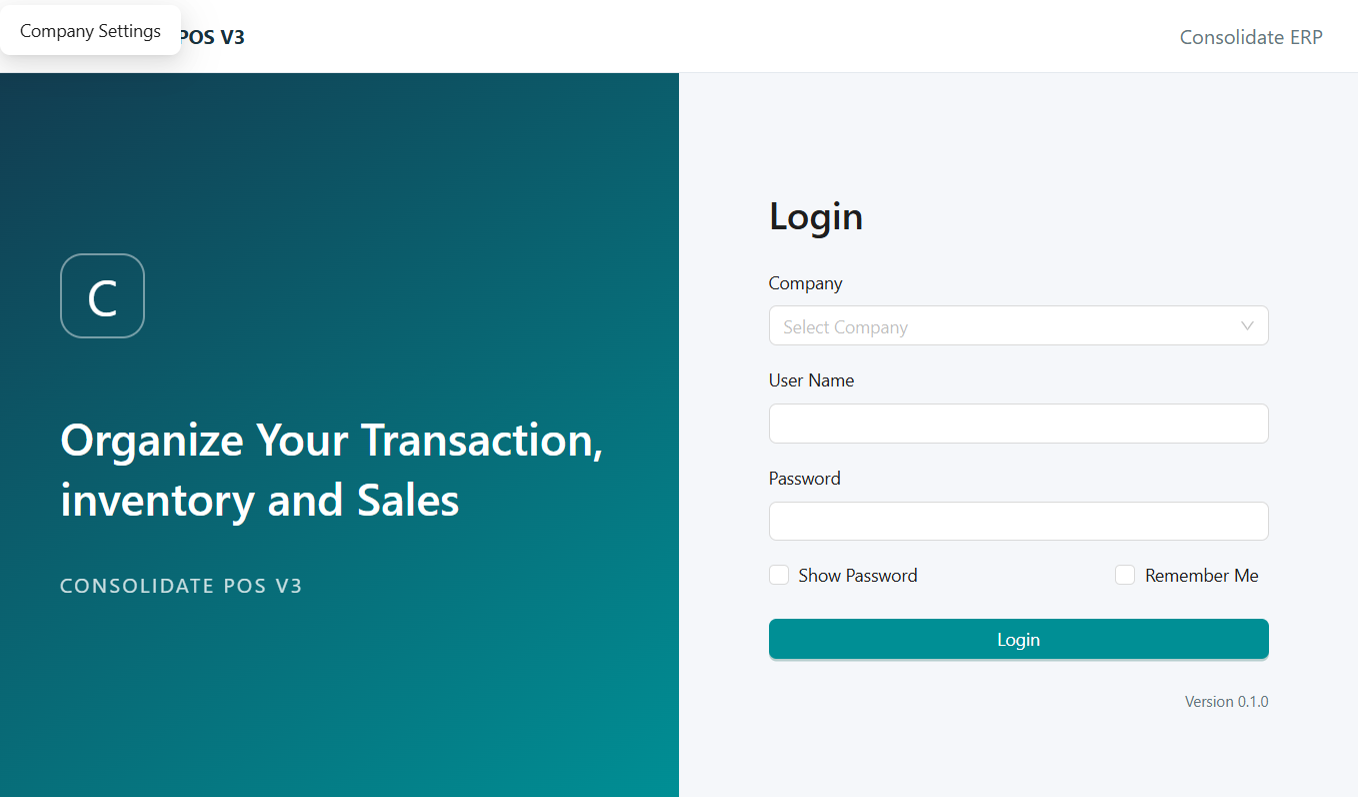
Open Company Settings from the login screen.
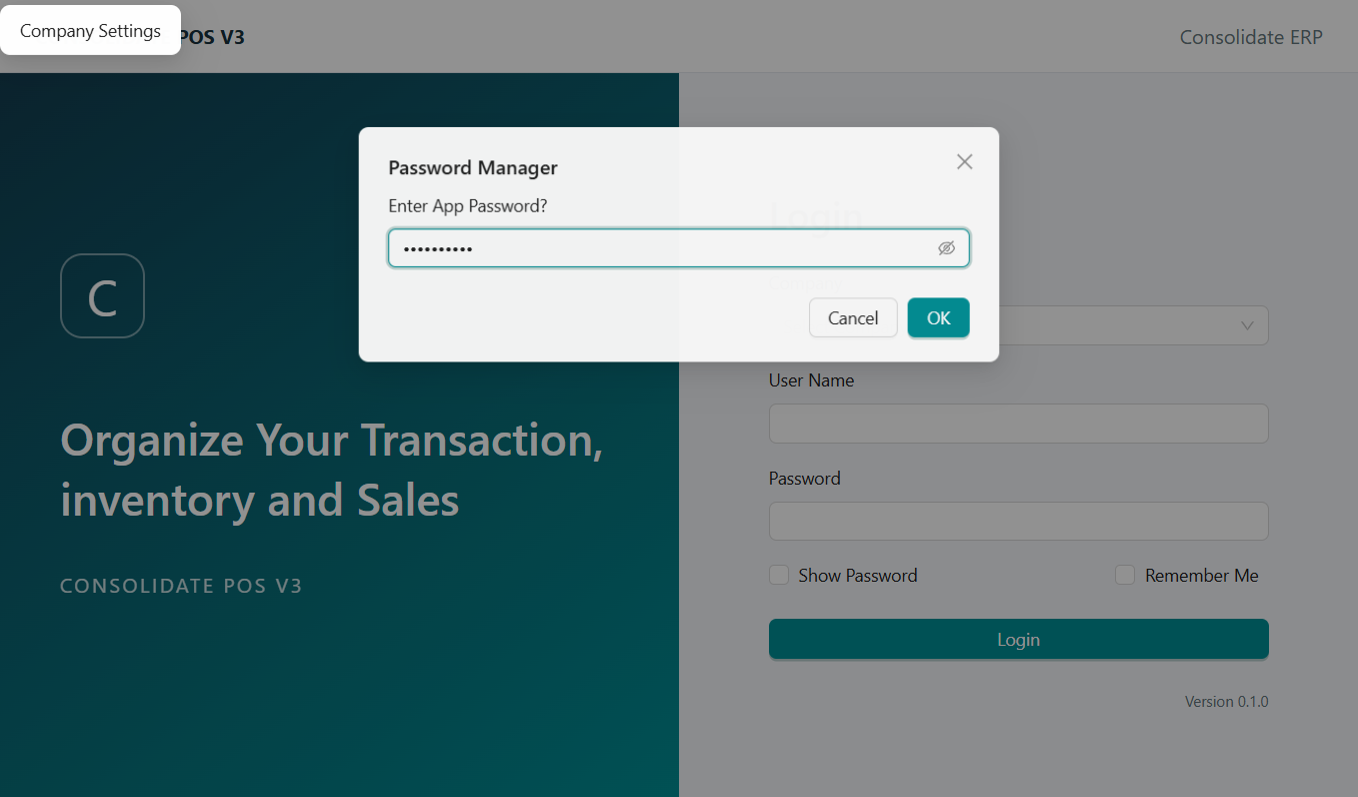
Enter or review the company connection details.
Save, return to sign in and select the company.
Company connection settings · Example screen. Click to view full size. Sample data and layout may differ from your company.Company connection settings · Example screen 2. Click to view full size. Sample data and layout may differ from your company.
Getting started
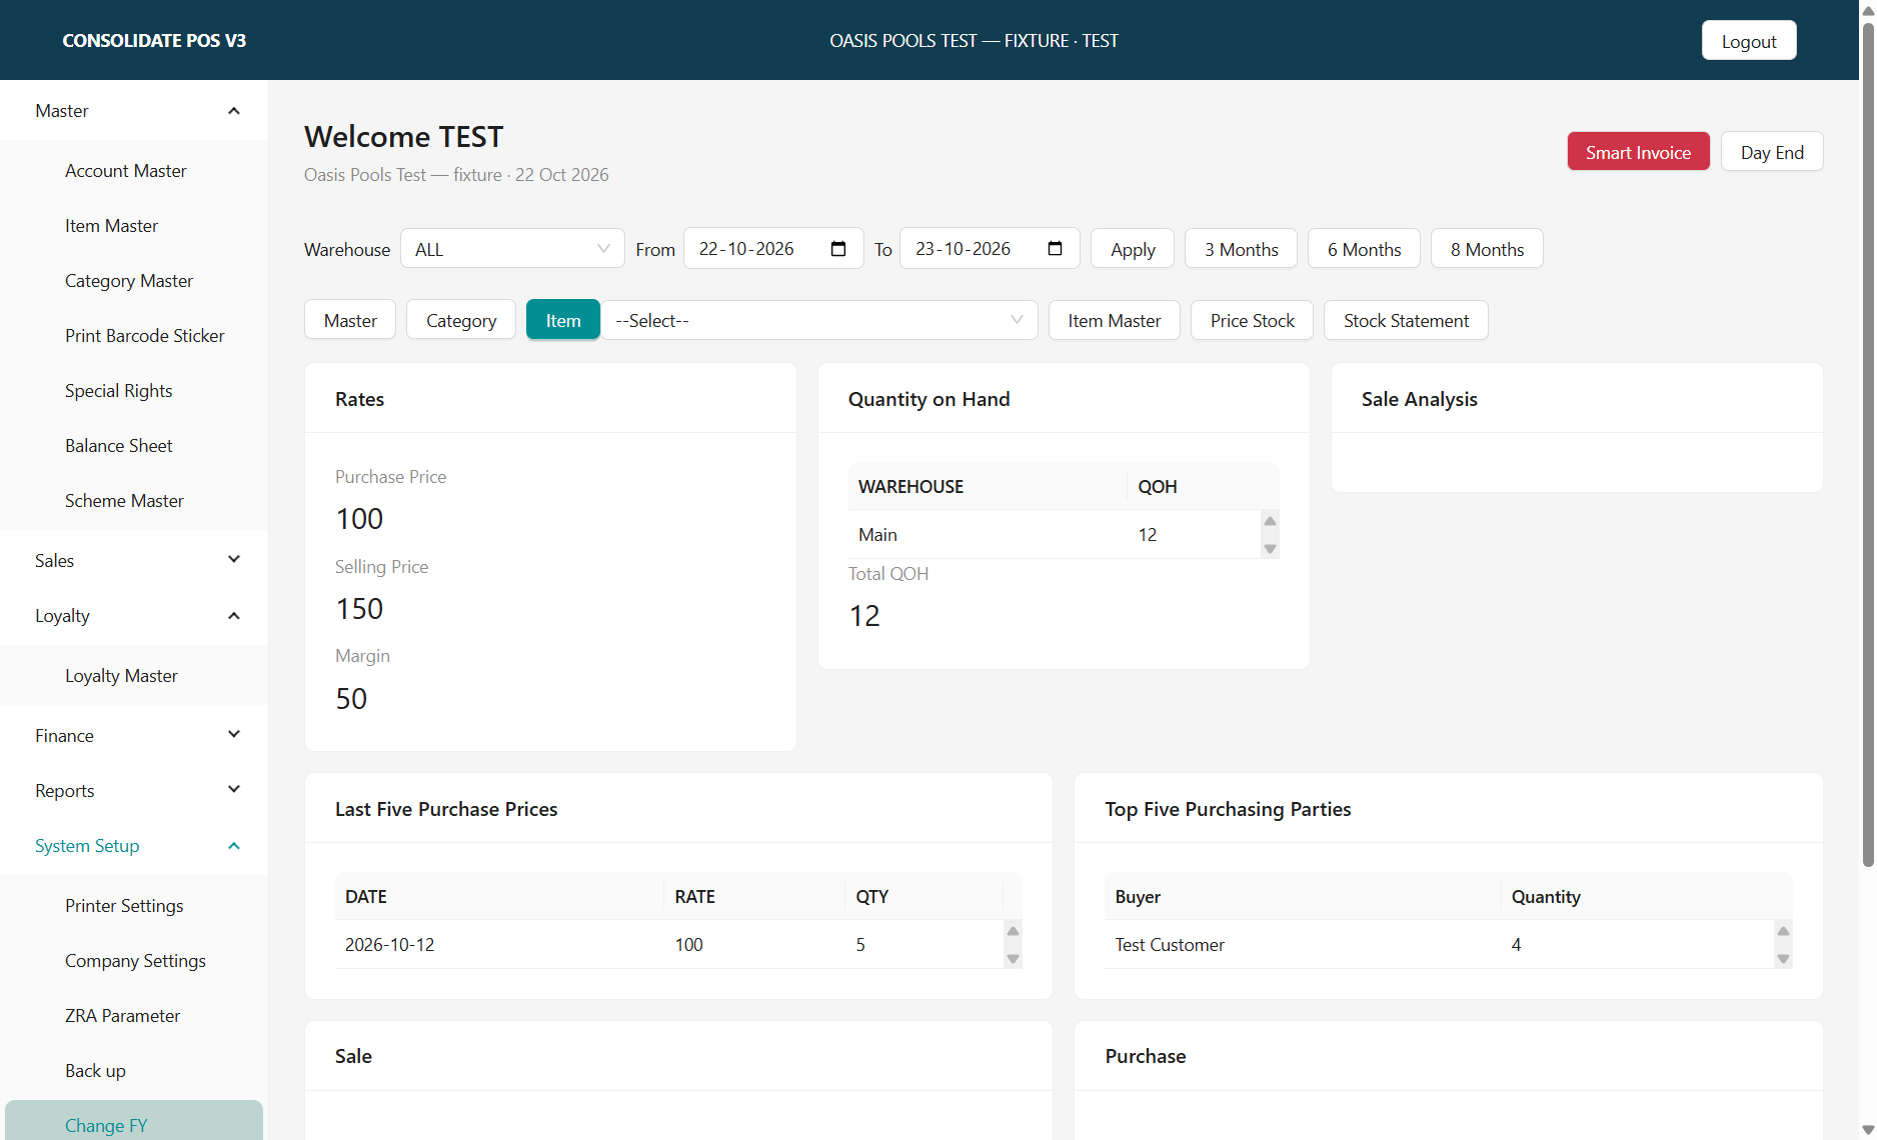
Main dashboard
Goal
Open forms and review business summaries.
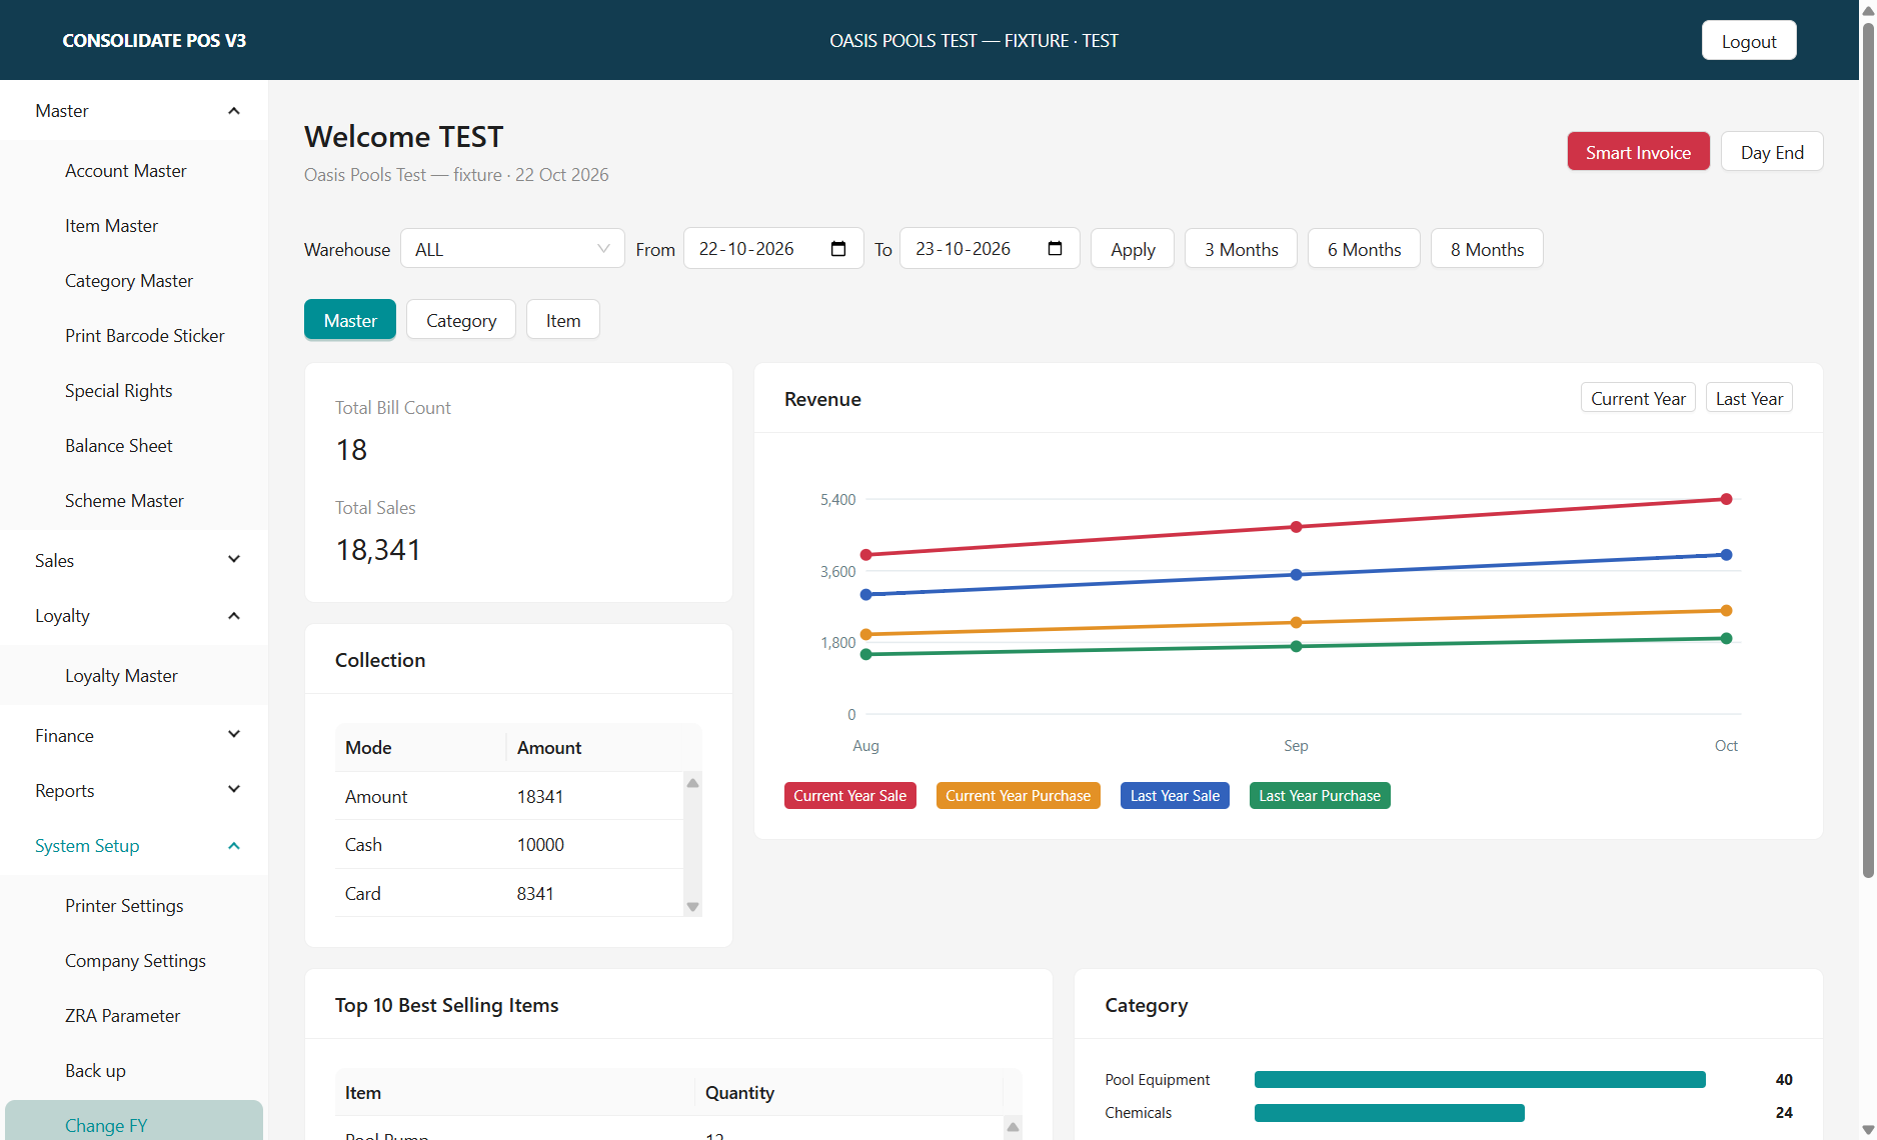
The dashboard is the starting point for daily work. Its menus lead to master records, transaction entry, reports and configuration.
Key Rules
Available menus depend on company features and user rights.
Open documents in the intended company and financial year.
Validations
Application checks and checks to make before continuing:
Check the company, user and working year shown.
A missing or disabled menu may require a feature or permission change by an administrator.
Open: From the related menu, list or parent workflow
How to use
Use the menu or dashboard shortcuts to open the required activity.
Check the active company and user.
Return here to move between work areas or sign out.
Main dashboard · Example screen. Click to view full size. Sample data and layout may differ from your company.Main dashboard · Example screen 2. Click to view full size. Sample data and layout may differ from your company.
Master
Master
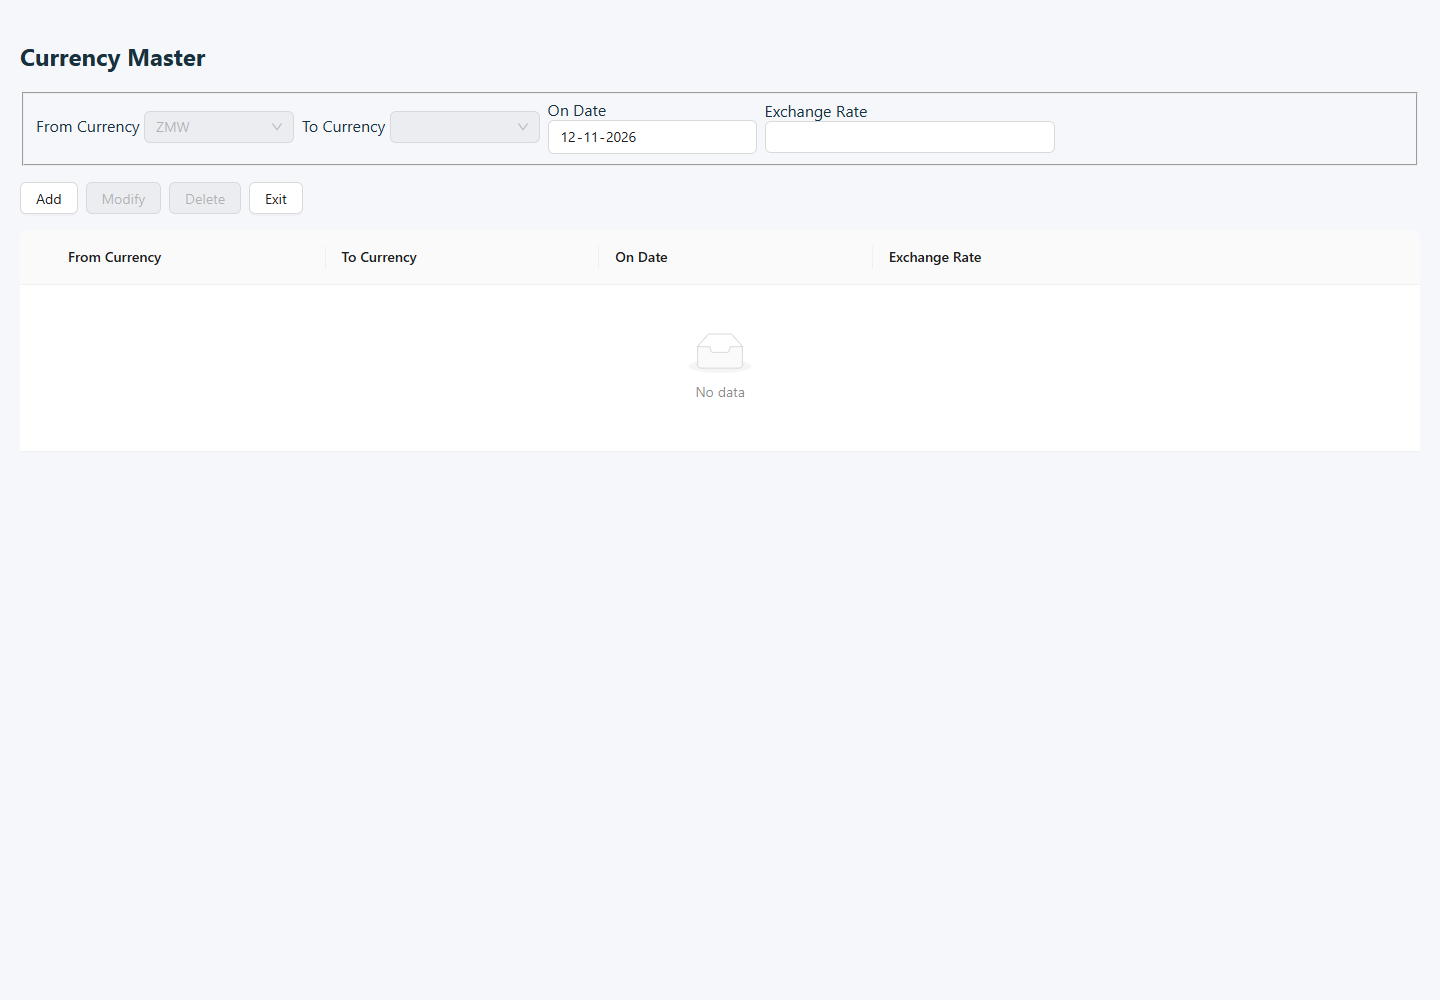
Currency master and rates
Goal
Maintain currencies and conversion rates.
Currency values support transactions that use different currencies. Confirm the conversion convention used by your company before changing a rate.
Key Rules
A rate belongs to a currency pair and date.
An existing dated rate may require overwrite confirmation.
Validations
Application checks and checks to make before continuing:
From and To currencies must be valid and different.
The date must be valid and the exchange rate greater than zero.
Modification requires the relevant permission.
Open: Master → Currency Master
How to use
Select or add a currency.
Enter the applicable rate and other displayed details.
Save and review the result before using the currency.
Field-wise description
Fields may be hidden or read-only according to company settings, the selected record and your permissions. Percentage values are entered as percentages; verify the selected unit for rates and quantities.
Exchange rate
Exchange rate field descriptions
Field
Description
From Currency
Currency from which the conversion is recorded.
To Currency
Currency into which the conversion is recorded.
On Date
Date for this currency-pair rate. An existing rate on that date may prompt for replacement.
Exchange Rate
Positive conversion value for the selected currency pair; verify the company's conversion convention.
Currency master and rates · Example screen. Click to view full size. Sample data and layout may differ from your company.
Master
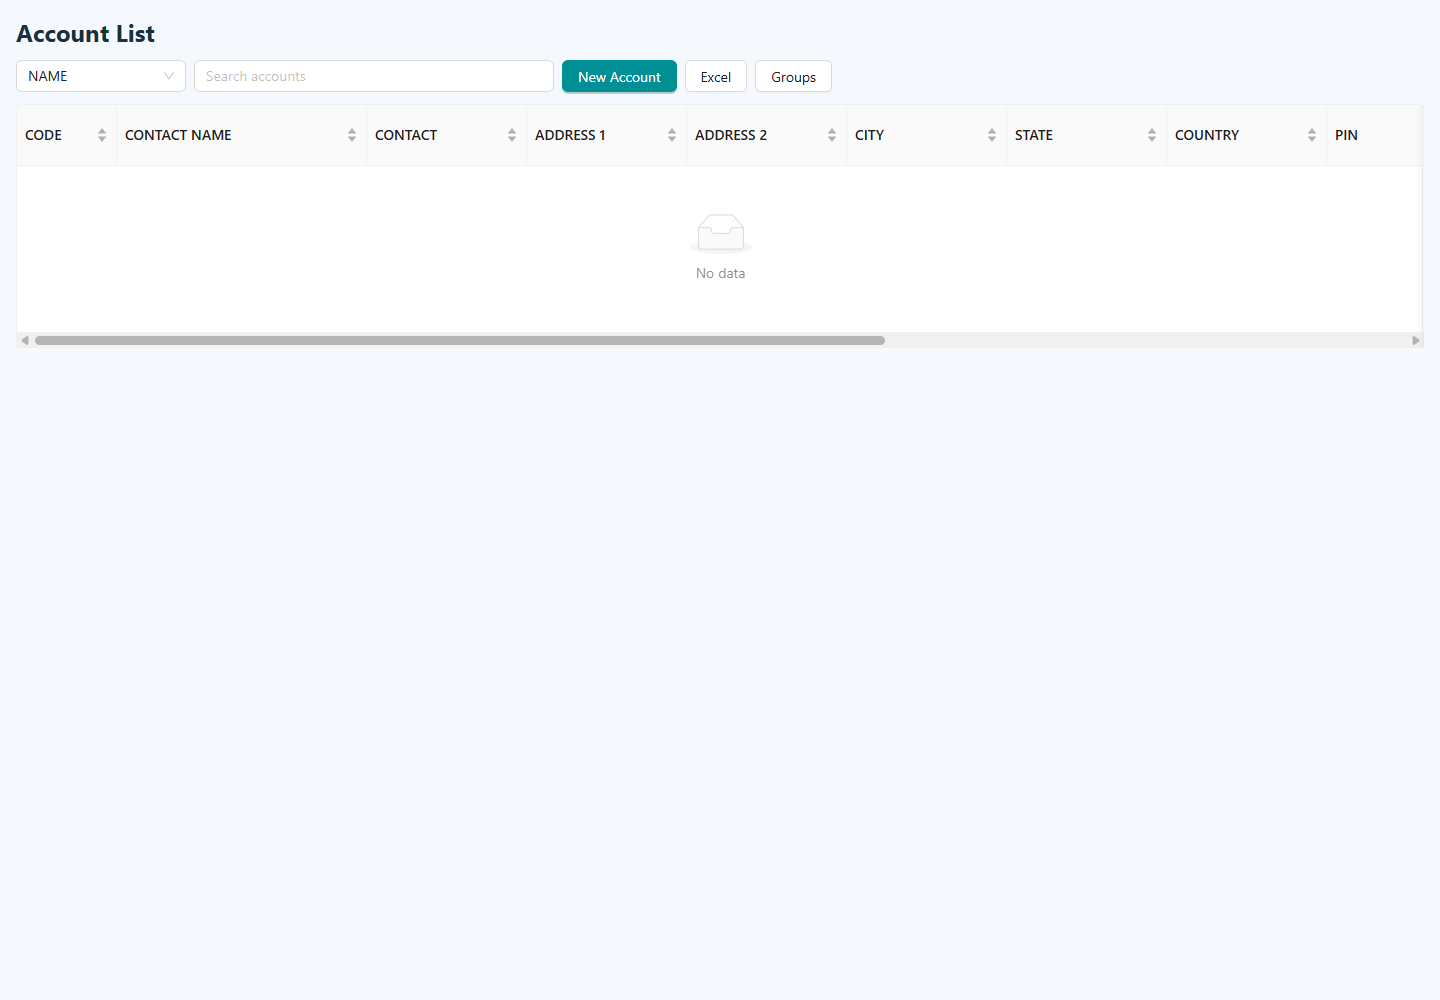
Account list
Goal
Find customer, supplier and ledger accounts.
Use this list to locate an existing account before creating another one. Opening a row takes you to the account editor for a closer review.
Key Rules
Search existing accounts before creating a new one.
The group filter narrows the account list; opening a row opens its master record.
Validations
Application checks and checks to make before continuing:
Check the selected search field and active group filter if an account is not found.
Open the intended account before editing its details.
Open: Master → Account Master
How to use
Search the account list.
Open a record to review its details, or choose New.
Use Excel export when a list is required.
Field-wise description
Fields may be hidden or read-only according to company settings, the selected record and your permissions. Percentage values are entered as percentages; verify the selected unit for rates and quantities.
Account search
Account search field descriptions
Field
Description
Search field
Account column used by the search control.
Search text
Text used to narrow the account list.
Select Accounts by Group
Check classifications in the group tree, then apply the filter to narrow the list. Clear All removes the group restriction.
Account rows
Select or open the required account to review its master record; the account's full field descriptions are under Account master.
Account list · Example screen. Click to view full size. Sample data and layout may differ from your company.
Master
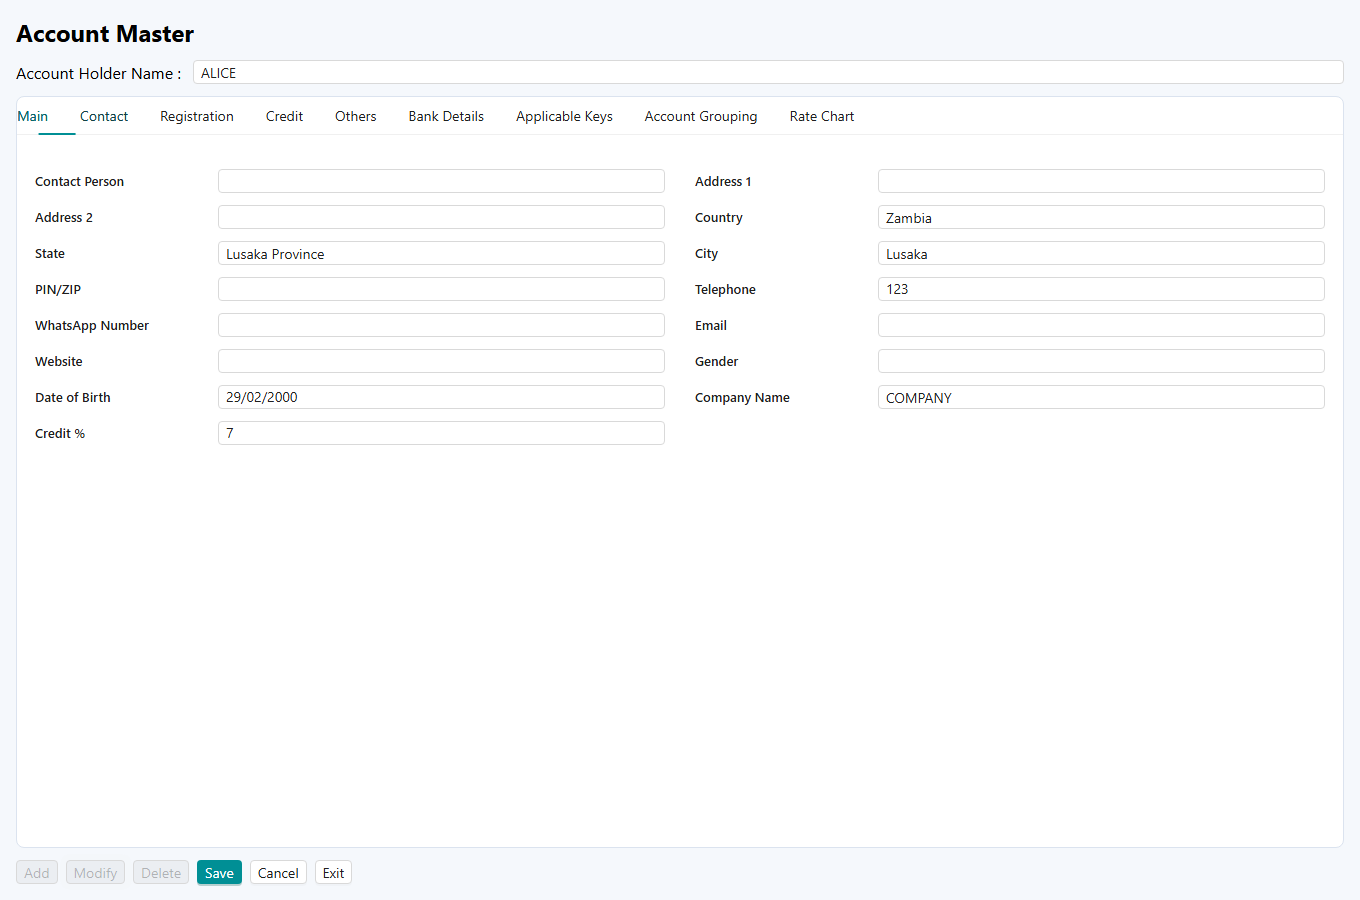
Account master
Goal
Maintain account identity, classification and commercial details.
Customer, supplier and ledger records provide the account details used throughout billing and accounting. Accurate classification, credit and tax information helps keep later transactions consistent.
Key Rules
Enter Add or Modify mode before saving.
Party rates are staged separately and must be confirmed before closing when pending.
Review opening-balance changes carefully; Cancel may not undo earlier saved writes.
Validations
Application checks and checks to make before continuing:
Account Name cannot be blank.
Select an account/item before the corresponding edit or rate action.
The rate editor checks that GST/VAT percentage is not above 100.
Open: From the related menu, list or parent workflow
How to use
Open an account from Account Master or choose New.
Enter the name, classification, contact and applicable tax/credit details.
Review opening balance and rate details before confirming Save.
Field-wise description
Fields may be hidden or read-only according to company settings, the selected record and your permissions. Percentage values are entered as percentages; verify the selected unit for rates and quantities.
Main
Main field descriptions
Field
Description
Account Code
Identifier for this account. Use the code assigned by the application.
Salutation
Title used with the account name.
Account Name
Customer, supplier or ledger name used when selecting this account.
Alias
Alternative name or short reference for the account.
Account Classification
Classification under which the account is grouped.
Lock Date
Account lock date displayed by the editor; check the applicable posting policy before changing it.
Last Reconcile Date
Date recorded for the last reconciliation of this account.
Tax Expire Date
Expiry date recorded for the account tax registration.
Currency
Currency displayed for the account. This control may be disabled in the current editor.
Currency Rate
Displayed currency conversion rate. This control may be disabled.
A/C Balance As On
Displayed account balance amount; check the associated balance type.
Balance Type
Debit or credit side associated with the displayed balance.
Age This Account
Marks the account for ageing treatment in the configured workflow.
Tax Exempt
Marks the account as tax exempt; use only where applicable to the party.
Registration
Registration field descriptions
Field
Description
PAN Number
Permanent Account Number recorded for the party.
Service Tax Number
Service tax registration number, where used.
Excise Range
Excise range recorded for the party.
Division
Excise division recorded for the party.
GST Number
Goods and Services Tax registration number.
VAT Number
VAT registration number.
CST Number
Central Sales Tax registration number, where applicable.
E.C.C Code
Excise registration / E.C.C. reference.
Credit
Credit field descriptions
Field
Description
Bill To
Billing classification or recipient choice displayed for the account.
Credit Due From
Basis from which credit due days are calculated in the configured workflow.
Payment Mode
Payment method or terms selection for the account.
Financial Credit Limit
Financial credit limit recorded for the party.
Credit Period
Credit period recorded for the party, normally expressed in days.
Returnable Credit Limit
Limit recorded for returnable-item credit.
Transfer Month End Balance To H.O.
Marks the account for the month-end head-office balance transfer workflow.
Others
Others field descriptions
Field
Description
Rate Type
Rate category used to select applicable item prices.
Category
Additional category assigned to the account.
Specific Sale A/C
Specific sales ledger associated with this party.
Party Discount Account
Account associated with the party discount setup.
Apply GST on purchase before discount
Selects the configured purchase GST calculation before discount.
Inactive Party
Marks the party as inactive. Check the business reason before changing this flag.
Route Number
Delivery or sales route reference.
Head of Sales
Head-of-sales reference assigned to the party.
Area
Sales or service area assigned to the party.
T.D.M.
Company-defined T.D.M. assignment; choose the value used by your organization.
C.E.
Company-defined C.E. reference.
Franchise
Franchise associated with the party.
Transport Category
Transport category used for this party.
Transport TDS %
Transport tax-deduction percentage.
Bank Details
Bank Details field descriptions
Field
Description
Bank Name/IFSC Code
Bank name or IFSC identification as requested by this field.
A/C No.
Bank account number; preserve leading zeros.
Address 1
First line of the bank address.
Address 2
Second line of the bank address.
Address 3
Third line of the bank address.
Swift Code
SWIFT code for the bank.
IBAN Code/NIB No.
IBAN or NIB identification for the bank account.
Contact
Contact field descriptions
Field
Description
Contact Person
Person to contact for this account.
Address 1
First line of the party address.
Address 2
Second line of the party address.
Country
Country for the party address.
State
State or province for the party address.
City
City for the party address.
PIN/ZIP
Postal or ZIP code.
Telephone
Telephone number.
WhatsApp Number
WhatsApp number; the screen uses this label for the stored contact value.
Email
Email address.
Website
Website address.
Gender
Gender recorded for the contact.
Date of Birth
Date of birth recorded for the contact.
Applicable Keys
Applicable Keys field descriptions
Field
Description
TDS Deduction %
TDS deduction percentage in the applicable-key setup.
TDS %
TDS percentage in the applicable-key setup.
Surcharge %
Surcharge percentage.
Cess %
Cess percentage.
Commission
Commission field descriptions
Field
Description
Company Name
Company selected for the commission setup.
Credit %
Credit percentage in the commission setup.
Selection
Selection field descriptions
Field
Description
Account holder name
Find and select an existing account by name before reviewing or modifying it.
Account Grouping
Account Grouping field descriptions
Field
Description
Search classifications
Find a classification in the account-grouping tree.
Classification tree
Review the hierarchy and the account's classification context.
Rate Chart
Rate Chart field descriptions
Field
Description
Rate Type
Choose PURCHASE or SALE for the party-specific rate.
Rate Item
Product to which the party-specific rate applies.
Rate
Party-specific item price entered in the rate editor.
GST % / VAT %
Tax percentage associated with the party-specific rate; label depends on the company tax mode.
Tax Inclusive
Whether the party-specific rate includes tax.
Confirm Rates
Commits the staged rate changes through the rate workflow; review rows before confirming.
Account master · Example screen. Click to view full size. Sample data and layout may differ from your company.
Master
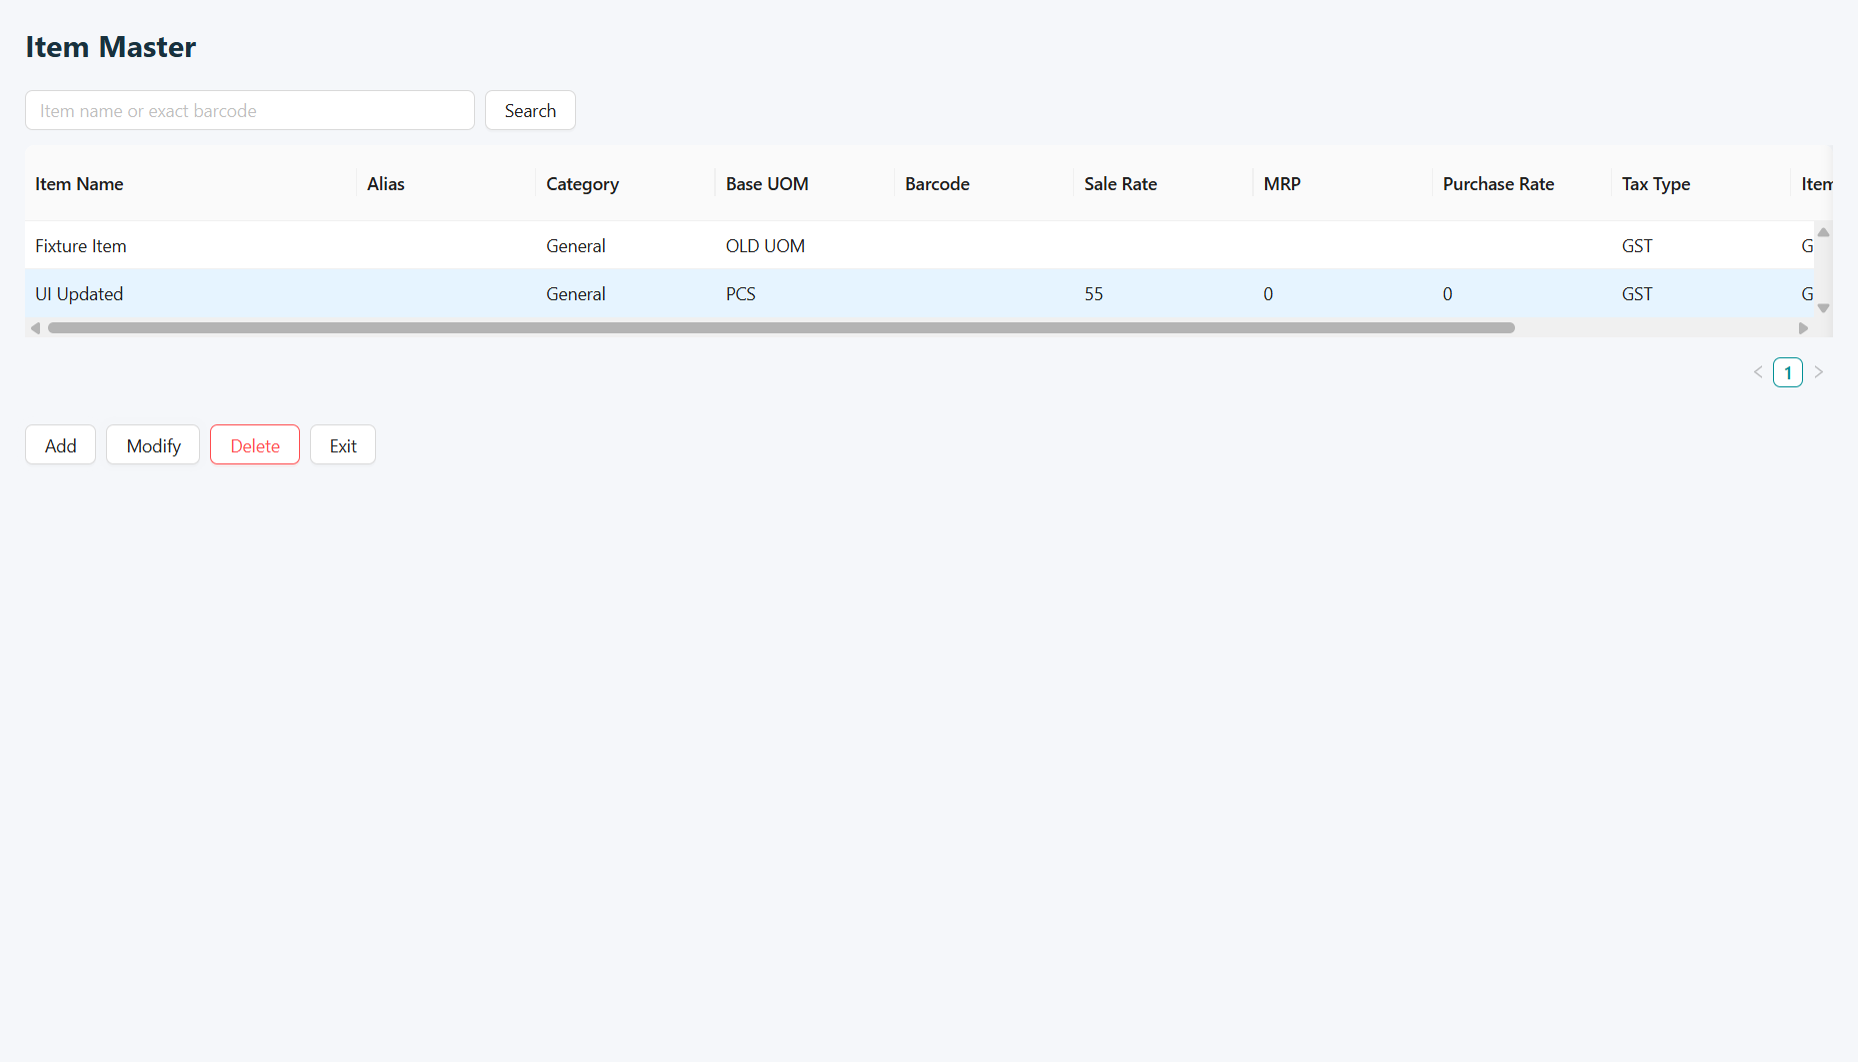
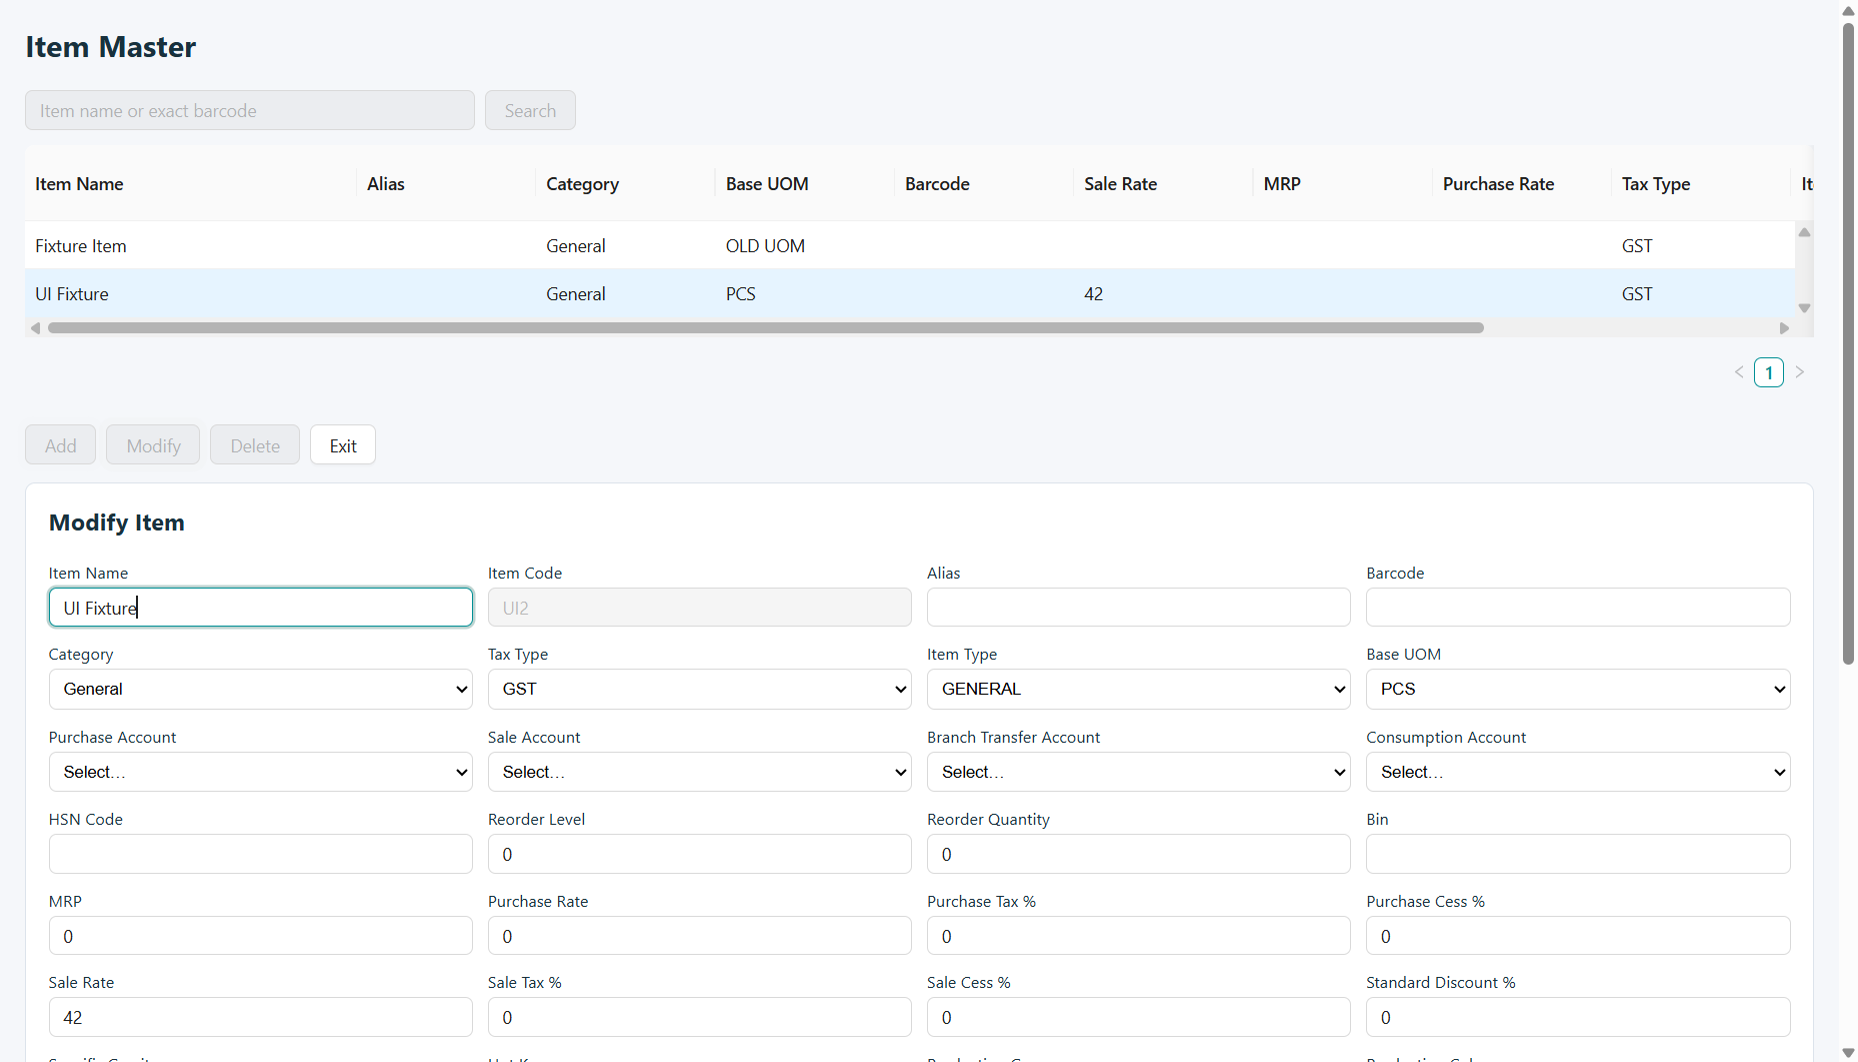
Item master
Goal
Maintain products, units, prices and tax details.
The item record supplies product information to purchasing, sales and stock screens. Check the unit and tax settings carefully because these affect subsequent document calculations.
Key Rules
The base unit determines the meaning of item quantities.
Additional UOMs are added after the item has been saved and reopened in Modify mode.
Warehouse, tax and price settings affect later item use.
Validations
Application checks and checks to make before continuing:
Select an existing additional UOM and enter a factor greater than zero.
Save a changed base UOM before adding its conversions.
Use the highlighted validation messages for missing or incompatible item details.
Open: Master → Item Master
How to use
Find an item or start a new record.
Complete identification, category, unit, rate and applicable tax fields.
Review and save the record before using it in transactions.
Field-wise description
Fields may be hidden or read-only according to company settings, the selected record and your permissions. Percentage values are entered as percentages; verify the selected unit for rates and quantities.
Identity and prices
Identity and prices field descriptions
Field
Description
Item Name
Product description shown in searches and document item lines.
Item Code
Identifier assigned to the product; use the existing code when modifying an item.
Alias
Alternative product name or search reference.
Barcode
Primary code used when the product is scanned.
HSN Code
Product classification code recorded for applicable tax reporting.
Reorder Level
Stock threshold recorded to identify when replenishment should be considered.
Reorder Quantity
Quantity recorded as the replenishment amount.
Bin
Storage bin or shelf reference.
MRP
Maximum retail price or the price label configured for this company.
Purchase Rate
Default purchase price recorded for the item.
Purchase Tax %
Purchase tax percentage.
Purchase Cess %
Additional purchase cess percentage.
Sale Rate
Default selling price recorded for the item.
Sale Tax %
Sales tax percentage.
Sale Cess %
Additional sales cess percentage.
Standard Discount %
Standard discount percentage for the item.
Specific Gravity
Density-related value used by applicable production calculations.
Production Group
Group reference used to organize production variants.
Options
Options field descriptions
Field
Description
Allow Purchase
Marks the item as eligible for receiving or purchase workflows.
Allow Sale
Marks the item as eligible for issue or sale workflows.
Allow Negative Stock
Allows the item to use the negative-stock option where the transaction workflow permits it.
Allow Fractional Sale
Allows fractional item quantities in the applicable sales workflow.
Batch Item
Marks the item for batch-related handling.
Show On App
Marks the product for display in the associated app workflow.
Book Sale
Sales-booking option for the item.
Book Consumption
Consumption-booking option; associated production/BOM controls depend on this setting.
Book Recipe
Recipe-booking option for the item.
Purchase Tax Inclusive
Indicates that the purchase price includes tax.
Sale Tax Inclusive
Indicates that the selling price includes tax.
Classification and accounts
Classification and accounts field descriptions
Field
Description
Category
Product classification selected from the category master.
Tax Type
Tax-treatment selection offered for the item.
Item Type
Product type used by the configured workflow.
Base UOM
Base unit in which the item quantity is maintained.
Purchase Account
Ledger selected for purchase postings.
Sale Account
Ledger selected for sales postings.
Branch Transfer Account
Ledger selected for branch transfers.
Consumption Account
Ledger selected for consumption postings.
Production Color
Color used to identify a production variant.
Production Size
Size used to identify a production variant.
Hot Key
Shortcut assignment offered for item selection.
ZRA integration
ZRA integration field descriptions
Field
Description
Item Class
ZRA item classification.
Item Type
ZRA item type selected from the integration lookup.
Country
ZRA origin-country selection.
Packing Unit
ZRA packing-unit selection.
Quantity Unit
ZRA quantity-unit selection.
Taxation Type
ZRA VAT/taxation category.
Insurance Premium Levy[IPL]
ZRA insurance-premium-levy category.
Tourism levy
ZRA tourism-levy category.
Excise duties
ZRA excise-duty category.
Units, barcodes and warehouses
Units, barcodes and warehouses field descriptions
Field
Description
Search Items
Find products by item name or exact barcode in the item list.
Allowed Warehouses
Select warehouses assigned to this item.
Additional UOM
Alternative unit used for the product, such as a box or pack.
UOM factor
Conversion factor for the additional unit; check it against the base unit.
Additional barcode
Extra scan code linked to the item.
Additional barcode UOM
Unit associated with that extra barcode.
Rate rows
Rate rows field descriptions
Field
Description
Rate Type
Pricing category to which the row applies.
UOM
Unit for the rate row.
Pack
Pack value recorded for this rate.
MRP
Retail price recorded for this rate row.
Sale Rate
Selling price for this rate type and unit.
SaleTax
Sales tax percentage for the row.
SaleCess
Sales cess percentage for the row.
Tax Inclusive
Whether the row's selling rate includes tax.
BottleRate
Bottle charge/rate recorded where returnable packaging is used.
ShellRate
Shell or crate charge/rate recorded where used.
Currency
Currency associated with the rate row.
Item master · Example screen. Click to view full size. Sample data and layout may differ from your company.Item master · Example screen 2. Click to view full size. Sample data and layout may differ from your company.
Master
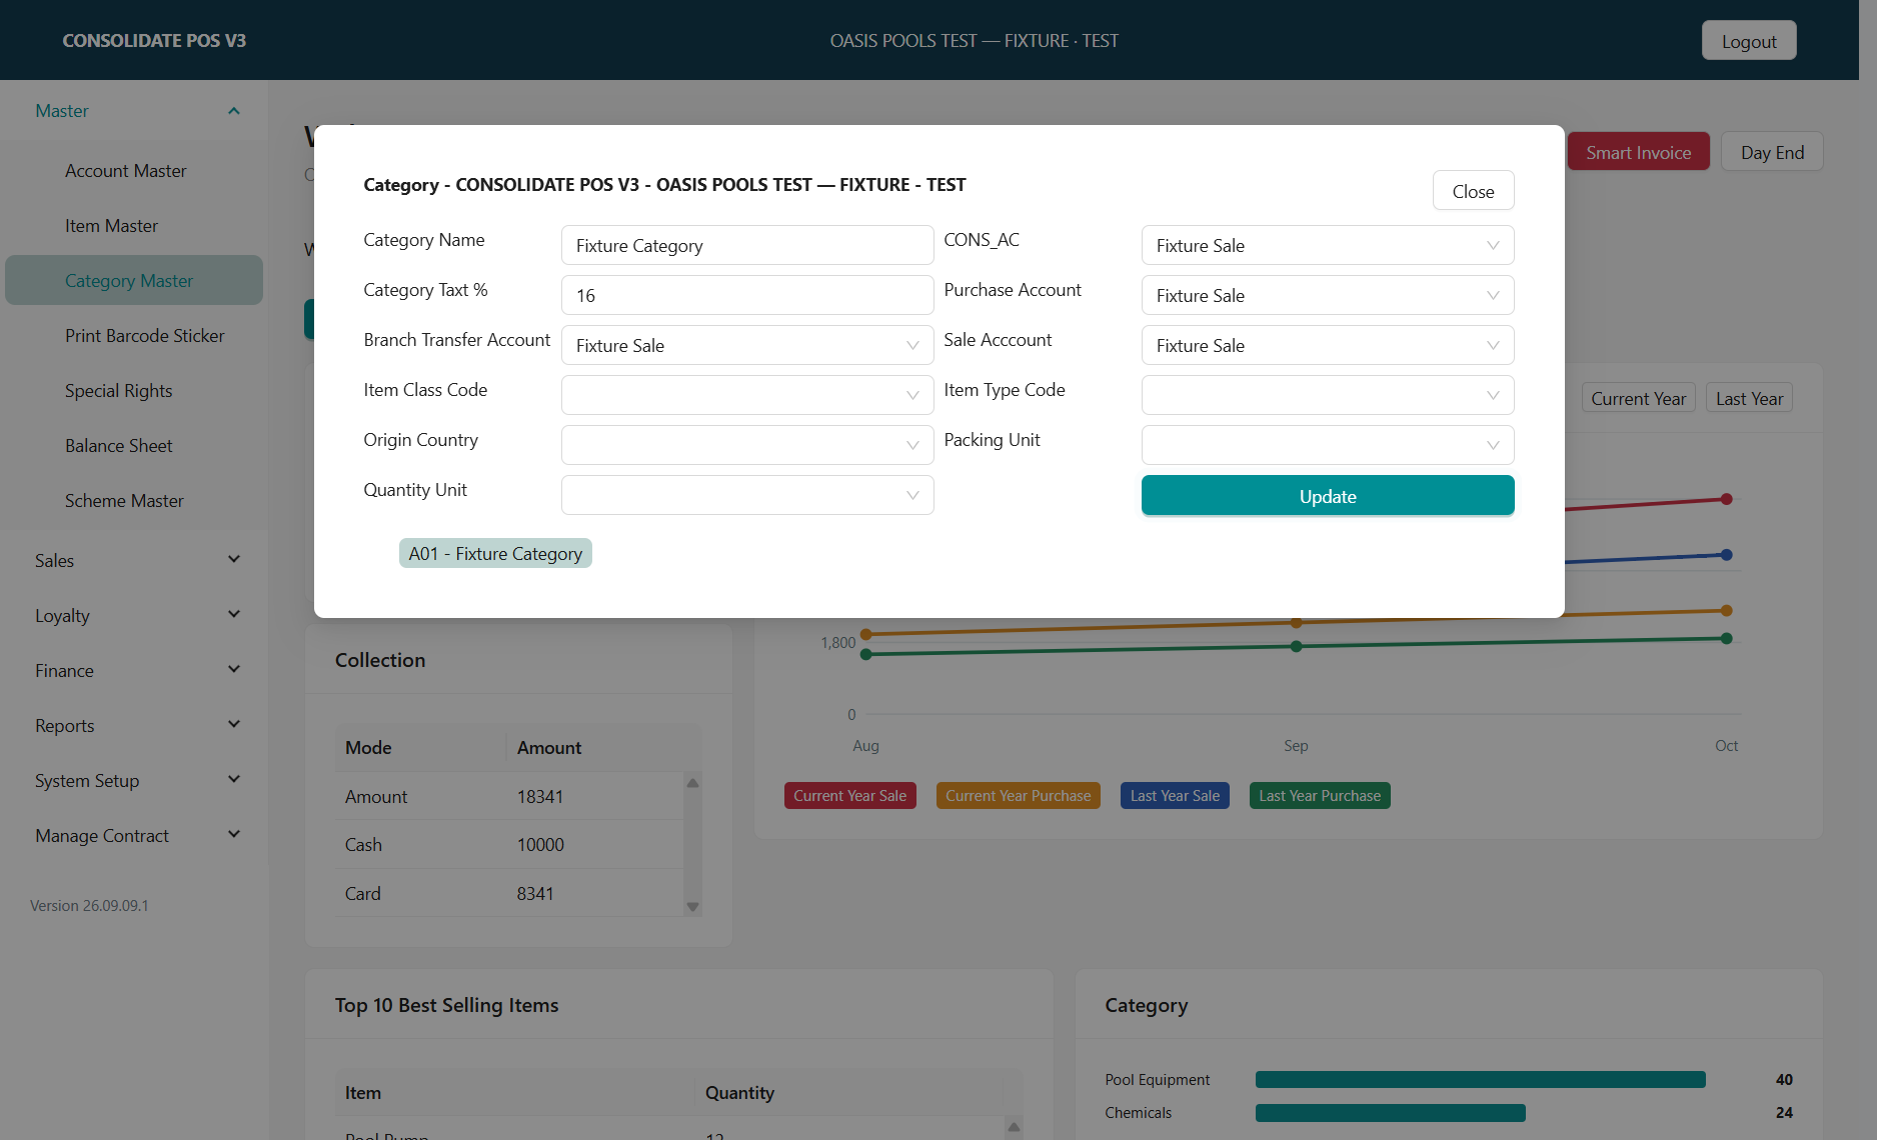
Category master
Goal
Organize items into categories.
Categories help users find and group related products. Choose names that staff can recognize when selecting or filtering items.
Key Rules
Categories form a parent-and-child hierarchy.
The selected parent determines where a subcategory is added.
Validations
Application checks and checks to make before continuing:
Use an allowed tax percentage from company tax settings.
Duplicate category names are checked.
A category used by items cannot be deleted until those items are reassigned.
Open: Master → Category Master
How to use
Select the relevant category or create an entry.
Enter the category details.
Save and check the category list.
Field-wise description
Fields may be hidden or read-only according to company settings, the selected record and your permissions. Percentage values are entered as percentages; verify the selected unit for rates and quantities.
Category details
Category details field descriptions
Field
Description
Category Name
Name of the product category or subcategory.
CONS_AC
Consumption ledger associated with the category.
Category Tax %
Tax percentage selected for the category.
Purchase Account
Purchase ledger associated with the category.
Branch Transfer Account
Ledger associated with branch transfers.
Sale Acccount
Sales ledger associated with the category; label follows the screen.
Item Class Code
ZRA product classification code.
Item Type Code
ZRA product type code.
Origin Country
Country-of-origin choice for ZRA classification.
Packing Unit
Packing unit used in the ZRA mapping.
Quantity Unit
Quantity unit used in the ZRA mapping.
Category tree
Select the existing node to edit, delete or add a subcategory beneath it.
Category master · Example screen. Click to view full size. Sample data and layout may differ from your company.
Master
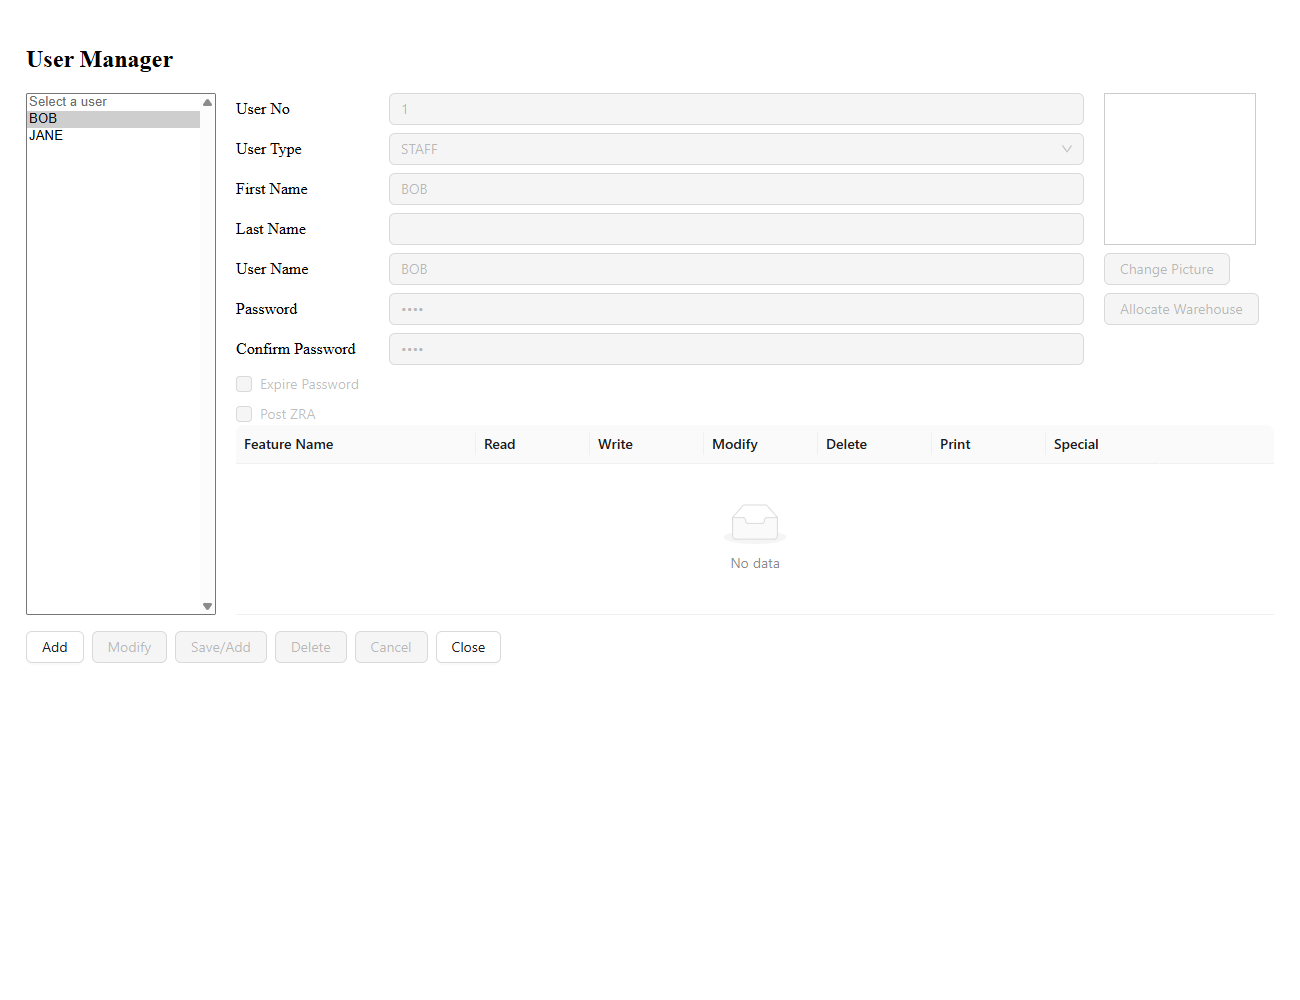
User manager
Goal
Maintain users and their access.
User records control who can sign in and what work they can perform. Assign permissions according to the user's responsibilities and review them after changes.
Key Rules
Feature permissions and warehouse allocation are separate access settings.
Use Add or Modify to change a user.
Review the selected user before applying rights.
Validations
Application checks and checks to make before continuing:
Select a user for existing-record actions.
Enter/select the username before allocating warehouses.
Check password confirmation and required identity fields before saving.
Open: Master → User Master
How to use
Select an existing user or create a user.
Enter account details and assign the available permissions.
Save and review the user's access.
Field-wise description
Fields may be hidden or read-only according to company settings, the selected record and your permissions. Percentage values are entered as percentages; verify the selected unit for rates and quantities.
User details
User details field descriptions
Field
Description
Users
Select the existing user whose record you want to review.
User No
Record number displayed for the user.
User Type
STAFF, MANAGER or ADMIN classification offered by the screen.
First Name
User's given name.
Last Name
User's family name.
User Name
Login identifier assigned to the user.
Password
Password to set for the account when editing is allowed.
Confirm Password
Repeat the new password to confirm the entry.
Expire Password
Password-expiry flag for the user.
Post ZRA
User flag for the ZRA posting workflow.
Change Picture
Select or change the user's profile image.
Allocate Warehouse
Open warehouse allocation and select the locations assigned to the user.
Feature permissions
Feature permissions field descriptions
Field
Description
Feature Name
Application feature to which the row of permissions applies.
Read
Permission to view the feature.
Write
Permission to create records in the feature.
Modify
Permission to change existing records.
Delete
Permission to remove records.
Print
Permission for the feature's print operation.
Special
Additional feature-specific permission; its effect depends on that feature.
User manager · Example screen. Click to view full size. Sample data and layout may differ from your company.
Master
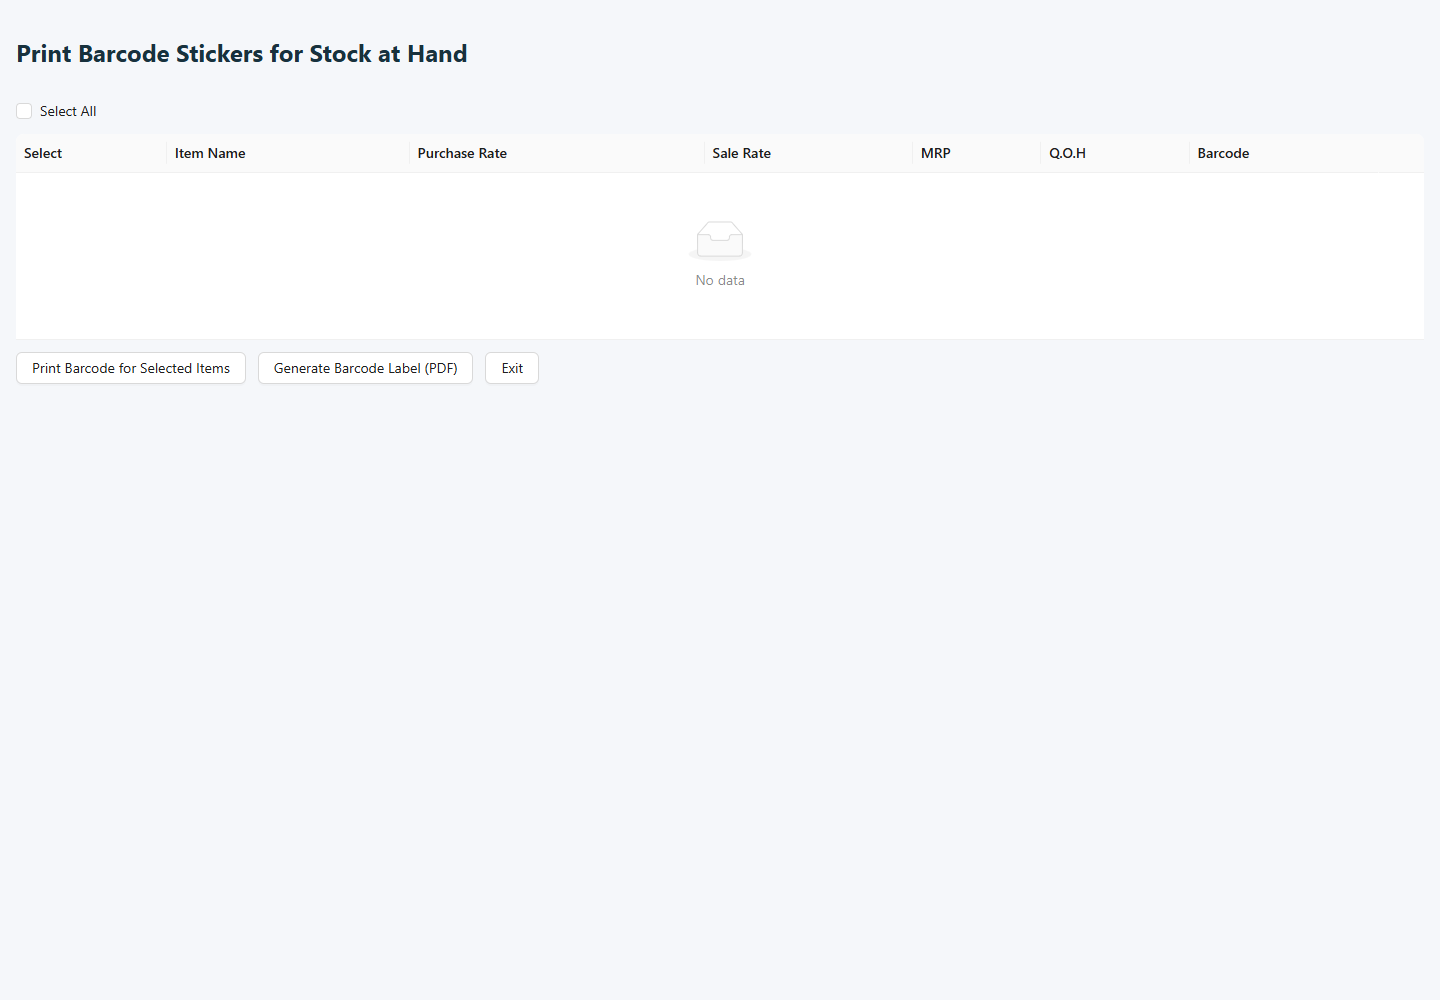
Stock barcode printing
Goal
Prepare stock labels.
Labels help identify products during scanning and stock handling. Check the item, barcode and number of labels before sending output to a printer.
Key Rules
Only checked items are included in label output.
MRP changes in the grid are reviewed before generating labels.
Validations
Application checks and checks to make before continuing:
Select at least one item.
Enter a valid MRP.
Check the generated label before printing a batch.
Open: Master → Print Barcode Sticker
How to use
Select or load the items to label.
Check label quantities and the available label settings.
Preview or print through the supplied output action.
Field-wise description
Fields may be hidden or read-only according to company settings, the selected record and your permissions. Percentage values are entered as percentages; verify the selected unit for rates and quantities.
Label item grid
Label item grid field descriptions
Field
Description
Select All
Select or clear all displayed items for label output.
Select
Check each item that should be included in the label output.
Item Name
Description of the item to label.
Purchase Rate
Purchase price displayed for reference.
Sale Rate
Selling price displayed for reference.
MRP
Price value editable in the label grid before generating output.
Q.O.H
Quantity on hand shown for reference.
Barcode
Scan code associated with the selected item.
Stock barcode printing · Example screen. Click to view full size. Sample data and layout may differ from your company.
Master
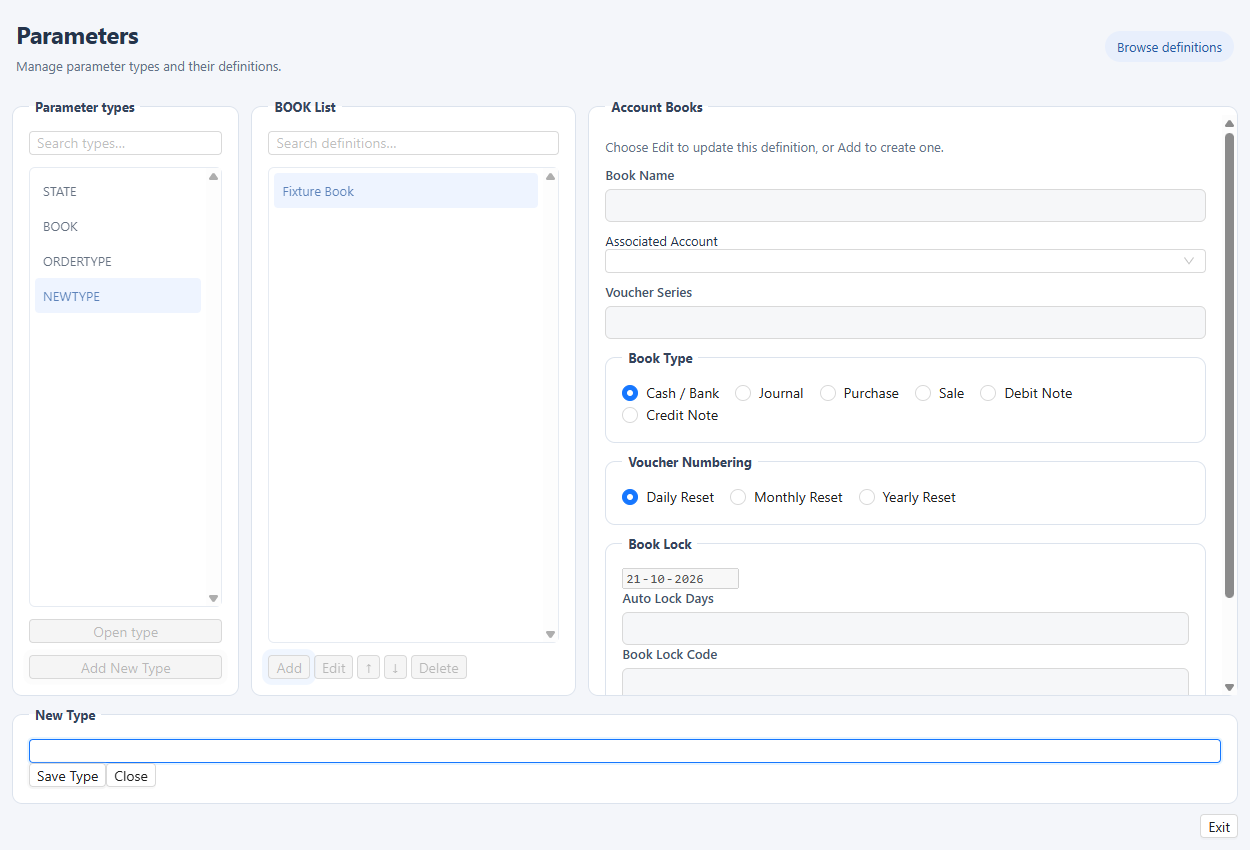
Parameters
Goal
Maintain shared lookup values used by forms.
Parameters provide reusable choices rather than individual transaction details. Select the correct parameter type so that the new value appears in its intended lookup.
Key Rules
The selected parameter type determines which fields appear.
Account-book numbering and locking are maintained separately from ordinary lookup values.
Validations
Application checks and checks to make before continuing:
Use the required description/code fields for the chosen type.
Voucher series are subject to the screen's length checks.
For UOM definitions, verify both units and the conversion factor.
Open: Master → Parameters
How to use
Select the parameter type.
Add or edit the required value.
Save, then check its availability in the relevant form.
Field-wise description
Fields may be hidden or read-only according to company settings, the selected record and your permissions. Percentage values are entered as percentages; verify the selected unit for rates and quantities.
Selection and general definitions
Selection and general definitions field descriptions
Field
Description
Search parameter types
Narrow the list of parameter types.
Parameter types
Select the type of lookup definitions to maintain.
Search definitions
Find an existing definition within the selected type.
Definitions
Select the existing value to review, edit or delete.
Type Id
Identifier entered when creating a new parameter type.
Description
Readable name of the parameter value, where shown.
Abriviation
Short code or abbreviation for the selected type; spelling follows the screen.
Line 1–Line 5
Additional values for general types. Their meaning depends on the selected parameter type and the company's setup.
Sequence / Code
Ordering or reference code for a general definition.
Related To
Associations offered for the selected parameter type. Choose only the relevant entries.
Account Books
Account Books field descriptions
Field
Description
Book Name
Name of the account book.
Associated Account
Ledger linked to the book.
Voucher Series
Voucher numbering series used by the book.
Book Type
Type of entries handled by the book, such as cash/bank, journal, purchase or sale.
Daily / Monthly / Yearly Reset
Numbering reset interval offered by the screen.
Book Lock Date
Date used by the book's lock setup.
Auto Lock Days
Day interval recorded for automatic book locking.
Book Lock Code
Code recorded for the book lock setup.
Fields shown for specific parameter types
Fields shown for specific parameter types field descriptions
Field
Description
Expense Group (Advance Type)
Expense group associated with this advance type.
Contra Account (Advance Type)
Counterpart ledger associated with the advance type.
Currency Name (Country)
Currency name recorded with the country definition.
Country Code (Country)
Code associated with the country definition.
Coin Name (Country)
Name of the currency's minor unit.
Q.C Status Type (QC)
Status-type value used by the quality-control definition.
Q.C Data (QC)
Associated quality-control data selection.
Form Type (Forms)
Form category associated with the definition.
Inward Series (Warehouse)
Document series recorded for inward warehouse movements.
Outward Series (Warehouse)
Document series recorded for outward warehouse movements.
Line 3 / Line 4 (Warehouse)
Additional warehouse values; these inputs have no descriptive label in the current screen. Use the company's established setup.
UOM From (UOM)
Source unit for the conversion definition.
UOM To (UOM)
Destination unit for the conversion definition.
Factor (UOM)
Conversion factor between the selected units.
Nature (Loan)
Nature or category associated with the loan definition.
Recover Loan (Loan)
Recovery selection associated with the loan definition.
Process Sequence (Order Type)
Position of the process in its configured order.
Process Type (Order Type)
Process category selection.
Movement (Order Type)
Movement selection associated with the process.
Type (Order Type)
Additional type selection for the order process.
Room Charge (Room)
Room-charge value stored in the definition.
Nursing Charge (Room)
Nursing-charge value stored in the definition.
State Code (State)
Code recorded for the state.
Display Sequence (Pack Size)
Ordering position for the pack-size definition.
Currency (Currency Denomination)
Currency to which the denomination belongs.
Linked Profit Center
Associated profit-center selection when offered by the chosen parameter layout.
Parameters · Example screen. Click to view full size. Sample data and layout may differ from your company.
Master
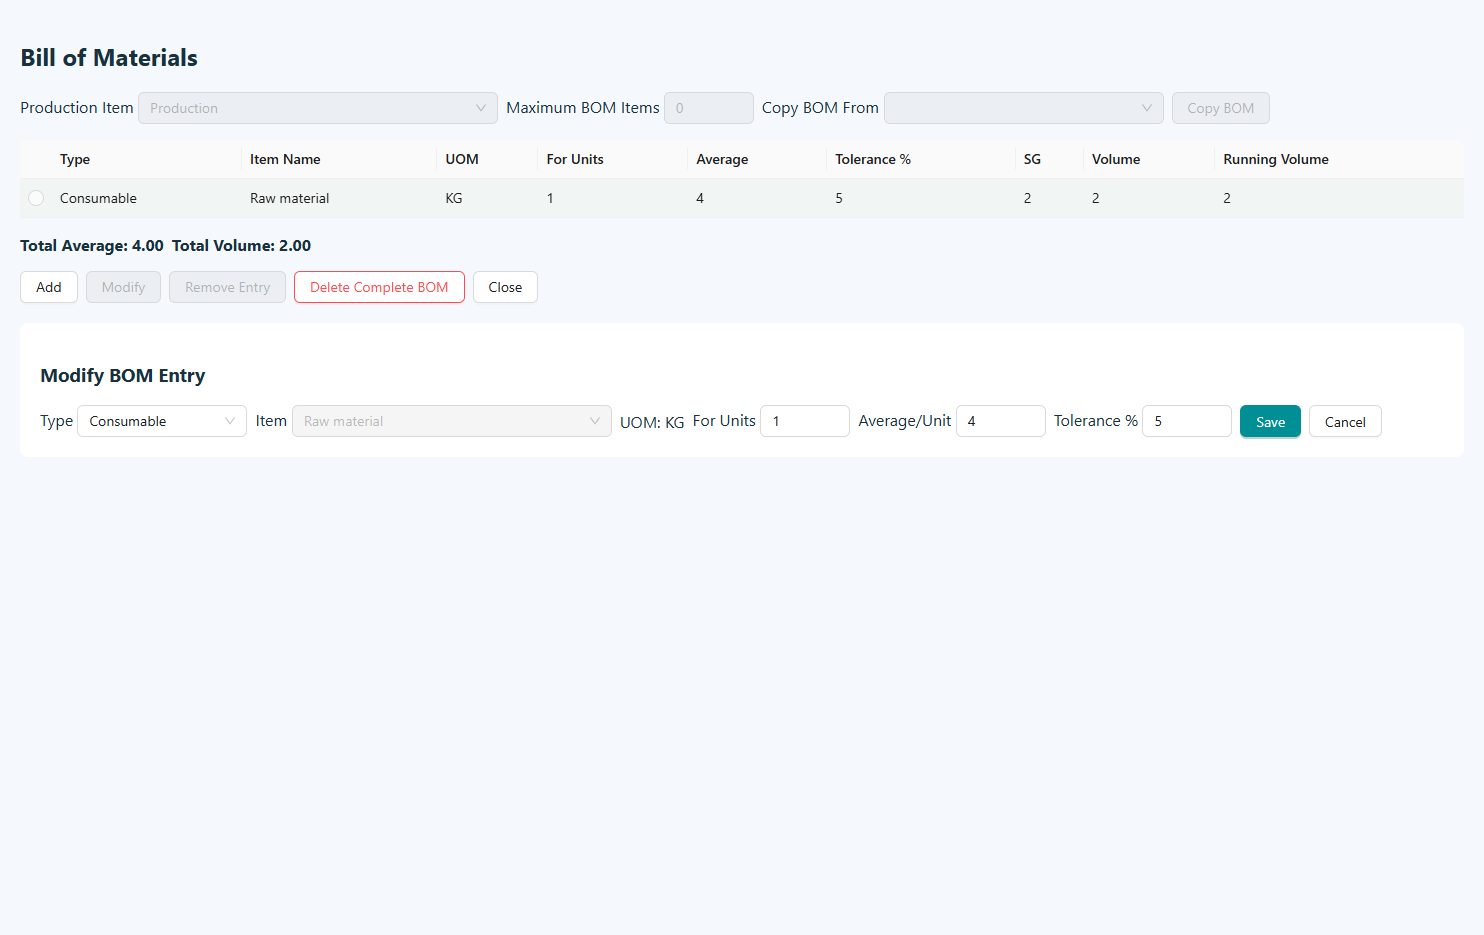
Bill of materials
Goal
Maintain component requirements for finished goods.
A bill of materials describes the components needed for a finished item. Component quantities and units provide the basis for production requirement calculations.
Key Rules
Component requirements belong to the selected production item.
For Units and component average must be read together.
Copying a BOM starts from another item's component setup.
Validations
Application checks and checks to make before continuing:
Select the production item and a valid component before editing.
Check units, averages and tolerance values.
Review totals before saving the component changes.
Open: Master → Varient BOM
How to use
Select the finished item.
Add or edit component items and their required quantities.
Review units and save the bill of materials.
Field-wise description
Fields may be hidden or read-only according to company settings, the selected record and your permissions. Percentage values are entered as percentages; verify the selected unit for rates and quantities.
BOM header and component
BOM header and component field descriptions
Field
Description
Production Item
Finished product whose component requirements are being maintained.
Maximum BOM Items
Maximum component count specified for this BOM.
Copy BOM From
Existing product whose BOM is used as a starting point.
Consumption Type
Consumption category assigned to the component.
BOM Item
Material or component to add to the selected production item.
For Units
Number of production units against which the component requirement is specified.
Average/Unit
Component quantity recorded per unit in the component editor.
Tolerance %
Tolerance percentage recorded for the component.
UOM
Unit of the component shown in the grid.
Average
Component average quantity shown in the grid.
SG
Specific gravity shown for the component.
Volume
Calculated or supplied component volume shown in the grid.
Running Volume
Cumulative volume shown as component rows are reviewed.
Bill of materials · Example screen. Click to view full size. Sample data and layout may differ from your company.
Master
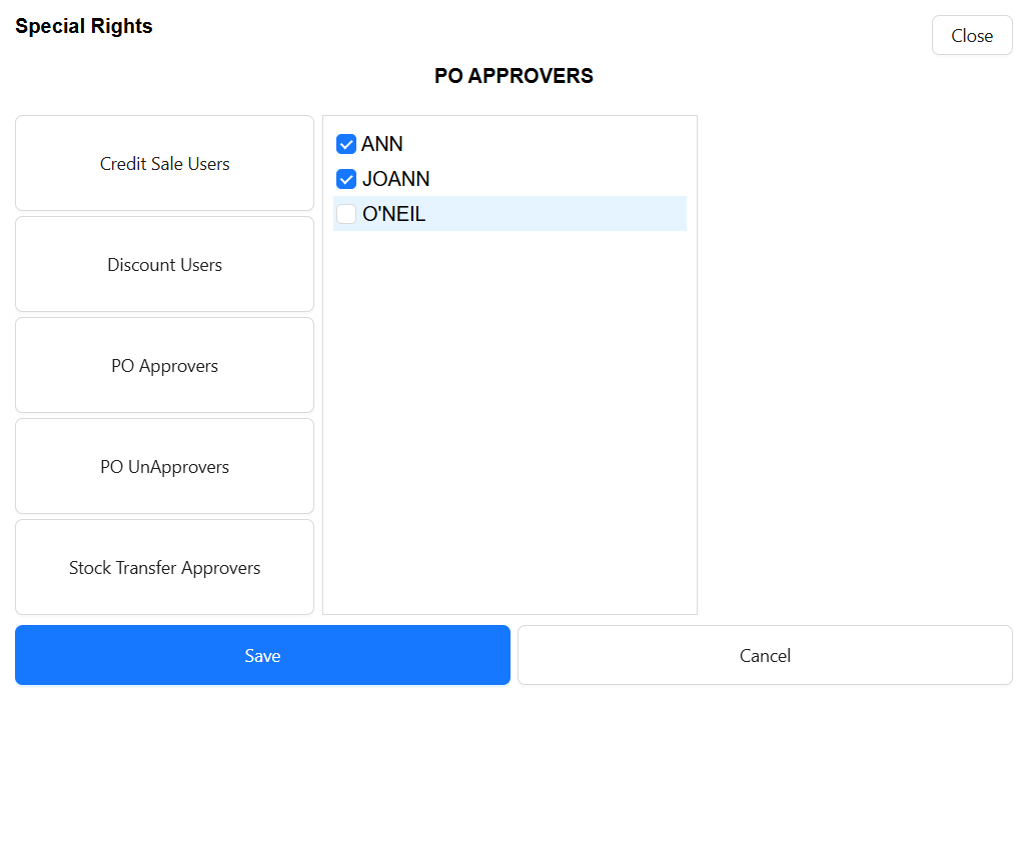
Special rights
Goal
Maintain additional user authorizations.
Special rights provide additional authorizations beyond routine access. Check the selected user before changing a right.
Key Rules
Each rights category maintains its own authorized user list.
Changing category changes which permission is being edited.
Validations
Application checks and checks to make before continuing:
Select the intended category.
Review checked users before saving and resolve any permission denial.
Open: Master → Special Rights
How to use
Select the user and rights scope.
Review and change the applicable rights.
Save the changes and verify the selected user.
Field-wise description
Fields may be hidden or read-only according to company settings, the selected record and your permissions. Percentage values are entered as percentages; verify the selected unit for rates and quantities.
Rights categories
Rights categories field descriptions
Field
Description
Credit Sale Users
Choose the users authorized by the credit-sale workflow.
Discount Users
Choose the users authorized by the discount workflow.
PO Approvers
Choose users authorized to approve purchase orders.
PO UnApprovers
Choose users authorized to reverse purchase-order approval.
Stock Transfer Approvers
Choose users authorized to approve stock transfers.
Users
Check or clear users for the currently selected rights category; review the category before saving.
Special rights · Example screen. Click to view full size. Sample data and layout may differ from your company.
Master
Classification tree
Goal
Maintain the classification hierarchy and its properties.
This is a classification editor with a parent-and-child tree. Use the hierarchy to keep related classifications together and check the selected parent before adding a subcategory.
Key Rules
The tree controls classification hierarchy.
The classification code is displayed rather than edited directly.
Validations
Application checks and checks to make before continuing:
Select the intended node before Edit or Add Subcategory.
Check effective dates, reference values and parent placement before saving.
Open: Master → Balance Sheet
How to use
Select a node in the tree.
Use Edit or Add Subcategory.
Enter the description and applicable properties, then save.
Field-wise description
Fields may be hidden or read-only according to company settings, the selected record and your permissions. Percentage values are entered as percentages; verify the selected unit for rates and quantities.
Classification properties
Classification properties field descriptions
Field
Description
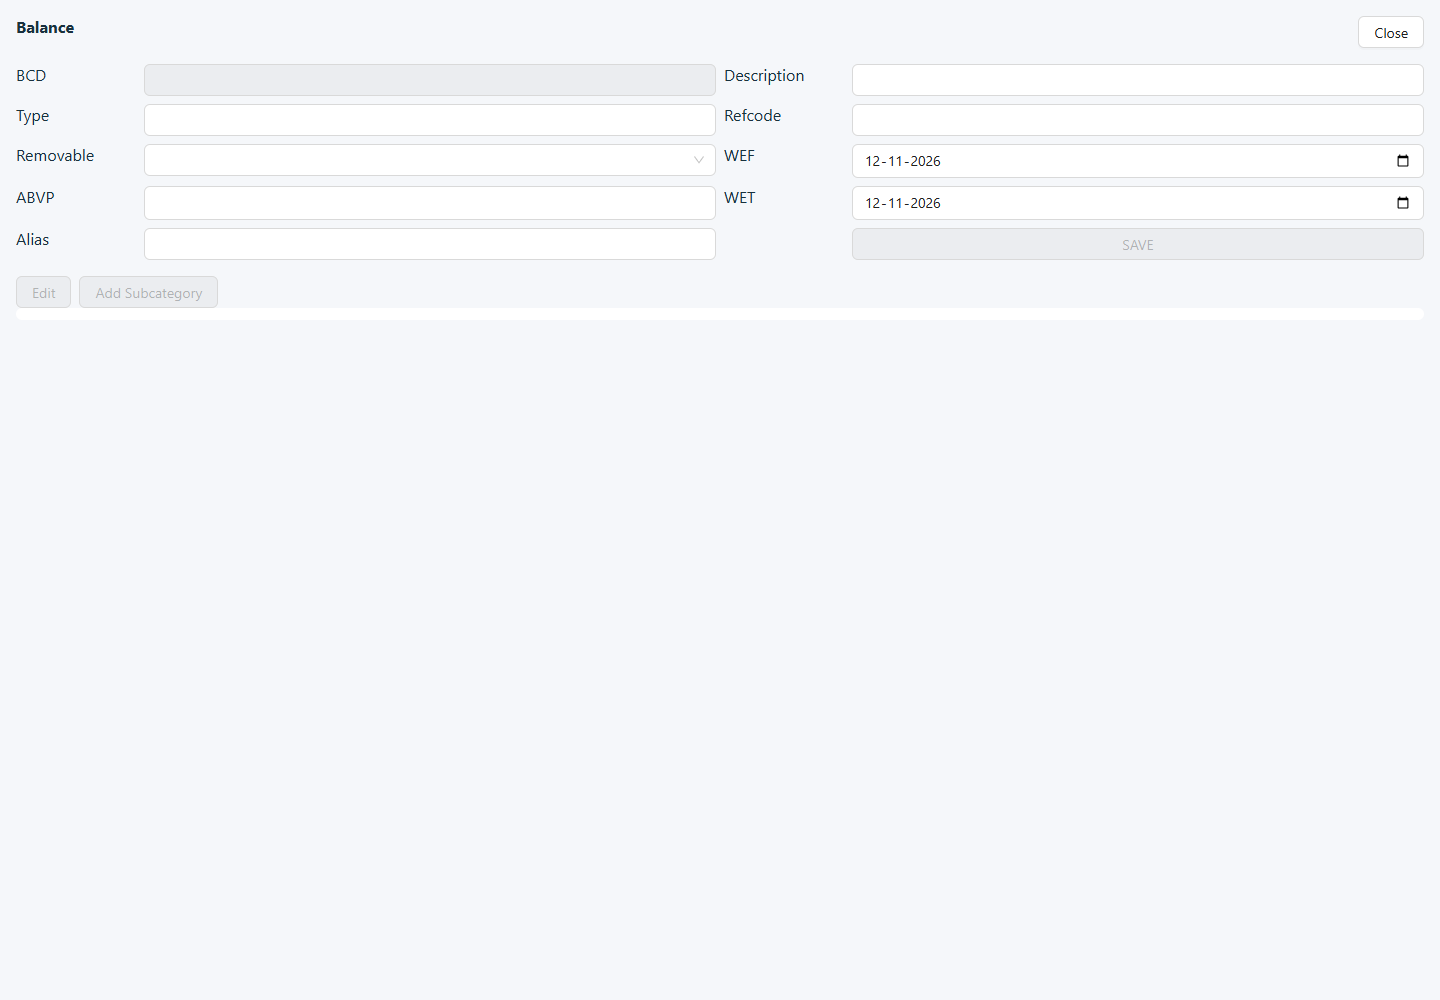
BCD
Classification identifier displayed by the system; not directly editable.
Description
Name of the classification node.
Type
Type value stored for this classification.
Refcode
Reference code associated with the classification.
Removable
True/False property indicating whether the classification is marked removable.
WEF
Effective-from date recorded for the classification.
ABVP
Abbreviation field displayed with this label on the screen.
WET
Effective-to date recorded for the classification.
Alias
Alternative classification name or reference.
Classification tree
Choose the parent or existing node before adding a subcategory or editing.
Classification tree · Example screen. Click to view full size. Sample data and layout may differ from your company.
Master
Scheme master
Goal
Maintain sales schemes and their conditions.
A scheme defines promotional conditions for eligible sales. Check the validity period and item conditions before staff begin using it.
Key Rules
Schemes apply to the selected sale/purchase side, item/bill level and channels.
Eligibility can cover all items/parties or selected item and account groups.
Bill schemes use amount thresholds.
Validations
Application checks and checks to make before continuing:
Code, name and a configured currency are required.
End date must not precede WEF; priority must be an integer.
At least one valid discount slab is required; percentages cannot exceed 100 and duplicate thresholds are rejected.
Open: Master → Scheme Master
How to use
Select an existing scheme or create one.
Enter the applicable items, dates and scheme conditions.
Review and save before applying the scheme to sales.
Field-wise description
Fields may be hidden or read-only according to company settings, the selected record and your permissions. Percentage values are entered as percentages; verify the selected unit for rates and quantities.
Scheme header
Scheme header field descriptions
Field
Description
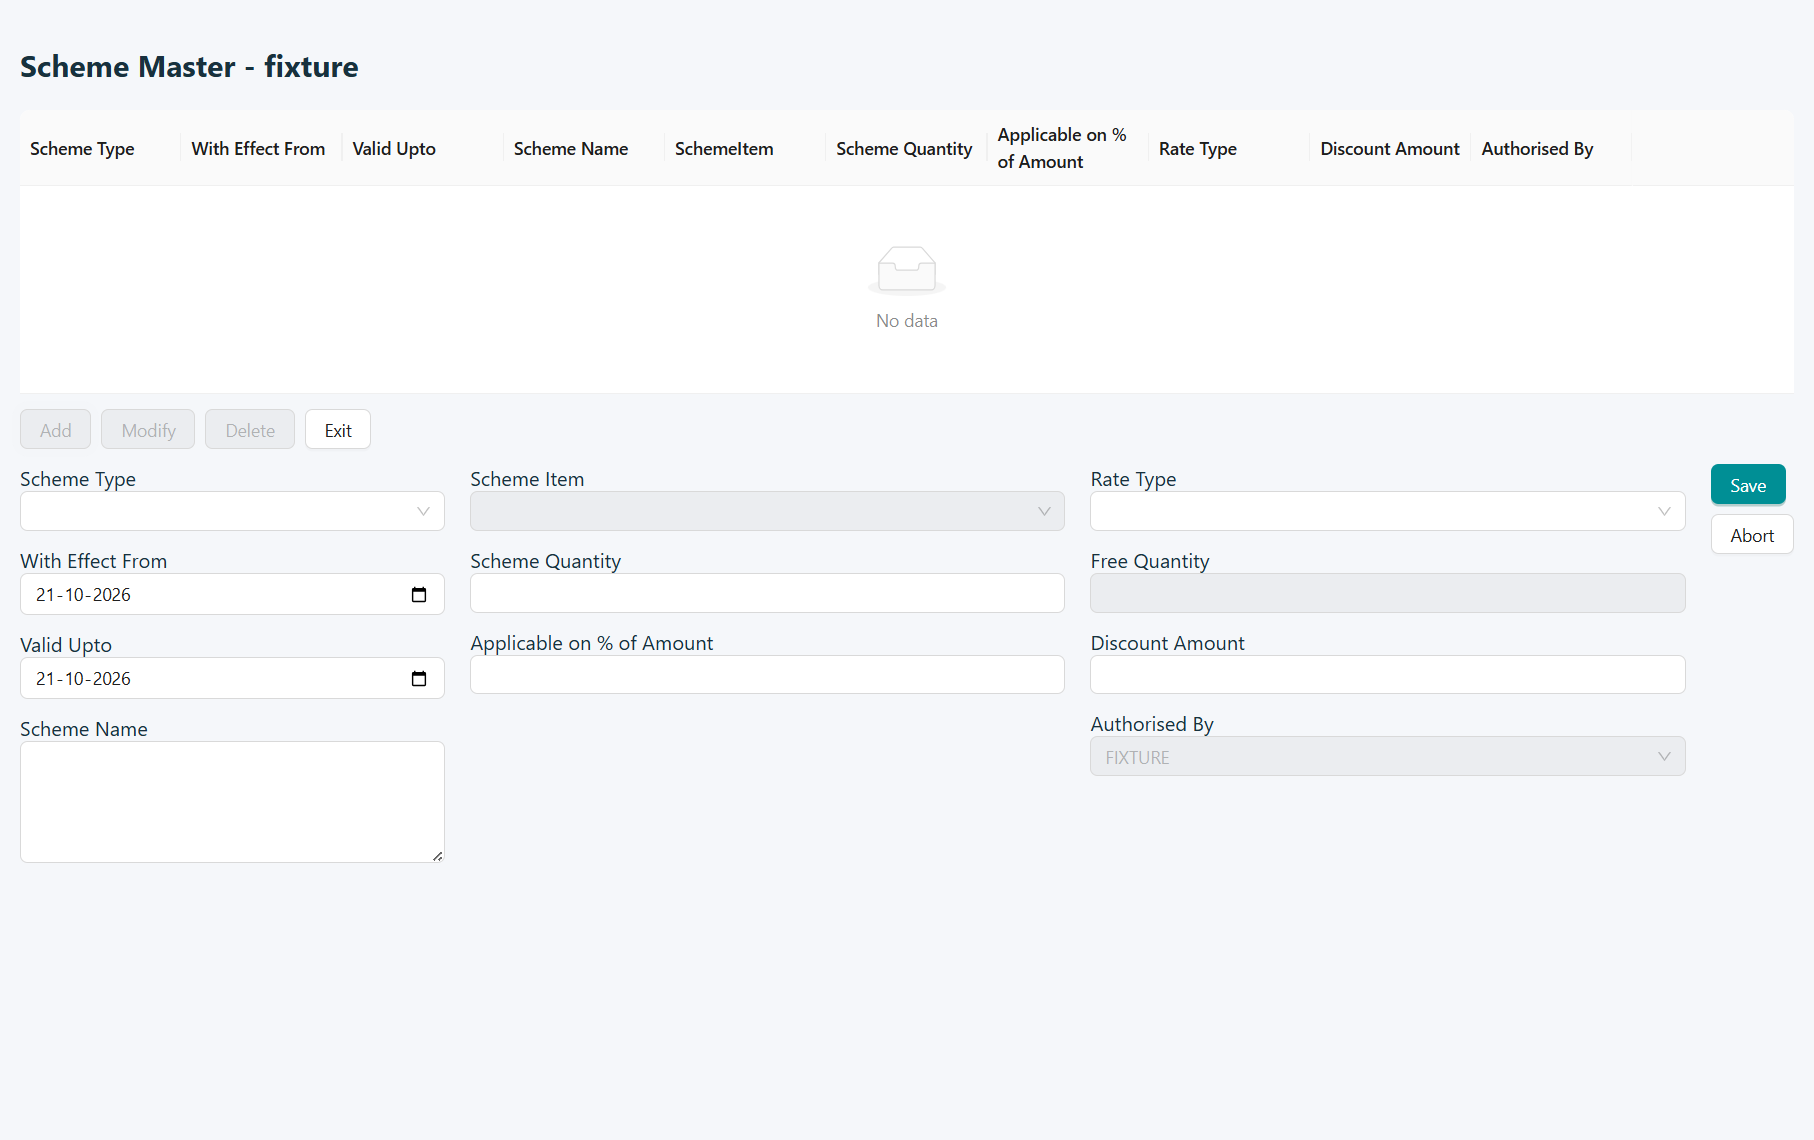
Code
Short identifier for the scheme.
Name
Description staff use to recognize the promotion.
Sale / Purchase
Determines whether the scheme applies to sales or purchases.
Apply to
ITEM applies at item level; BILL applies at document level.
WEF
Start date of the scheme's validity period.
End date
Last date of the scheme's validity period.
Channels
Eligible transaction channels such as counter sale, wholesale or goods purchase.
Currency
Currency selection used by the scheme.
Priority
Priority value used when considering eligible schemes.
Active
Enables the scheme for consideration by the workflow.
All items
Applies item eligibility broadly rather than to a selected item list.
Eligible items
Specific items covered when All items is not selected.
All customers / All suppliers
Applies party eligibility broadly for the selected transaction side.
Eligible account groups
Restricts eligibility to the selected account groups when required.
Allow a bill scheme on these items
Allows the item scheme to combine with a bill scheme under the configured rules.
Benefit tiers
Benefit tiers field descriptions
Field
Description
Minimum quantity
Quantity threshold for an item-level tier.
Minimum amount
Amount threshold for a bill-level tier.
Benefit
Selects the tier's benefit calculation: percentage, per-unit amount or bill amount as offered.
Value
Percentage or amount for the selected benefit type.
Maximum discount
Cap on the discount amount for the tier.
Scheme master · Example screen. Click to view full size. Sample data and layout may differ from your company.
Sales
Sales
Counter sale / point of sale
Goal
Enter a customer sale at the till.
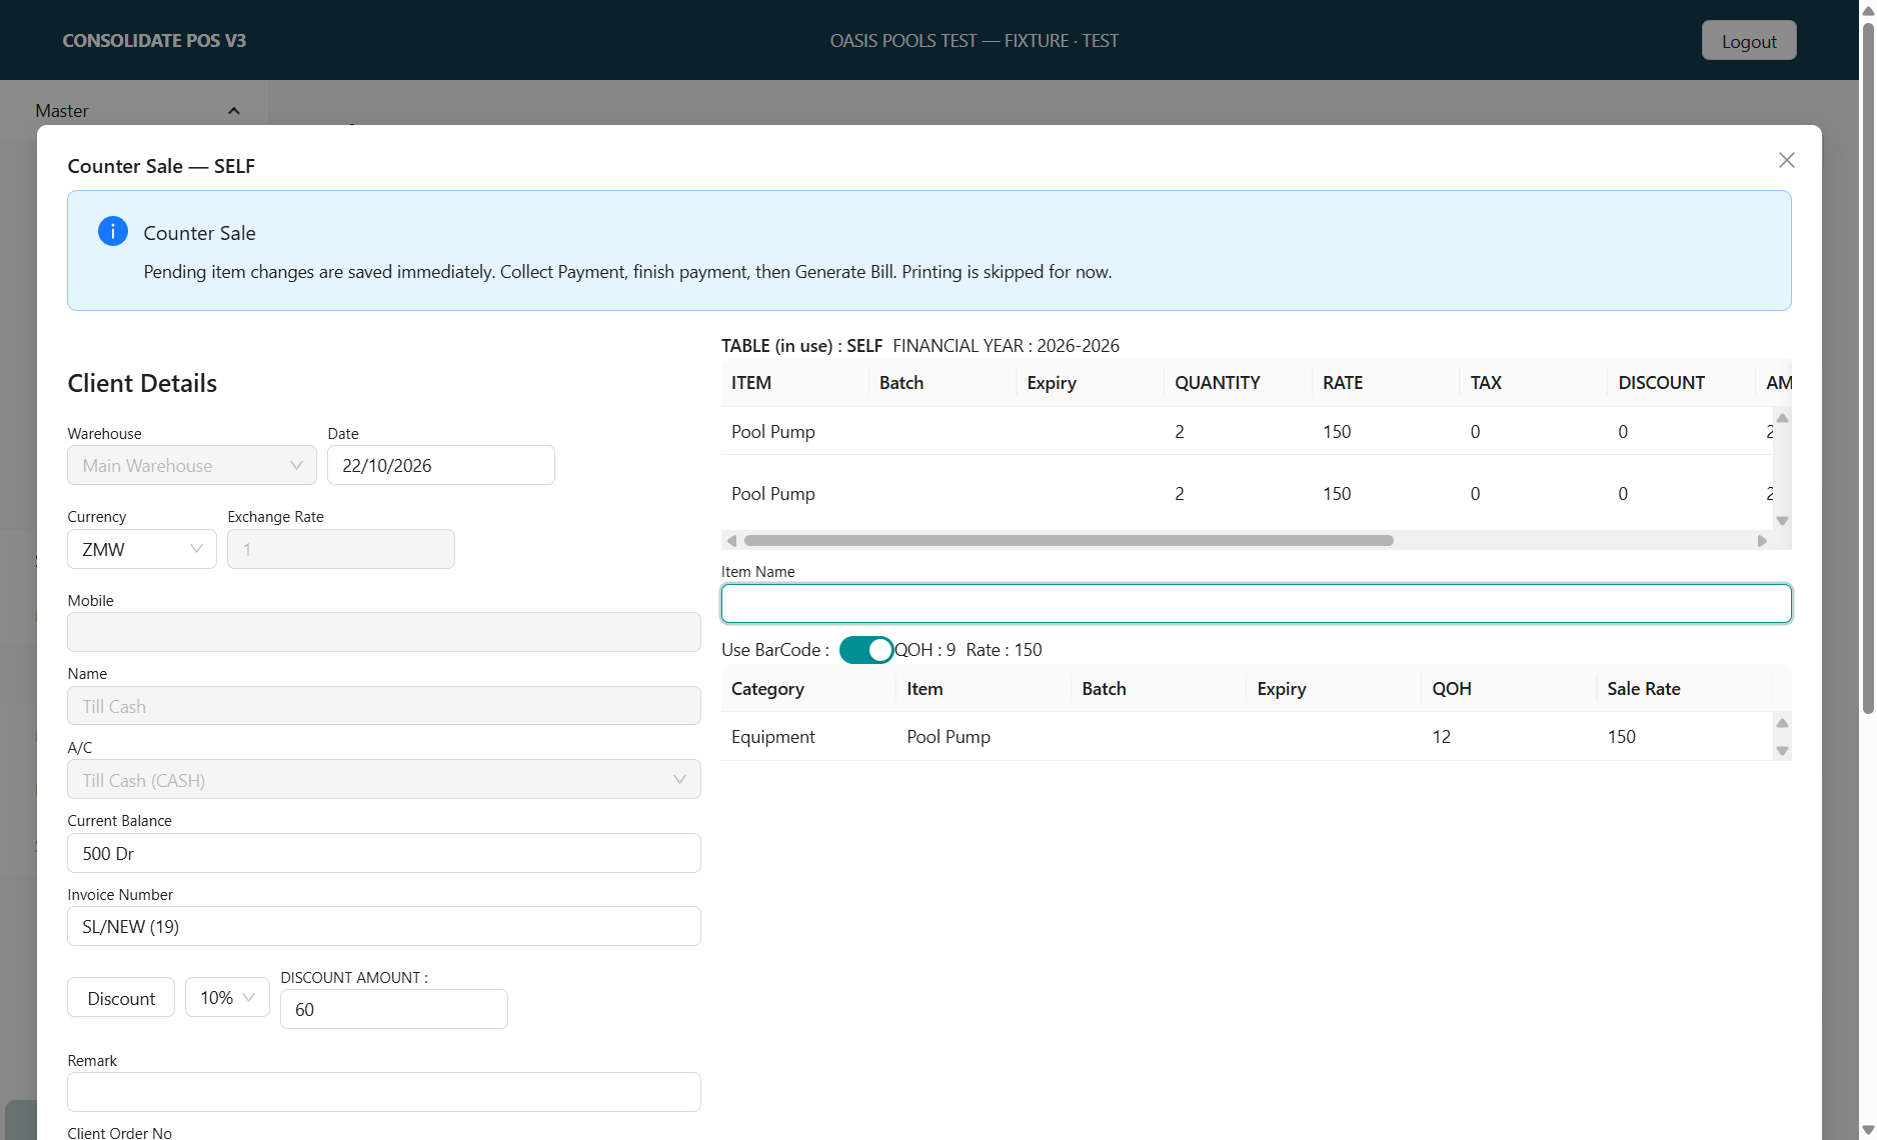
This is the day-to-day billing screen for till operators. Review the item grid before payment, especially repeated scans, quantities and any discounts.
Key Rules
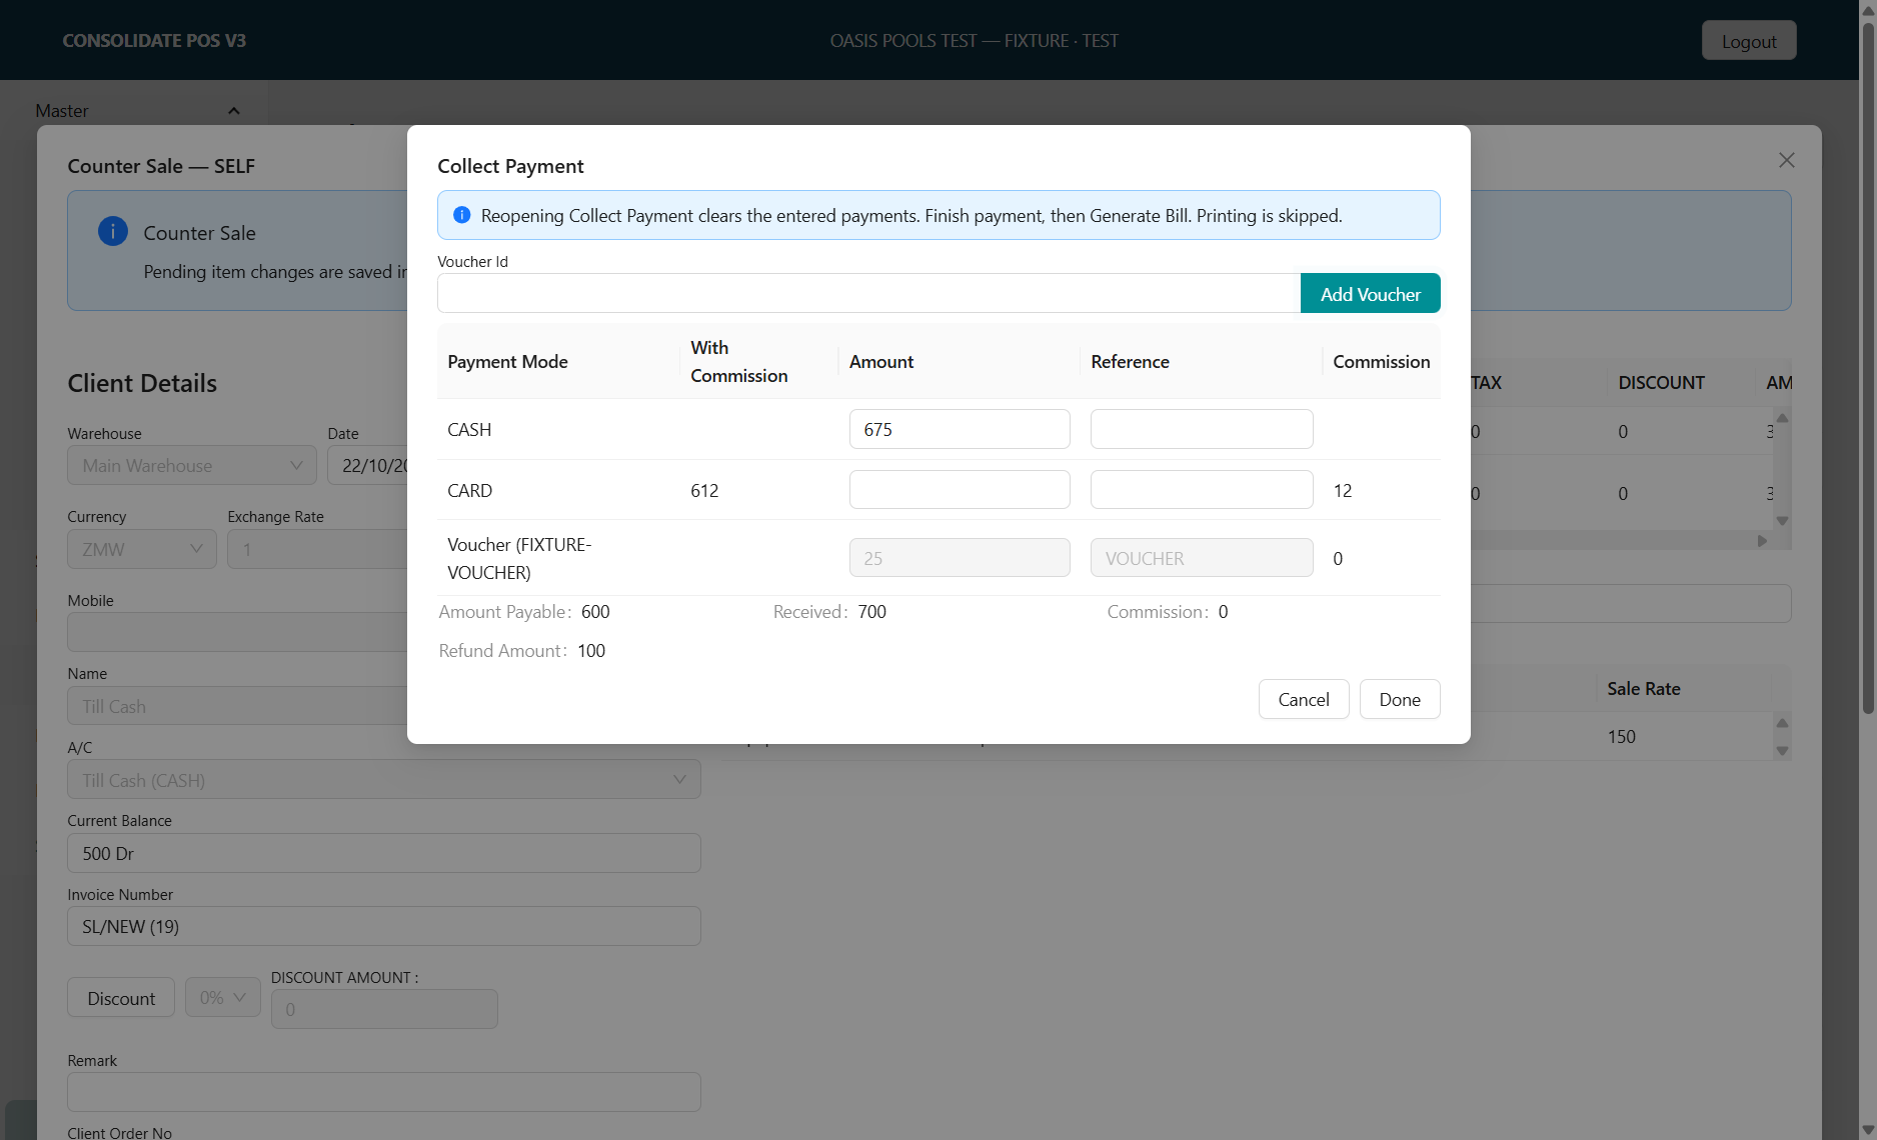
Item lines determine the bill total; payments complete collection.
Review discounts, customer selection and quantities before finalizing.
Validations
Application checks and checks to make before continuing:
Resolve item, stock or price messages before payment.
Check the payment allocation against the amount due.
Verify the saved receipt before retrying an interrupted completion.
Open: From the related menu, list or parent workflow
How to use
Select the customer where required and scan or select items.
Check quantities, prices, discounts and totals.
Complete the displayed payment workflow and obtain the receipt.
Counter sale / point of sale · Example screen. Click to view full size. Sample data and layout may differ from your company.Counter sale / point of sale · Example screen 2. Click to view full size. Sample data and layout may differ from your company.
Sales
Sales, returns and goods movement
Goal
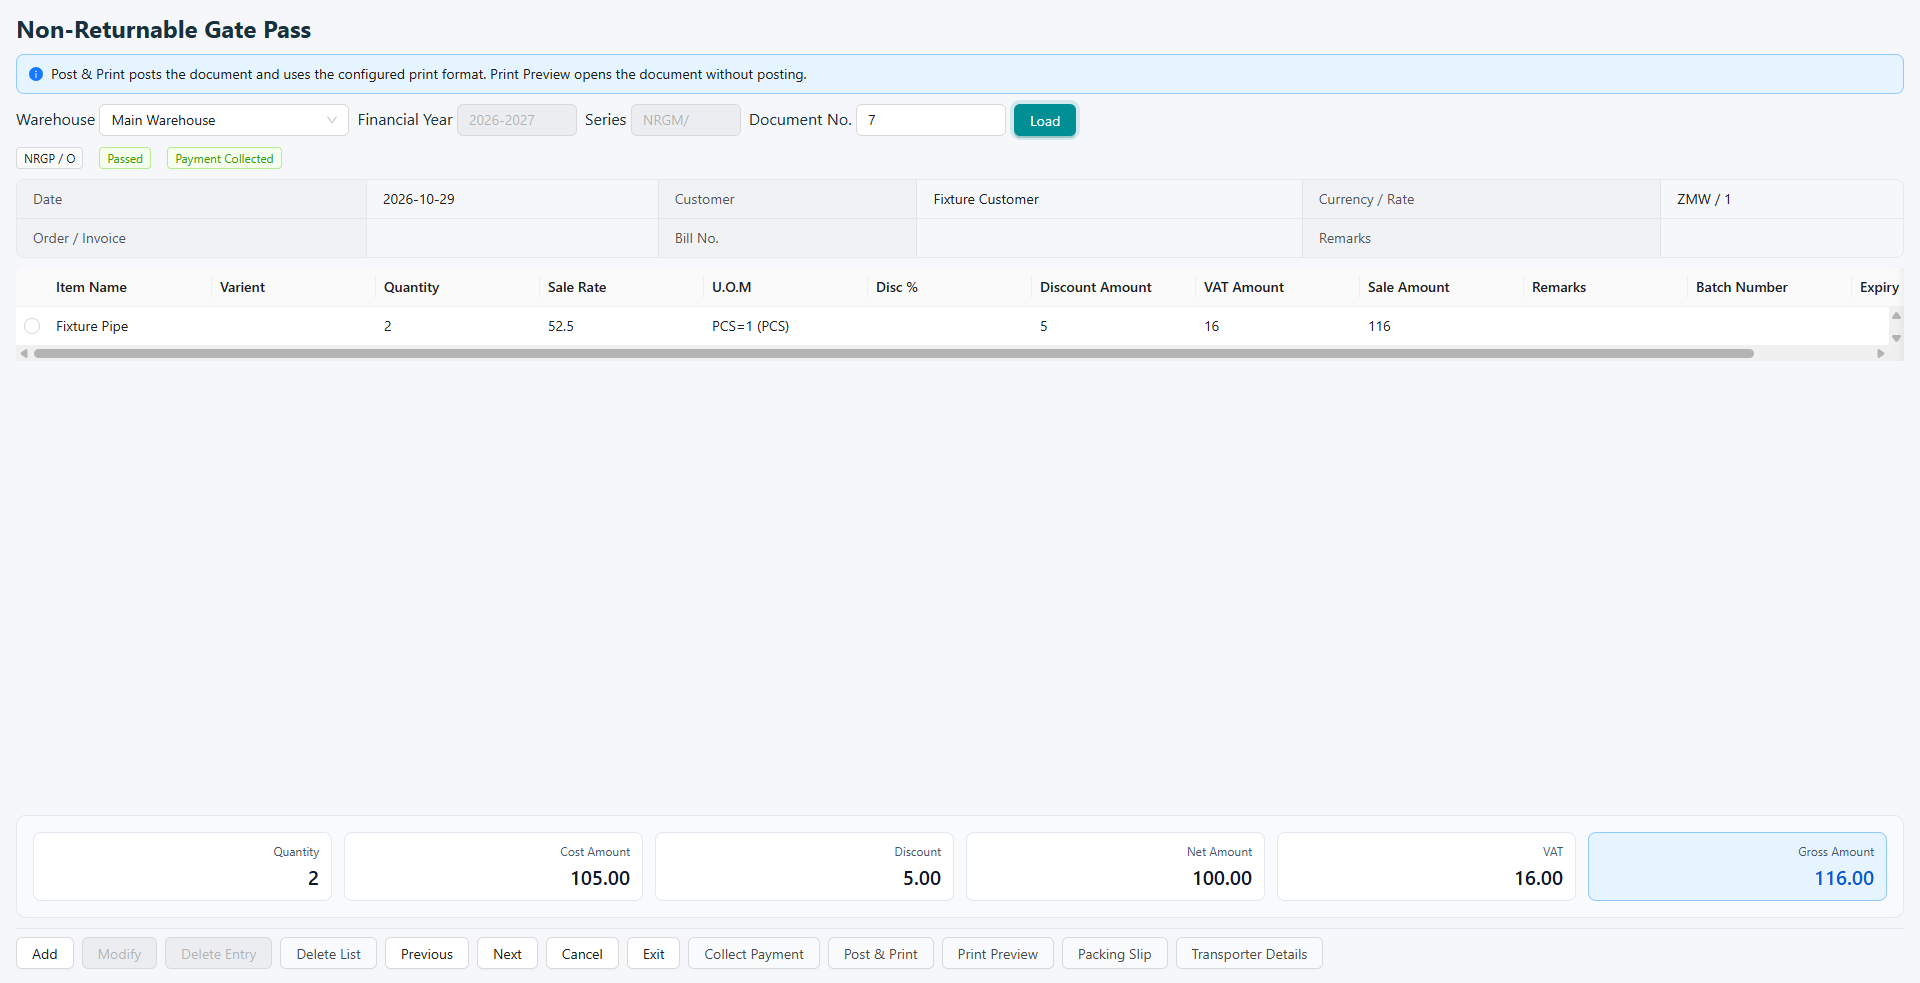
Enter documents in the transaction mode selected from the menu.
One screen supports several sales, return and goods-movement modes. The menu entry used to open it determines the document being prepared; always read its title before entering items.
Key Rules
The menu entry determines the sales, return or goods-movement mode.
Posted invoices with credit notes cannot be edited through the ordinary edit path.
Close active item/payment panels before changing the parent document.
Validations
Application checks and checks to make before continuing:
Check the party, authorized warehouse, document date and quantities for the selected mode.
Provide a return reason where the workflow requires it.
Resolve credit, payment, stock and tax messages before completion.
Open: Sales → Whole Sale · Sales → Delivery Note · Sales → Sale Return · Order → Delivery Note · Inventory → Non-Returnable Gate Pass · Additional shortcuts may be available.
How to use
Check the document title and mode, date, party and warehouse.
Add or load items and review quantities, rates and taxes.
Save and complete the payment, return-reason or printing steps offered for that mode.
Sales, returns and goods movement · Example screen. Click to view full size. Sample data and layout may differ from your company.
Sales
Till cash-up
Goal
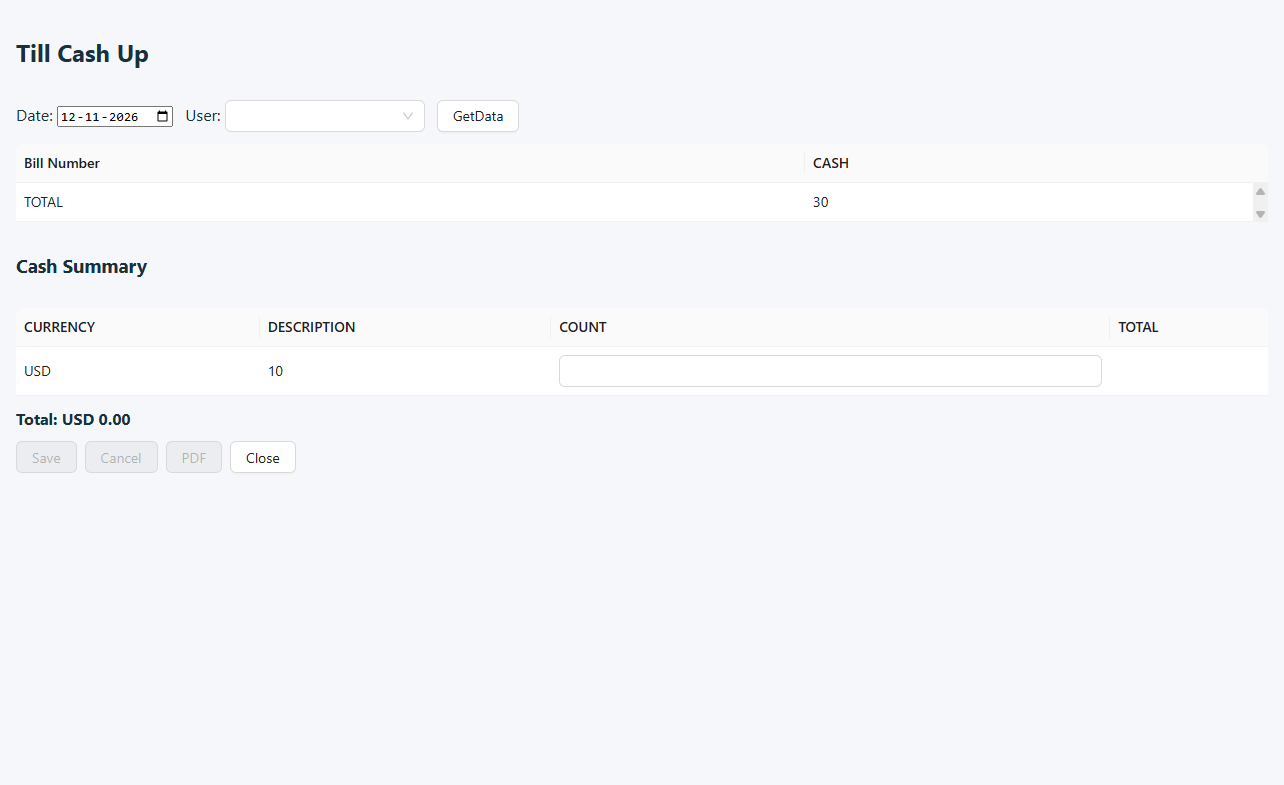
Record and review the end-of-shift till count.
Cash-up compares the operator's counted receipts with the recorded amounts. Enter the actual count and review differences before submission.
Key Rules
Count values represent the actual till count.
Review differences against recorded receipts before submitting.
Validations
Application checks and checks to make before continuing:
Dates must be valid.
Denominations/counts must be valid; count fields accept digits.
Review any no-data feedback for the selected scope.
Open: Sales → Till Cash Up
How to use
Select the till/session and date scope.
Enter counted amounts in the displayed payment/currency fields.
Review expected amounts and differences before submitting.
Till cash-up · Example screen. Click to view full size. Sample data and layout may differ from your company.
Sales
Cash-up approval
Goal
Review cash-up records before approval.
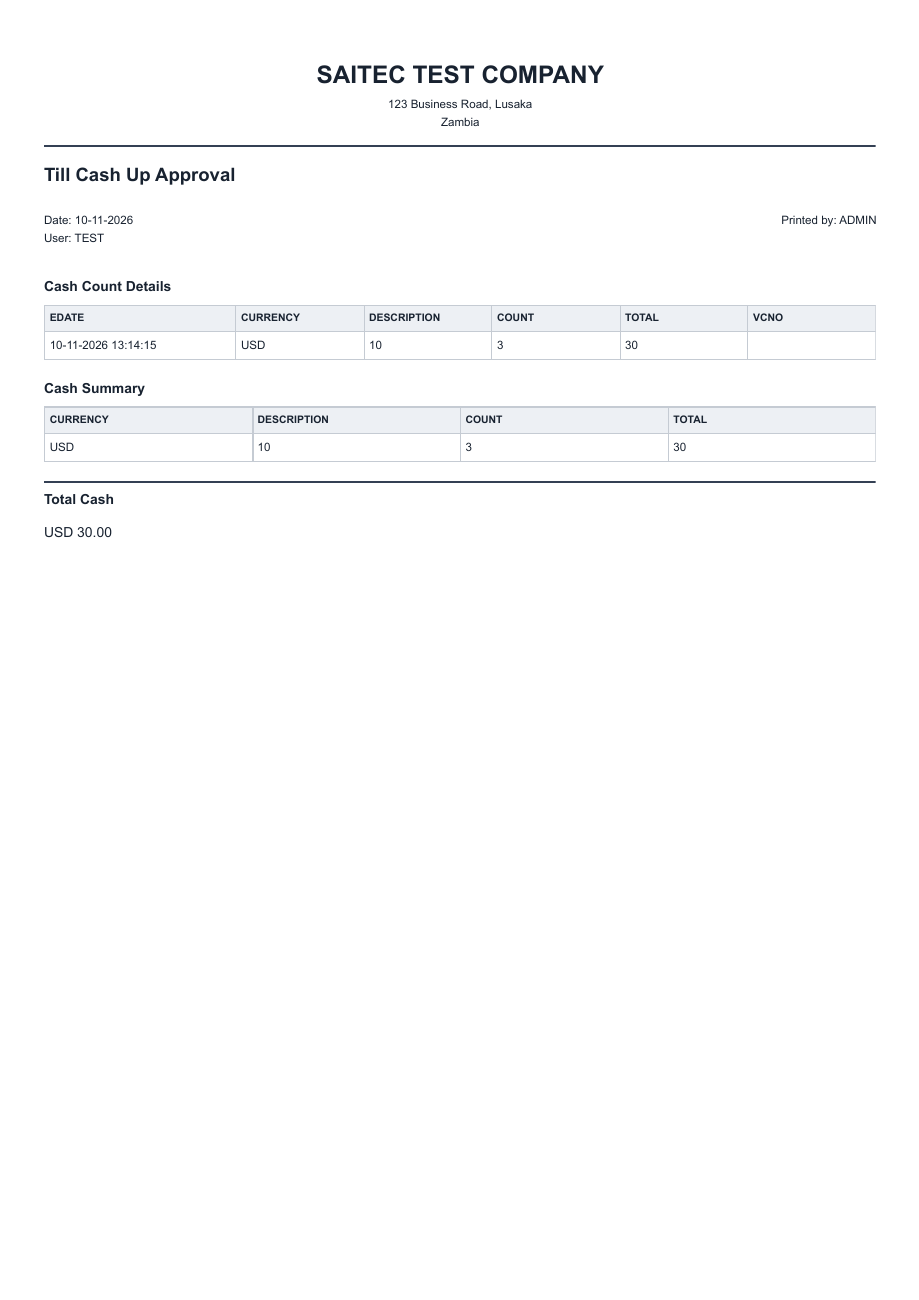
Approval is a separate review of submitted cash-up information. Check unexplained differences with the relevant till records before approving.
Key Rules
Approval is a review of submitted cash counts.
Cash payment mode and its associated account must be configured where used.
Validations
Application checks and checks to make before continuing:
Select the user and valid date.
Choose both withdrawal and deposit accounts; they must differ.
Check cash amounts before approval.
Open: Sales → Cash Up Approval
How to use
Filter and select the relevant cash-up.
Compare expected, counted and difference amounts.
Approve only after checking the supporting details.
Cash-up approval · Example screen. Click to view full size. Sample data and layout may differ from your company.
Sales
Export sale
Goal
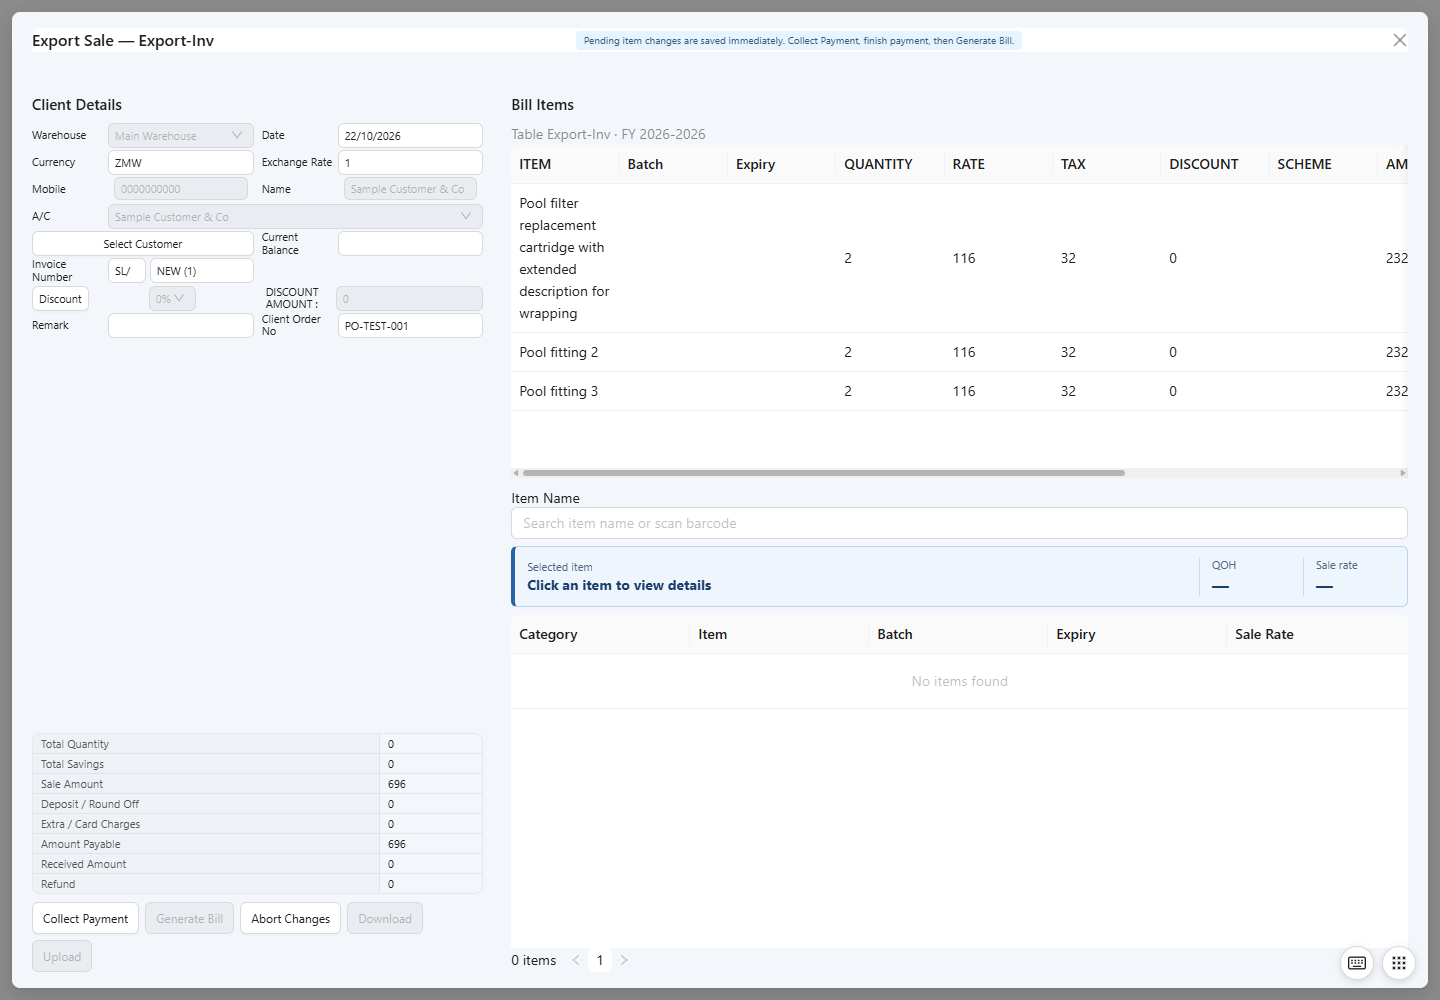
Prepare sales using the export billing screen.
Use this billing screen when the sale belongs to the export workflow. Check the customer and applicable commercial details before completing the document.
Key Rules
Use the customer and export details appropriate to this billing mode.
Review line values and totals before completing the document.
Validations
Application checks and checks to make before continuing:
Check the customer, item, quantity and date entries.
Resolve the screen's highlighted billing and payment messages before finalizing.
Add items and review quantities, prices and applicable export/tax details.
Complete the save and output actions shown on the screen.
Export sale · Example screen. Click to view full size. Sample data and layout may differ from your company.
Sales
Voucher report
Goal
Find and review accounting vouchers.
Use this report to find vouchers without starting a new entry. Match the voucher reference and date before reviewing its details.
Key Rules
Search parameters select the vouchers included in the result.
Use the document reference to identify the intended voucher.
Validations
Application checks and checks to make before continuing:
Check dates, voucher type and other selected filters.
Resolve missing selection/no-data messages before printing or exporting.
Open: Sales → Voucher Report
How to use
Choose the period, voucher type and available filters.
Load the report and select the relevant voucher.
Review or output the details as offered.
Voucher report · Example screen. Click to view full size. Sample data and layout may differ from your company.
Sales
Bank My Chenge
Goal
Search the Bank My Chenge records.
This screen provides a searchable list with date and text filters. Choose the correct search field to narrow the records before exporting.
Key Rules
The chosen search field determines how search text is interpreted.
Export uses the displayed record scope.
Validations
Application checks and checks to make before continuing:
Enter valid From and To dates.
Check search text and the selected column if the expected record is absent.
Open: Sales → Bank My Change
How to use
Choose the search field, text and From/To dates.
Run Search and review the matching rows.
Export to Excel if required.
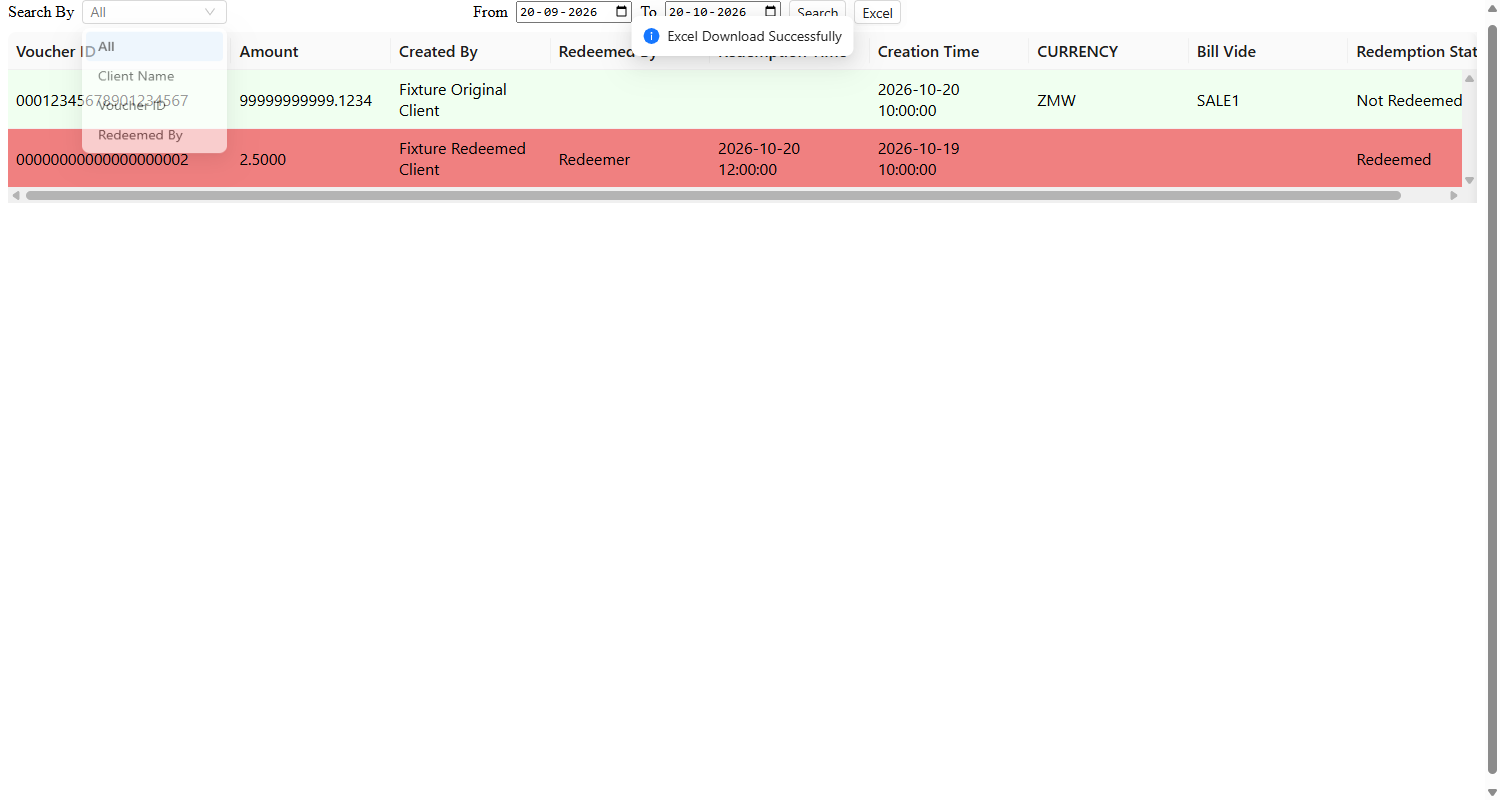
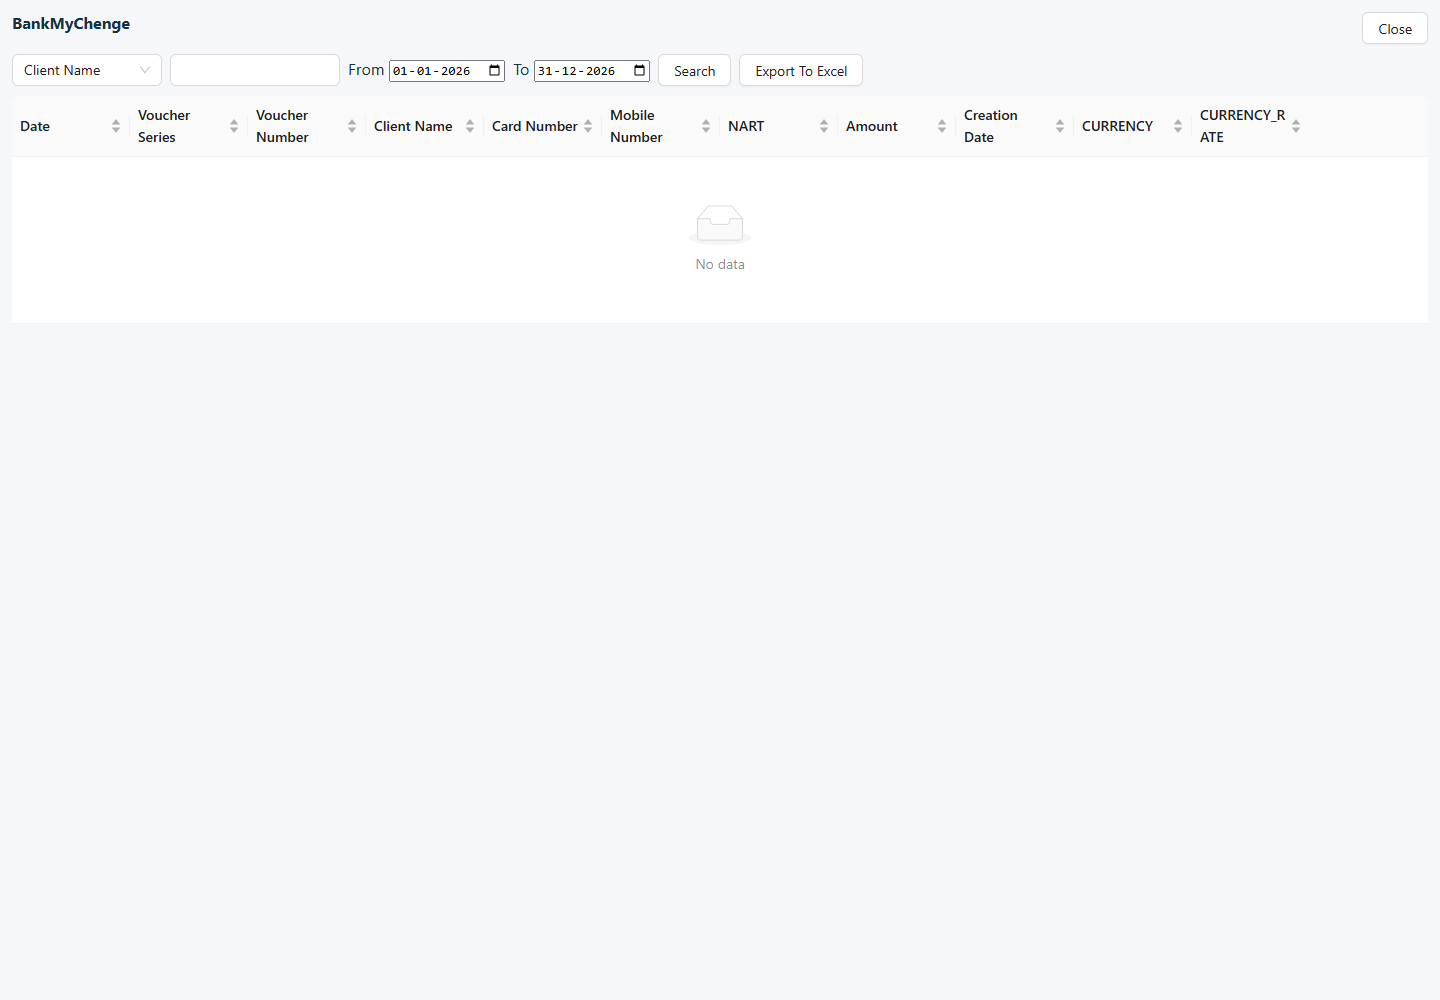
Bank My Chenge · Example screen. Click to view full size. Sample data and layout may differ from your company.
Loyalty
Loyalty
Loyalty master
Goal
Maintain loyalty members and cards.
Member and card details identify the customer in loyalty workflows. Search existing records first to avoid assigning duplicate memberships.
Key Rules
Search existing accounts before enrolling a member.
Linking an existing loyalty account differs from creating a new membership.
Review all linked accounts before changing shared membership data.
Validations
Application checks and checks to make before continuing:
Complete required fields highlighted by the editor.
Linked accounts must have compatible loyalty types.
Where transfer percentages are edited, the total must be 100.
Open: Loyalty → Loyalty Master
How to use
Search for a member or create a record.
Enter the customer/card details and applicable settings.
Save and verify the member record.
Field-wise description
Fields may be hidden or read-only according to company settings, the selected record and your permissions. Percentage values are entered as percentages; verify the selected unit for rates and quantities.
Search and membership
Search and membership field descriptions
Field
Description
Search field
Choose the account column to search, such as name, contact or group.
Search accounts
Text used to find an existing account.
Account
Customer account to enroll or update.
Loyalty Account
Existing loyalty account selected when linking to an established membership.
Mobile No.
Mobile contact for the membership.
Card No.
Identifier scanned or entered to recognize the loyalty card; Self Generate requests a generated value.
Email
Email contact associated with the membership.
Loyalty Type
Membership type selected from the available loyalty definitions.
Add Loyalty and linked information
Add Loyalty and linked information field descriptions
Field
Description
First Name
New member's given name.
Last Name
New member's family name.
Gender
Gender recorded for the member.
Date of Birth
Member's birth date.
Address
Member's address line.
City
City of the member's address.
State
State or province of the member's address.
Country
Country of the member's address.
TN No.
Tax-number reference requested by the new-member screen.
VAT No.
VAT registration reference for the member.
Information Account
Account whose linked loyalty information is displayed.
ACNAME
Account name in the linked-information grid.
CONTACT
Contact shown for the linked record.
CARD_NO
Card number shown for the linked record.
MAIL
Email shown for the linked record.
PRECENTAGE TRANSFER
Transfer percentage entered for the linked account; spelling follows the grid.
STATUS
Current status of the linked record.
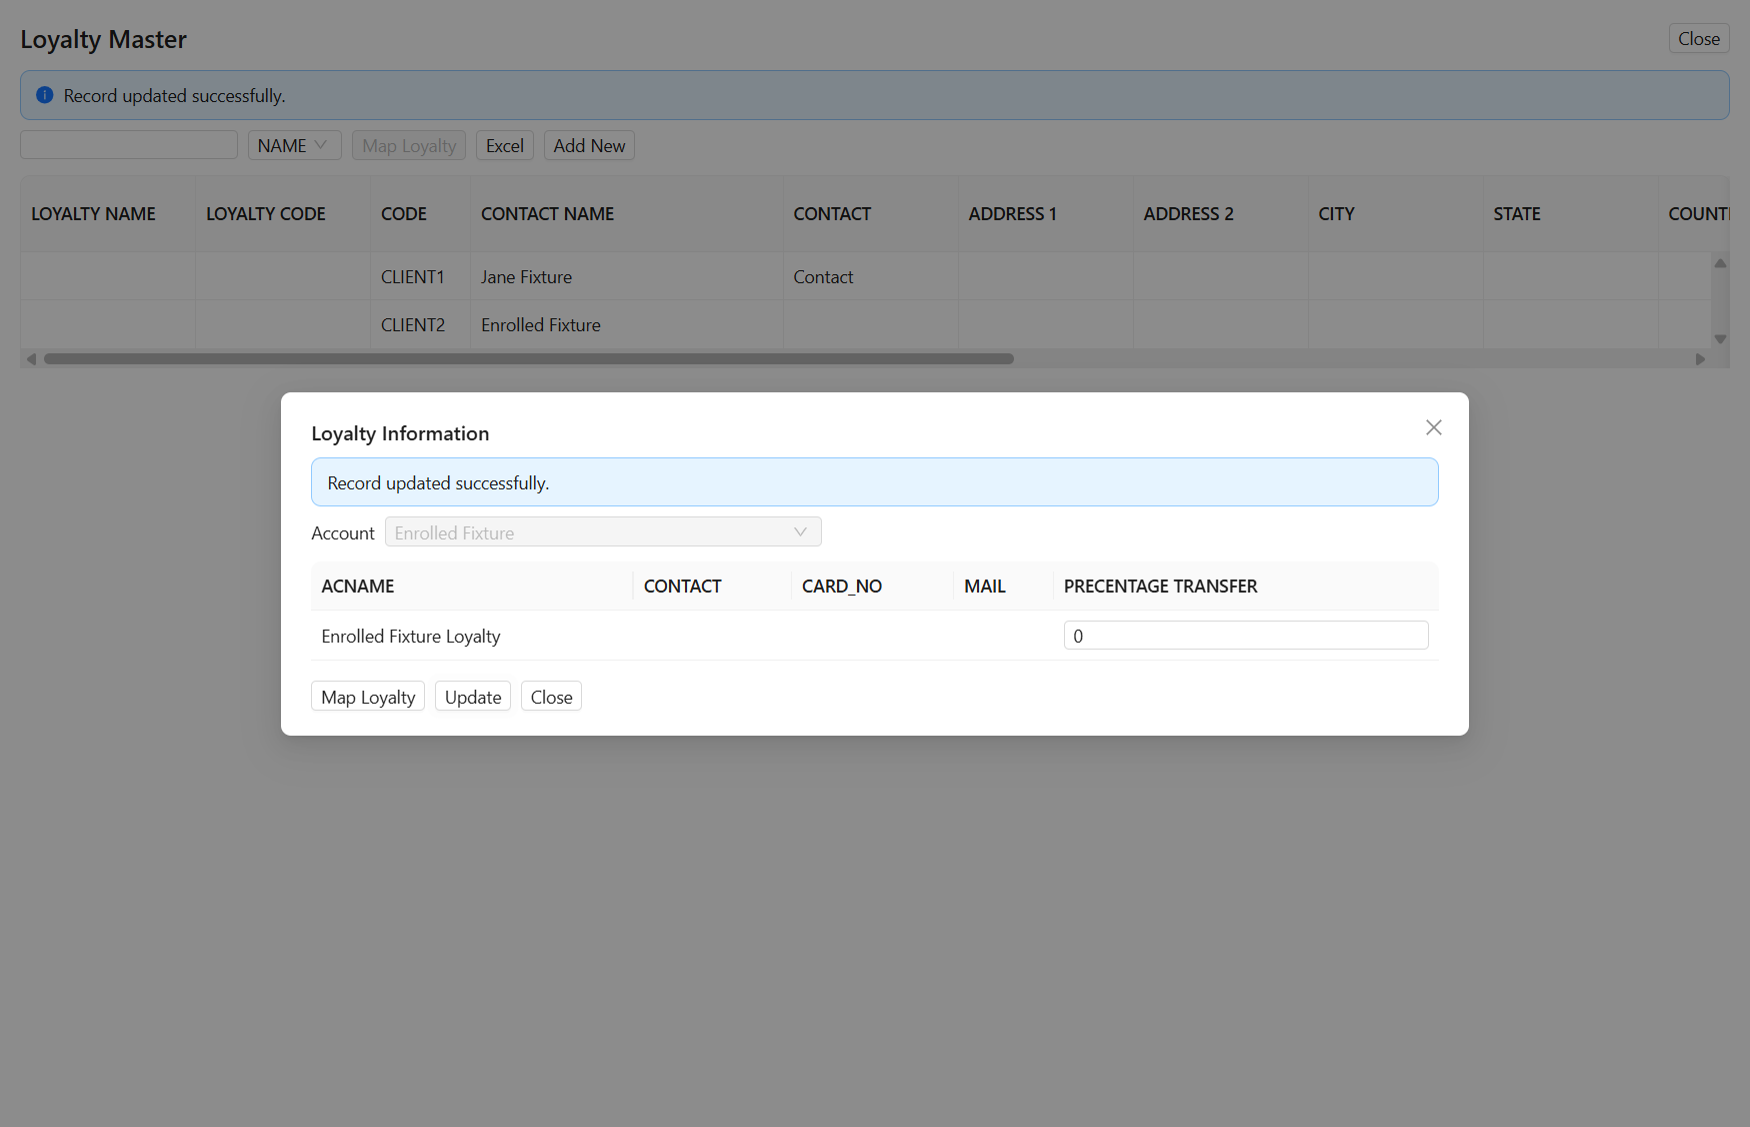
Loyalty master · Example screen. Click to view full size. Sample data and layout may differ from your company.
Loyalty
Loyalty recharge
Goal
Record a recharge against a loyalty account.
A recharge adds value through the loyalty workflow. Verify the selected member, amount and payment reference before confirmation.
Key Rules
A recharge belongs to the selected loyalty account.
Confirm payment/voucher details before completing the recharge.
Validations
Application checks and checks to make before continuing:
Check the member/card identifier and recharge amount.
Read any payment or voucher validation message before retrying the transaction.
Open: Loyalty → Recharge · Loyalty → Transaction
How to use
Select the relevant card or member.
Enter the date, amount and applicable voucher details.
Confirm the recharge and print when prompted if required.
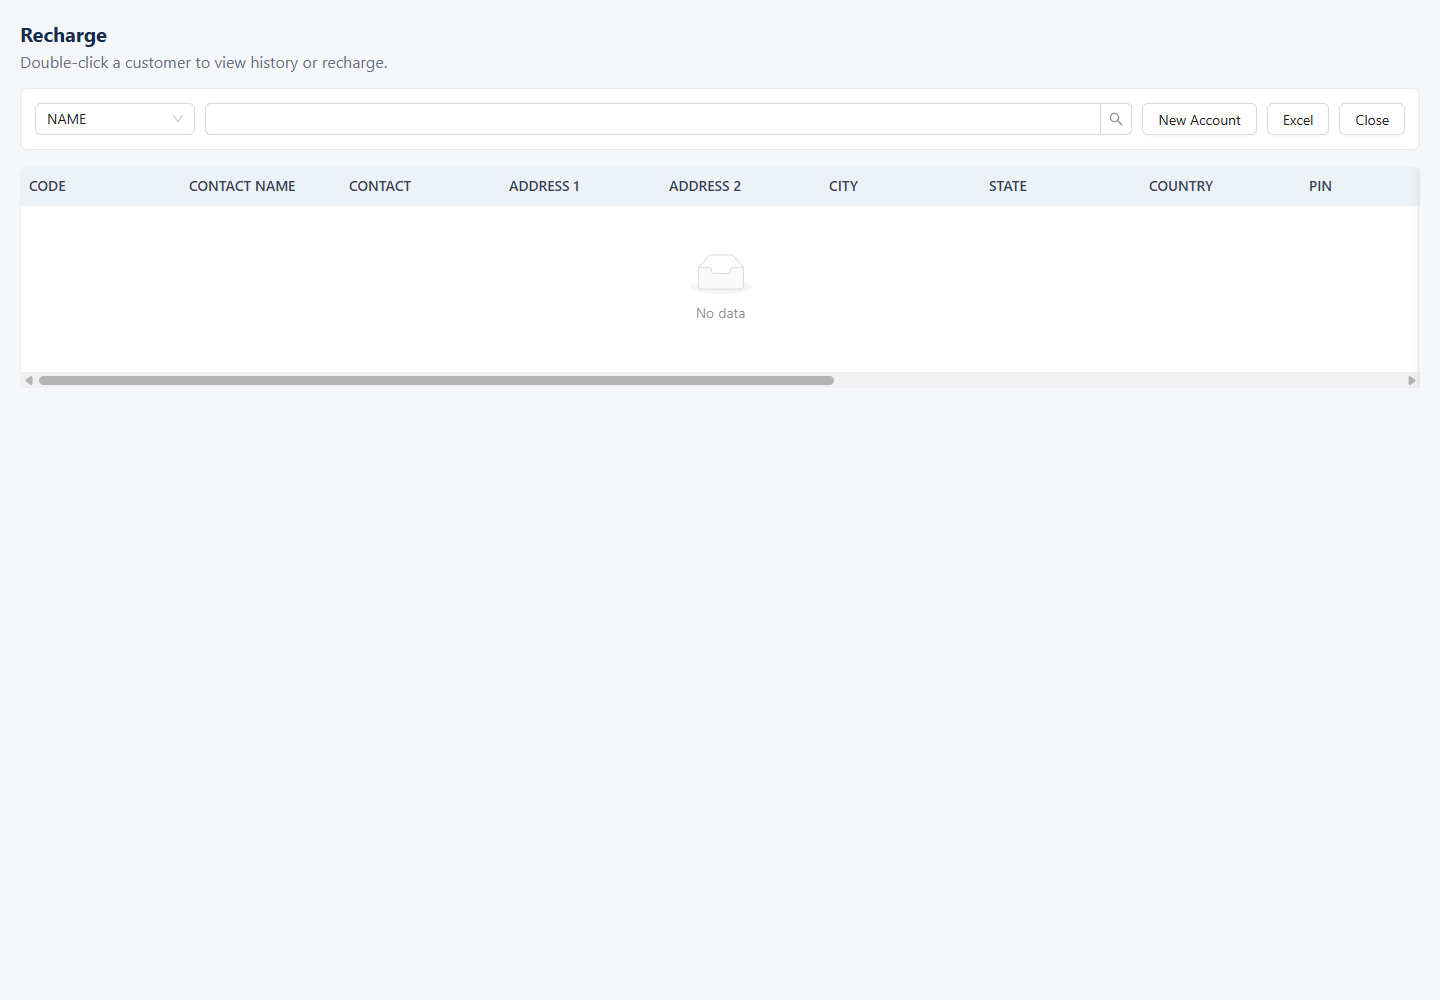
Loyalty recharge · Example screen. Click to view full size. Sample data and layout may differ from your company.
Order
Order
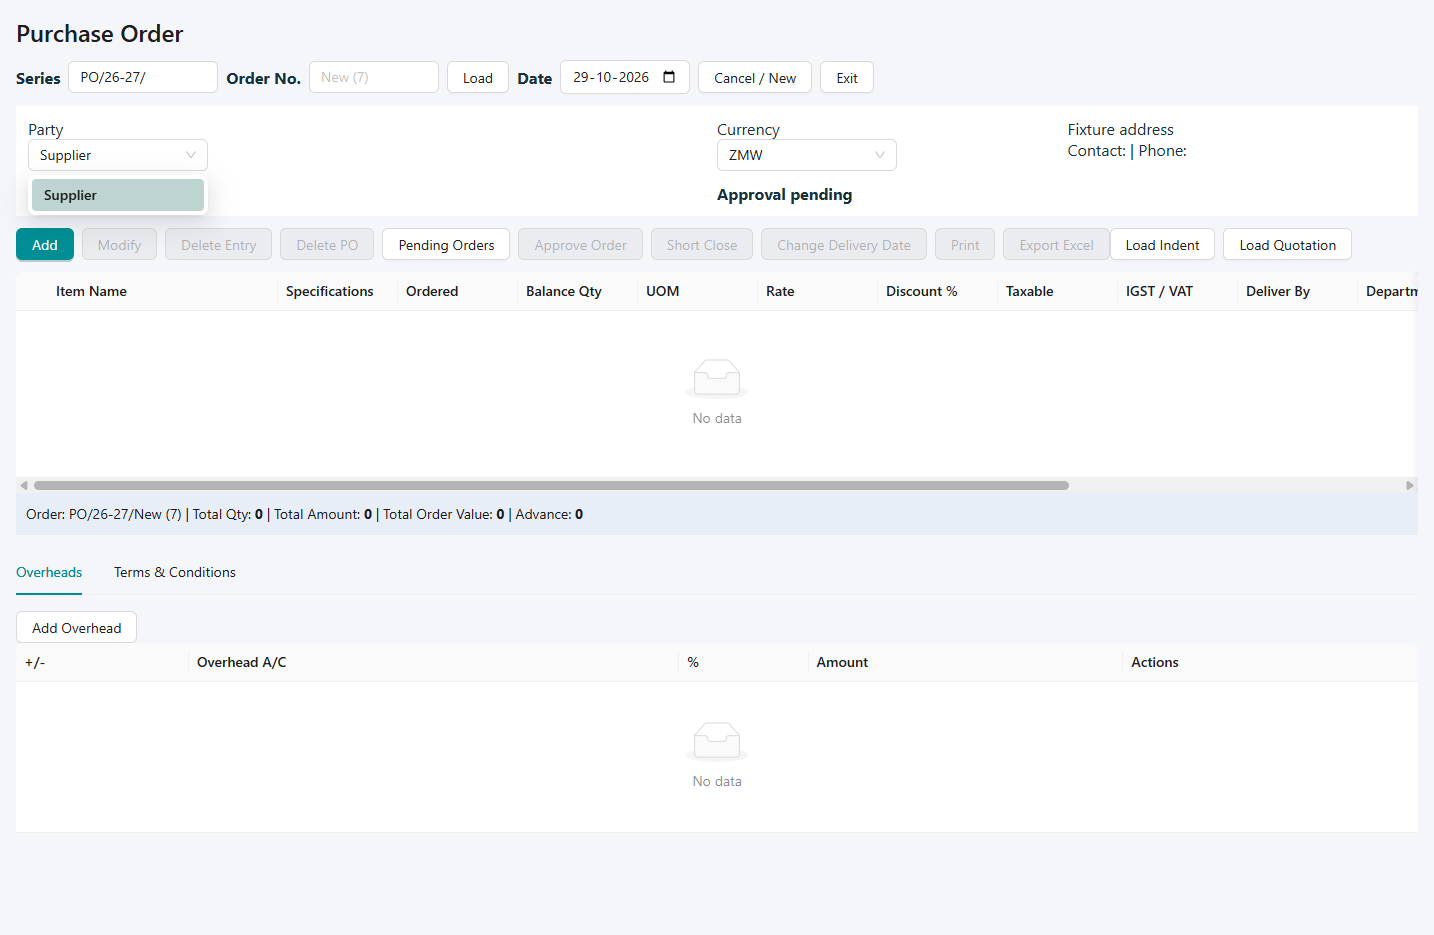
Purchase order / quotation / proforma / sale order
Goal
Prepare order documents in the mode opened from the menu.
The same editor is used for purchase orders and several customer-facing order documents. A quotation or proforma is a different business stage from an approved or released order, so check the selected mode.
Key Rules
The same editor serves purchase orders, quotations, proformas and sale orders.
Approved or closed documents restrict alterations.
Sale-order release can involve advance collection; payment writes may occur before stock release.
Validations
Application checks and checks to make before continuing:
Select the valid party, warehouse, items and units for the mode.
Check document/delivery dates and requested quantities.
Resolve approval, credit, stock and payment messages before release.
Open: Sales → Invoice Delivery Note · Order → Purchase Order · Order → Quotation · Order → Proforma Invoice · Order → Sale Order · Additional shortcuts may be available.
How to use
Check the document mode and select the supplier or customer.
Add items, quantities, rates, delivery details and terms.
Review the saved document; approve, release or print only as required by that mode.
Purchase order / quotation / proforma / sale order · Example screen. Click to view full size. Sample data and layout may differ from your company.
Order
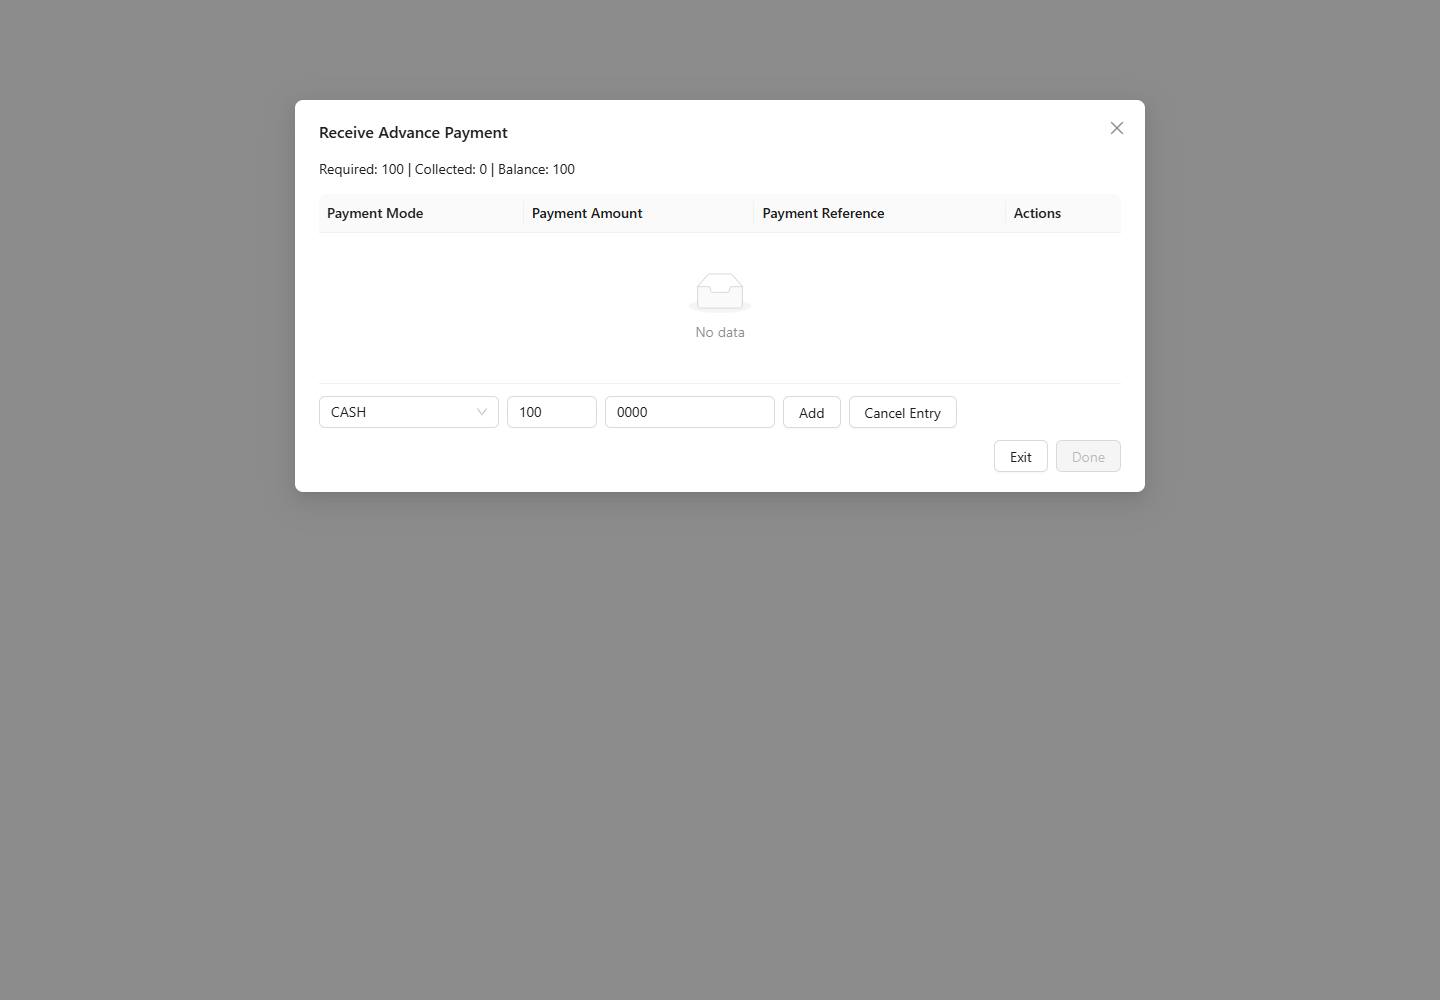
Sale order advance payment
Goal
Collect and allocate an advance during sale order release.
This panel belongs to the sale-order release workflow. Payment rows and their allocation determine how the advance collection is recorded against the order.
Key Rules
Payment rows are recorded against the sale order.
Deleting a persisted payment can take effect immediately.
Complete the collection workflow before returning to release.
Validations
Application checks and checks to make before continuing:
Check method, amount and remaining collection balance.
Resolve incomplete-payment or allocation warnings before Done.
Open: From the related menu, list or parent workflow
How to use
Open the payment step from Release to Dispatch.
Add the payment method and amount, then review the collection balance.
Choose Done after completing collection; persisted payment changes can take effect immediately.
Sale order advance payment · Example screen. Click to view full size. Sample data and layout may differ from your company.
Order
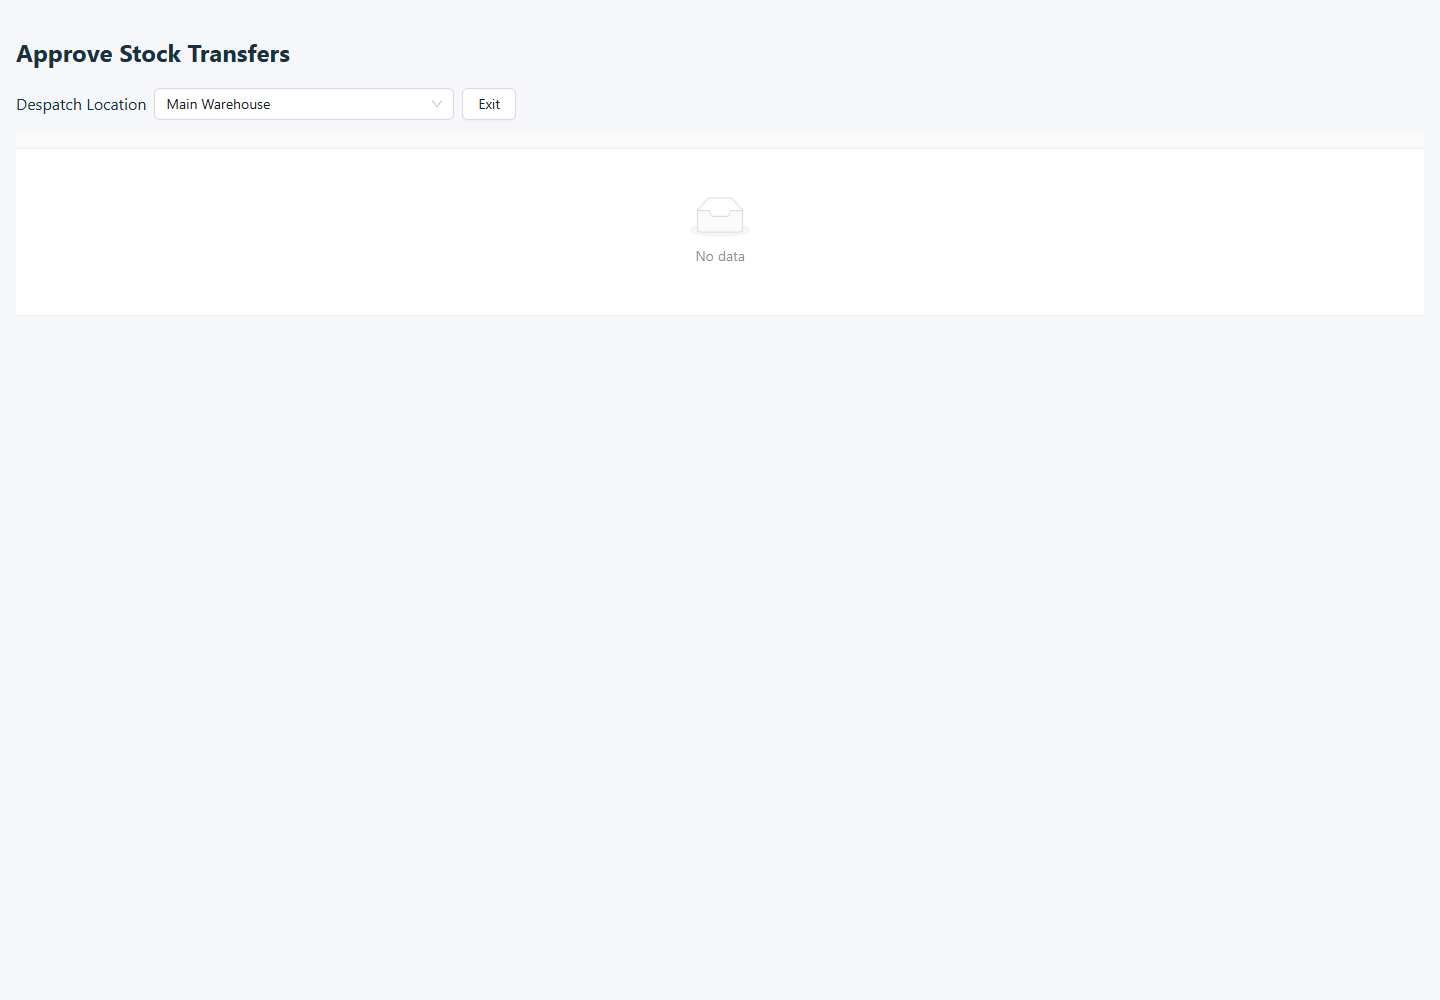
Release sale order
Goal
Review sale orders for release.
Release is the step that moves eligible order quantities towards dispatch. Review pending quantities and the order's current status before confirming.
Key Rules
Release acts on the selected eligible pending document.
Review remaining quantities before dispatch or approval actions.
Validations
Application checks and checks to make before continuing:
Select a valid pending order.
Check the displayed status and any release confirmation before proceeding.
Open: Order → Release Sale Order · Inventory → Approve Stock Transfers
How to use
Set the available order filters.
Select an order and review its pending quantities.
Use the release action and complete any displayed confirmations.
Release sale order · Example screen. Click to view full size. Sample data and layout may differ from your company.
Route Sale
Route Sale
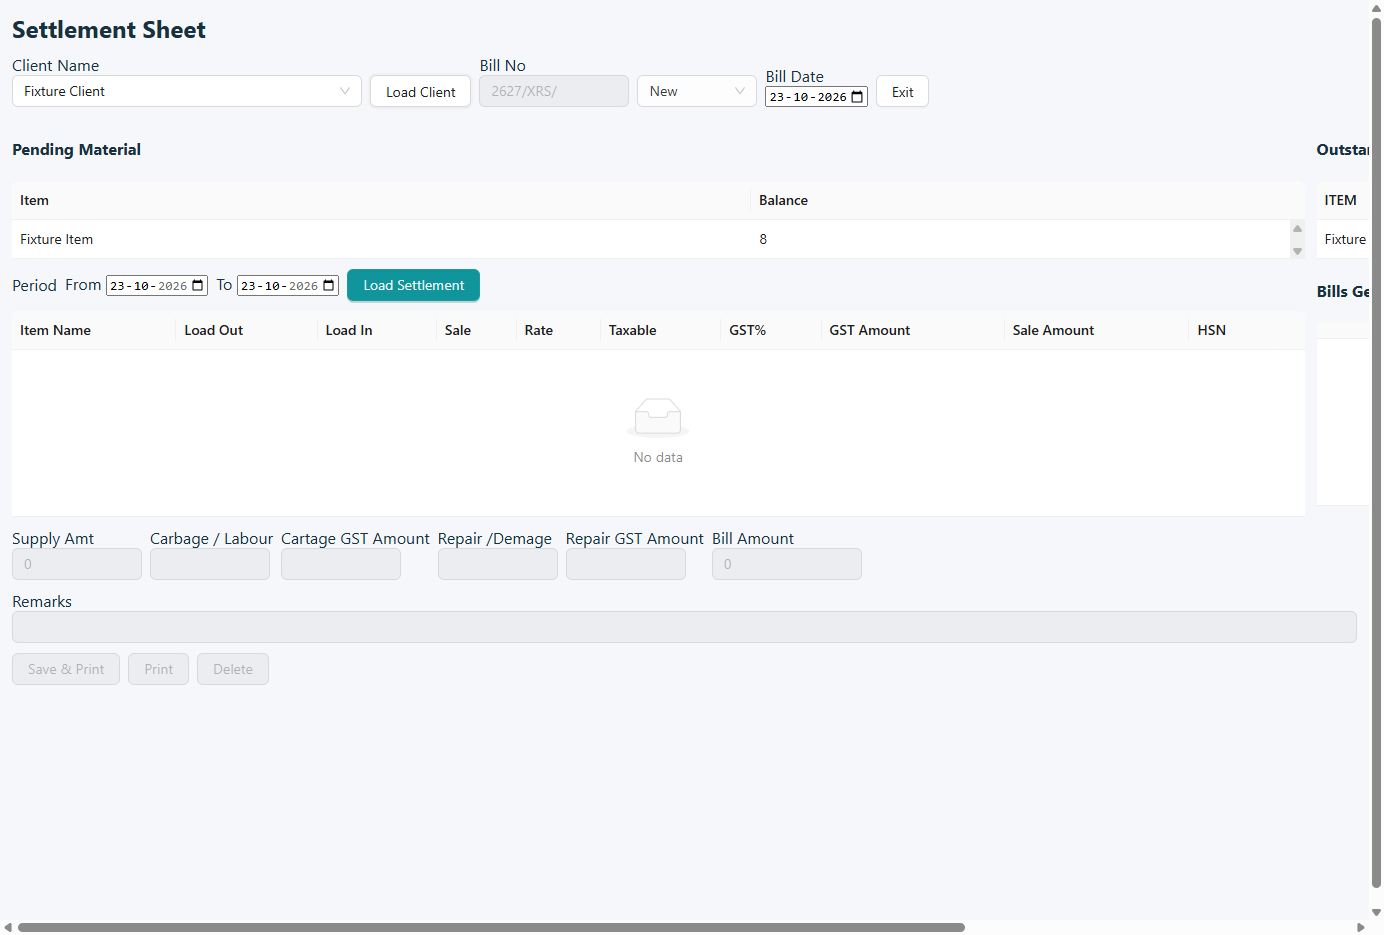
Settlement sheet
Goal
Review the settlement summary sheet.
The sheet is a compact settlement summary for review or output. Confirm its scope before using it as a handover or reconciliation record.
Key Rules
The sheet summarizes the selected settlement workflow.
Review its bill/payment figures before handover.
Validations
Application checks and checks to make before continuing:
Check the selected settlement/date scope.
Resolve missing-selection and numeric-entry feedback before completing any action.
Open: Route Sale → Settlement Billing
How to use
Select the available period and settlement filters.
Load the sheet.
Review the displayed totals and print/export as offered.
Settlement sheet · Example screen. Click to view full size. Sample data and layout may differ from your company.
Production
Production
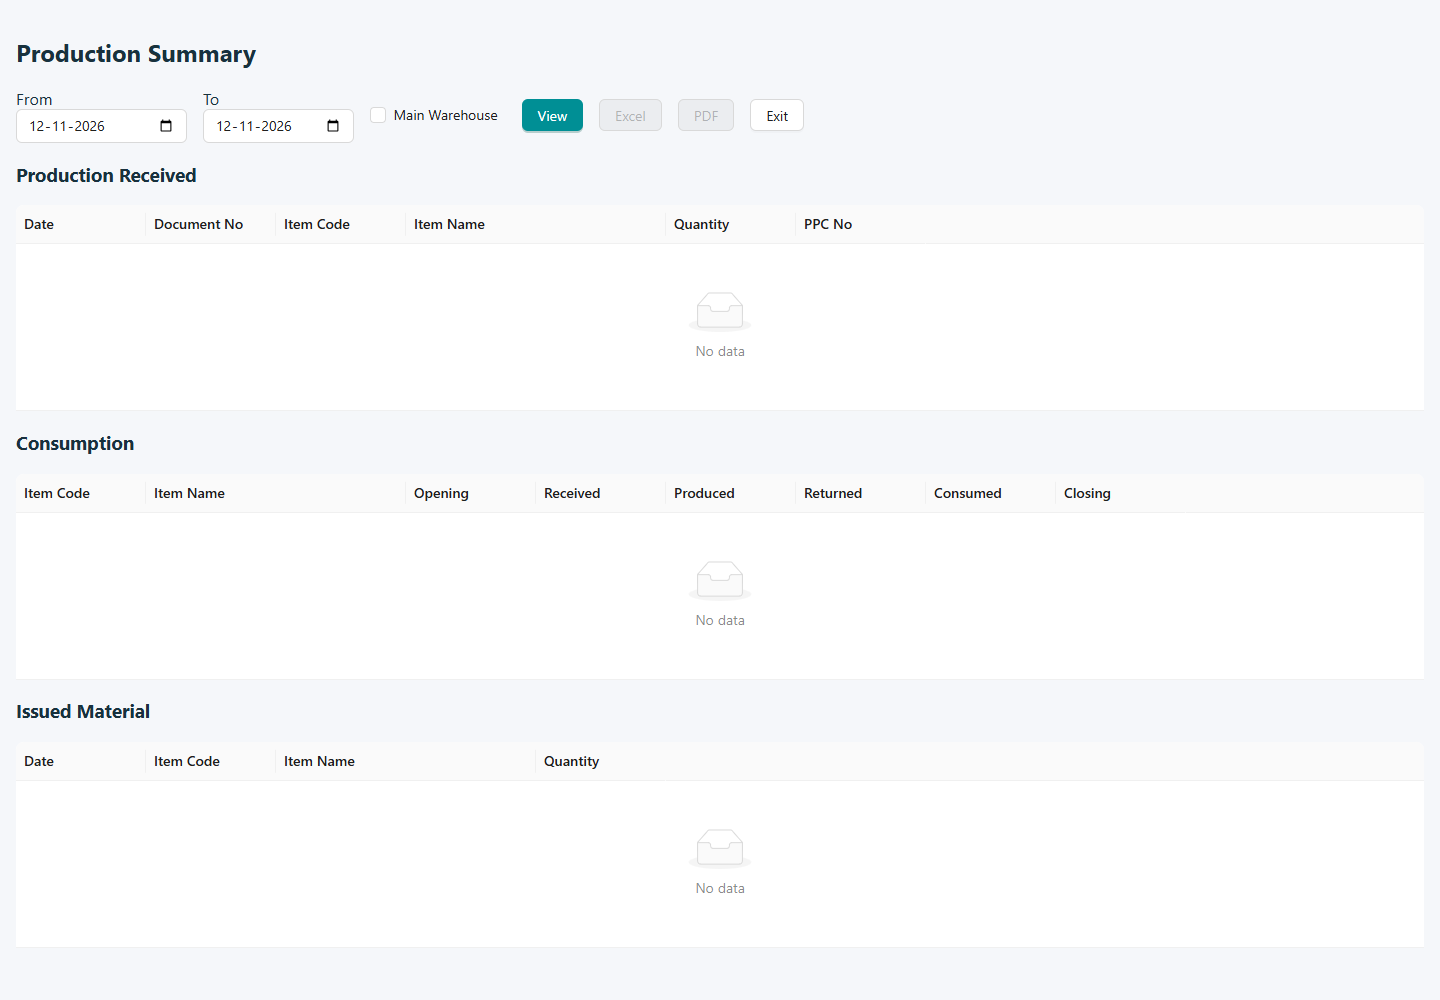
Production summary
Goal
Review production activity and totals.
The summary brings production activity together for the chosen scope. Use the same reporting period when comparing it with receipt or quality records.
Key Rules
The summary combines production activity within the selected scope.
Compare it with receipts and QC using consistent periods.
Validations
Application checks and checks to make before continuing:
Check date and production filters.
Review no-data feedback before exporting or drawing conclusions.
Open: Production → Production Summary
How to use
Select the reporting period and available production filters.
Load the summary.
Review the results and output as offered.
Production summary · Example screen. Click to view full size. Sample data and layout may differ from your company.
Production
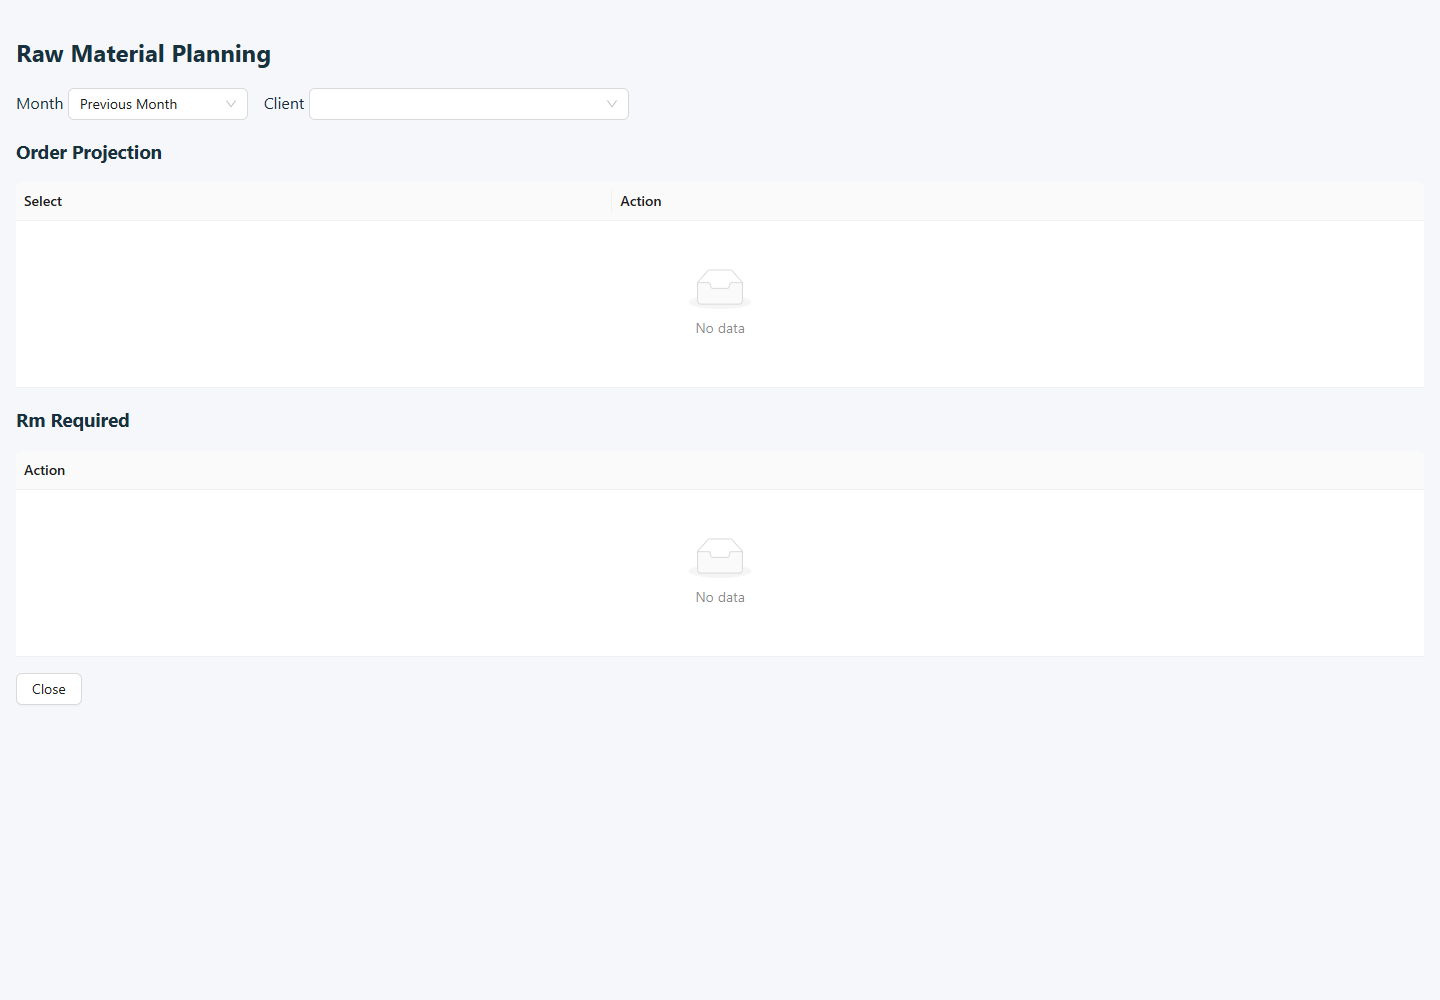
Raw material planning
Goal
Review order projections and material plans.
Planning begins with the selected month's client order projection. Review the underlying demand before preparing or changing a material plan.
Key Rules
Planning uses the chosen month and client projection.
Select the relevant order/item rows before opening plan details.
Validations
Application checks and checks to make before continuing:
Choose a valid month and item.
Numeric grid edits must contain valid numeric values.
Verify the client scope before saving.
Open: Order → RM Planning · Production → Raw Material Planning
How to use
Select the month and client.
Review Order Projection and select the relevant rows.
Open the available detail action, review the plan and save required changes.
Raw material planning · Example screen. Click to view full size. Sample data and layout may differ from your company.
Production
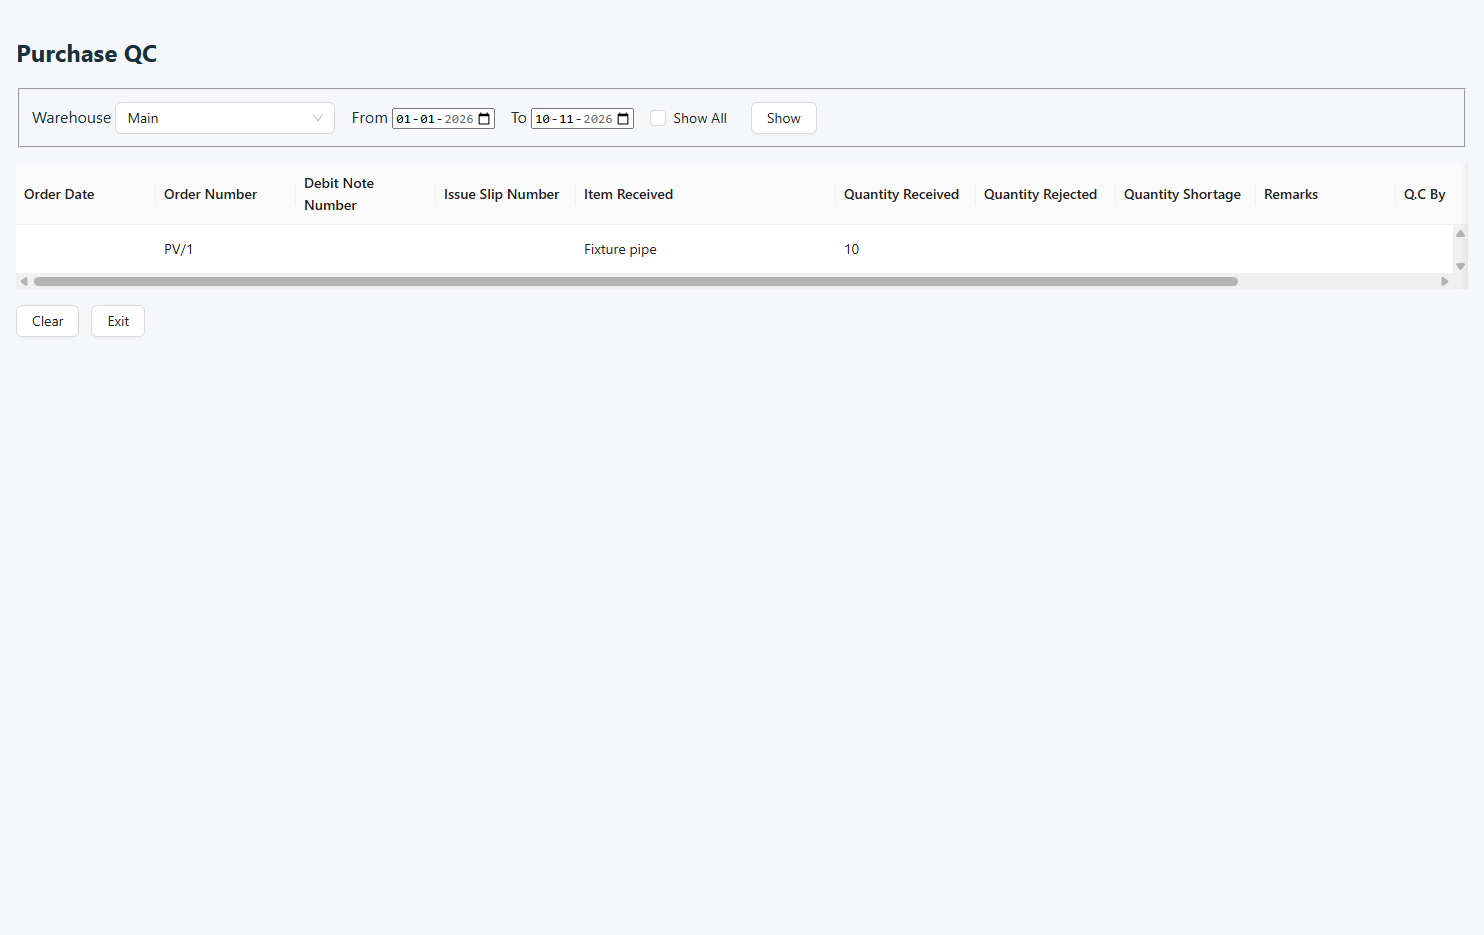
Purchase quality check
Goal
Record inspection results for purchased goods.
Purchase inspection records the quality decision for received goods. Match the inspection to the correct receipt and distinguish accepted quantities from rejected quantities.
Key Rules
QC applies to the selected purchase receipt row.
The configured QC warehouse is required.
Remarks explain the inspection outcome.
Validations
Application checks and checks to make before continuing:
Select a warehouse and a date within the company period.
Rejection plus shortage cannot exceed received quantity.
Remarks cannot be blank when the workflow requires them.
Open: From the related menu, list or parent workflow
How to use
Load the applicable purchase/receipt reference.
Enter the displayed inspection results and accepted/rejected quantities.
Review and save the quality check.
Purchase quality check · Example screen. Click to view full size. Sample data and layout may differ from your company.
Production
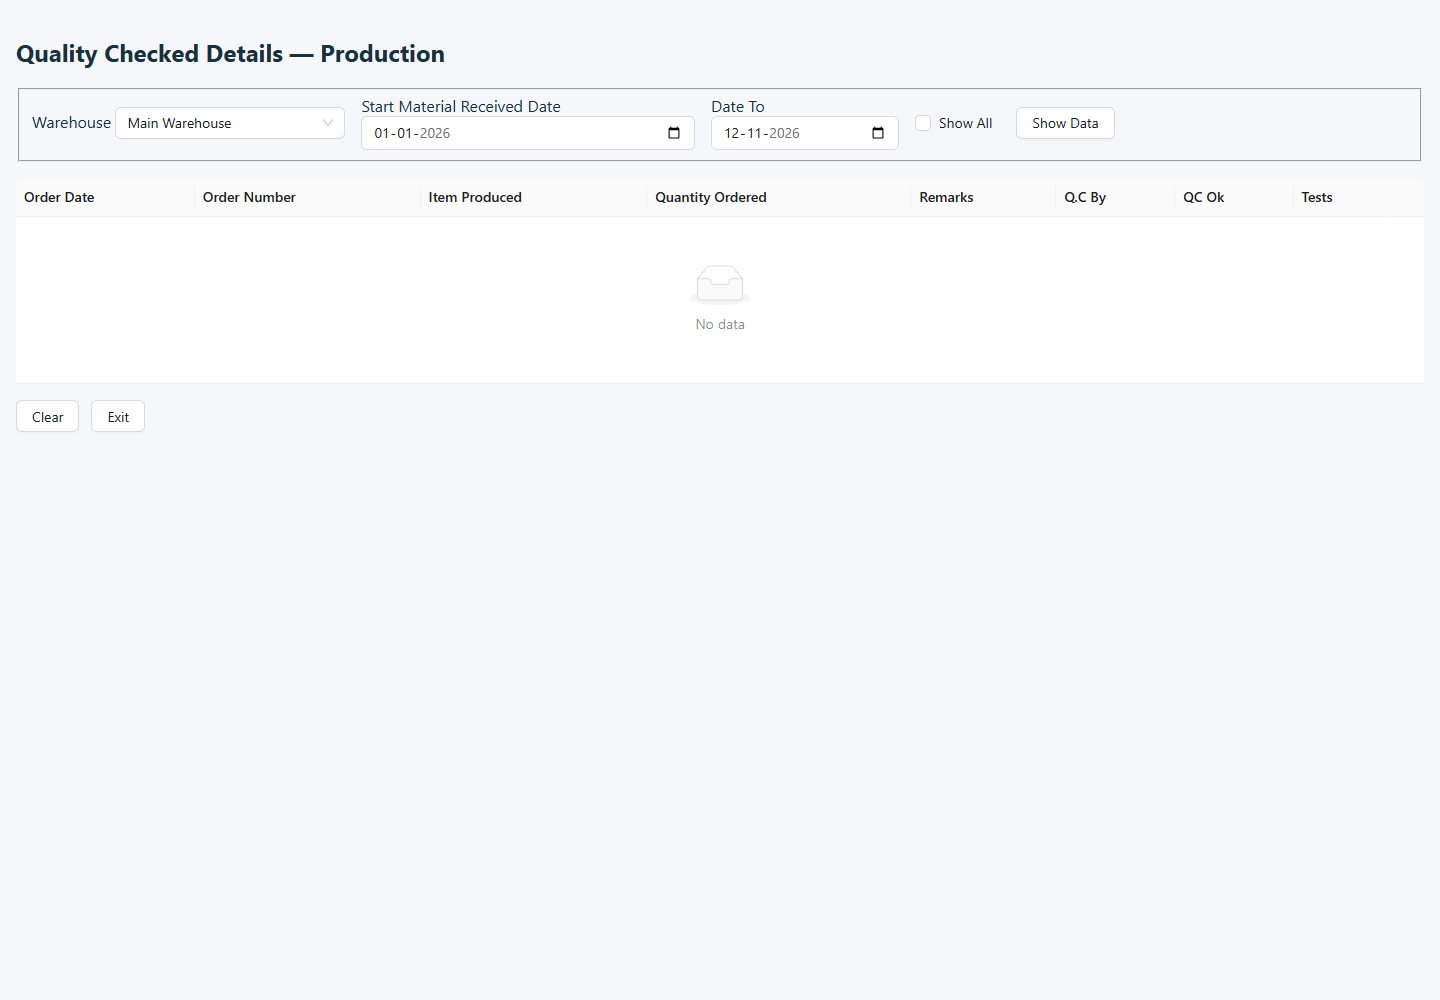
Production quality check
Goal
Record production inspection results.
Production inspection records the quality result for the selected production reference. Ensure that recorded quantities correspond to the goods actually inspected.
Key Rules
QC belongs to a selected production order and test.
The QC warehouse must be configured before continuing.
Validations
Application checks and checks to make before continuing:
Select a warehouse, production order and test.
Use a date within the company financial year.
Review no-data feedback before recording results.
Open: From the related menu, list or parent workflow
How to use
Select the production reference.
Enter the displayed quality results and quantities.
Review and save before the next production stage.
Production quality check · Example screen. Click to view full size. Sample data and layout may differ from your company.
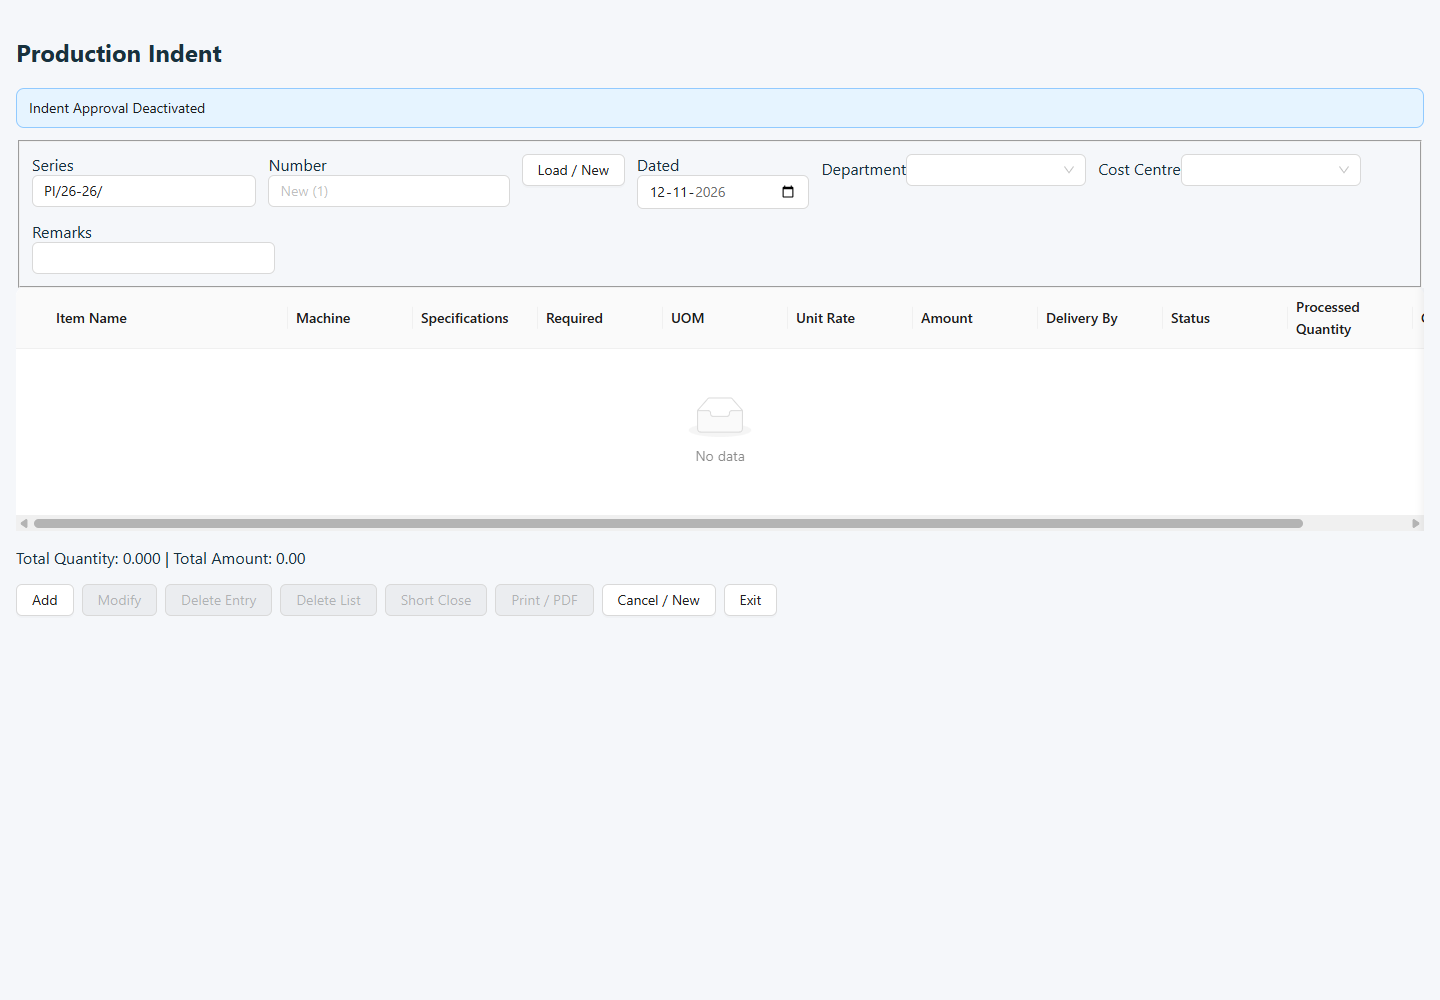
Production
Production indent
Goal
Request items for production.
An indent records the material requirement for production. Clear item quantities and references help the next operator identify what is being requested.
Key Rules
Indent items and delivery schedules are separate stages.
Use open approved items for operations that require them.
Validations
Application checks and checks to make before continuing:
Document and delivery dates must be valid.
Use a valid UOM/status.
A repeated item delivery schedule for the same date is checked.
Open: From the related menu, list or parent workflow
How to use
Enter the indent details and applicable production reference.
Add required items and quantities.
Review and save the indent for the next production step.
Production indent · Example screen. Click to view full size. Sample data and layout may differ from your company.
Production
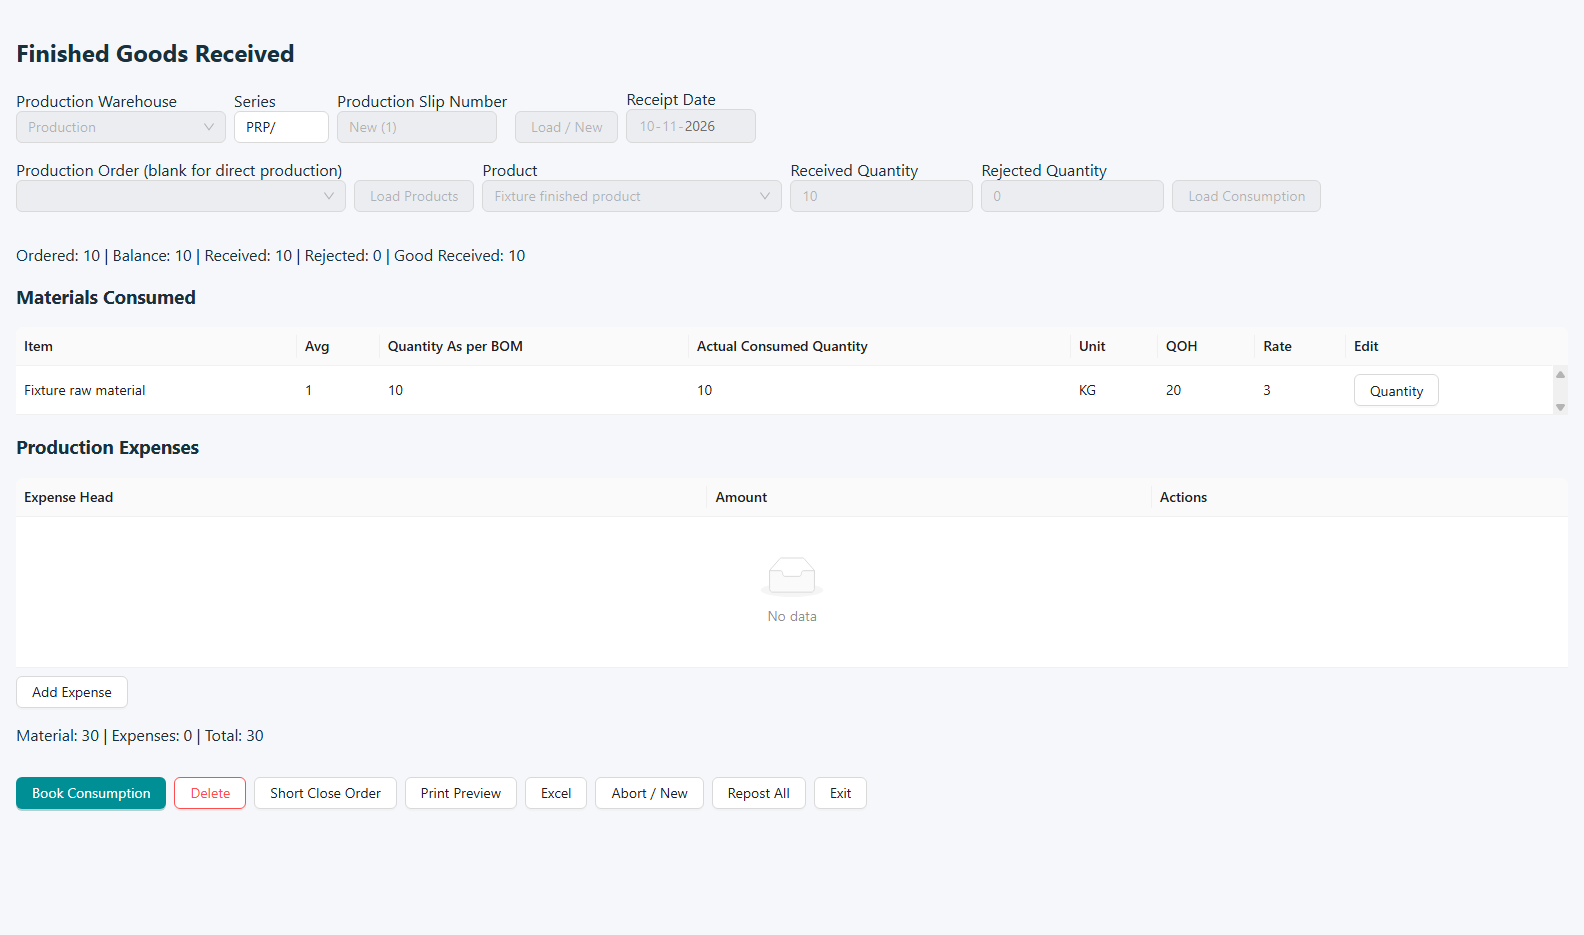
Finished goods received
Goal
Record finished goods received from production.
A receipt records finished output arriving from production. Check the production reference and received quantity before completing the record.
Key Rules
A finished-goods receipt belongs to a valid production product/reference.
Completed production cannot be selected for further receipt.
Applicable WIP and production-warehouse setup must be present.
Validations
Application checks and checks to make before continuing:
Receipt date must be valid and received quantity cannot be zero.
Rejection quantity cannot exceed received quantity.
Select a valid expense head and amount when adding receipt expenses.
Open: Production → Finished Good Received
How to use
Select the applicable production/job reference.
Enter finished items and received quantities.
Review and save the receipt.
Finished goods received · Example screen. Click to view full size. Sample data and layout may differ from your company.
Production
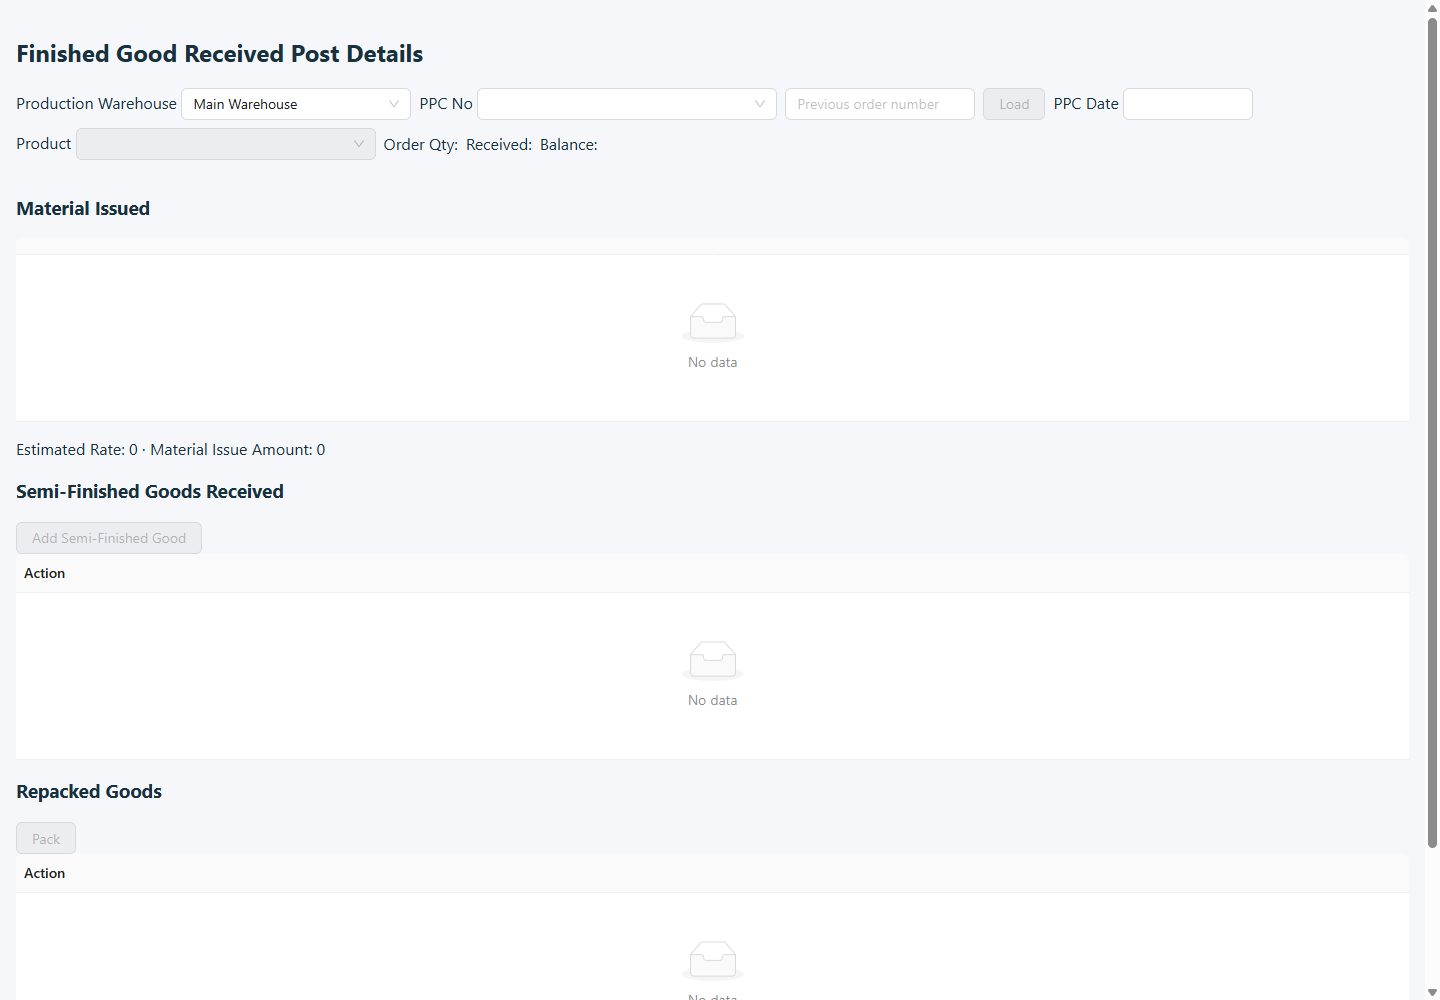
Post finished goods receipts
Goal
Post finished goods receipt records.
Posting processes the selected receipt records through the next stage of the workflow. Review each pending document before applying the posting action.
Key Rules
Posting processes the selected finished-goods receipt.
Review the receipt before applying the posting action.
Validations
Application checks and checks to make before continuing:
Select the intended pending receipt.
Check item quantities and the displayed posting messages before confirming.
Open: Production → Finished Goods Received Post
How to use
Load the relevant pending receipts.
Review items, quantities and document details.
Post the selected records using the displayed confirmation.
Post finished goods receipts · Example screen. Click to view full size. Sample data and layout may differ from your company.
Production
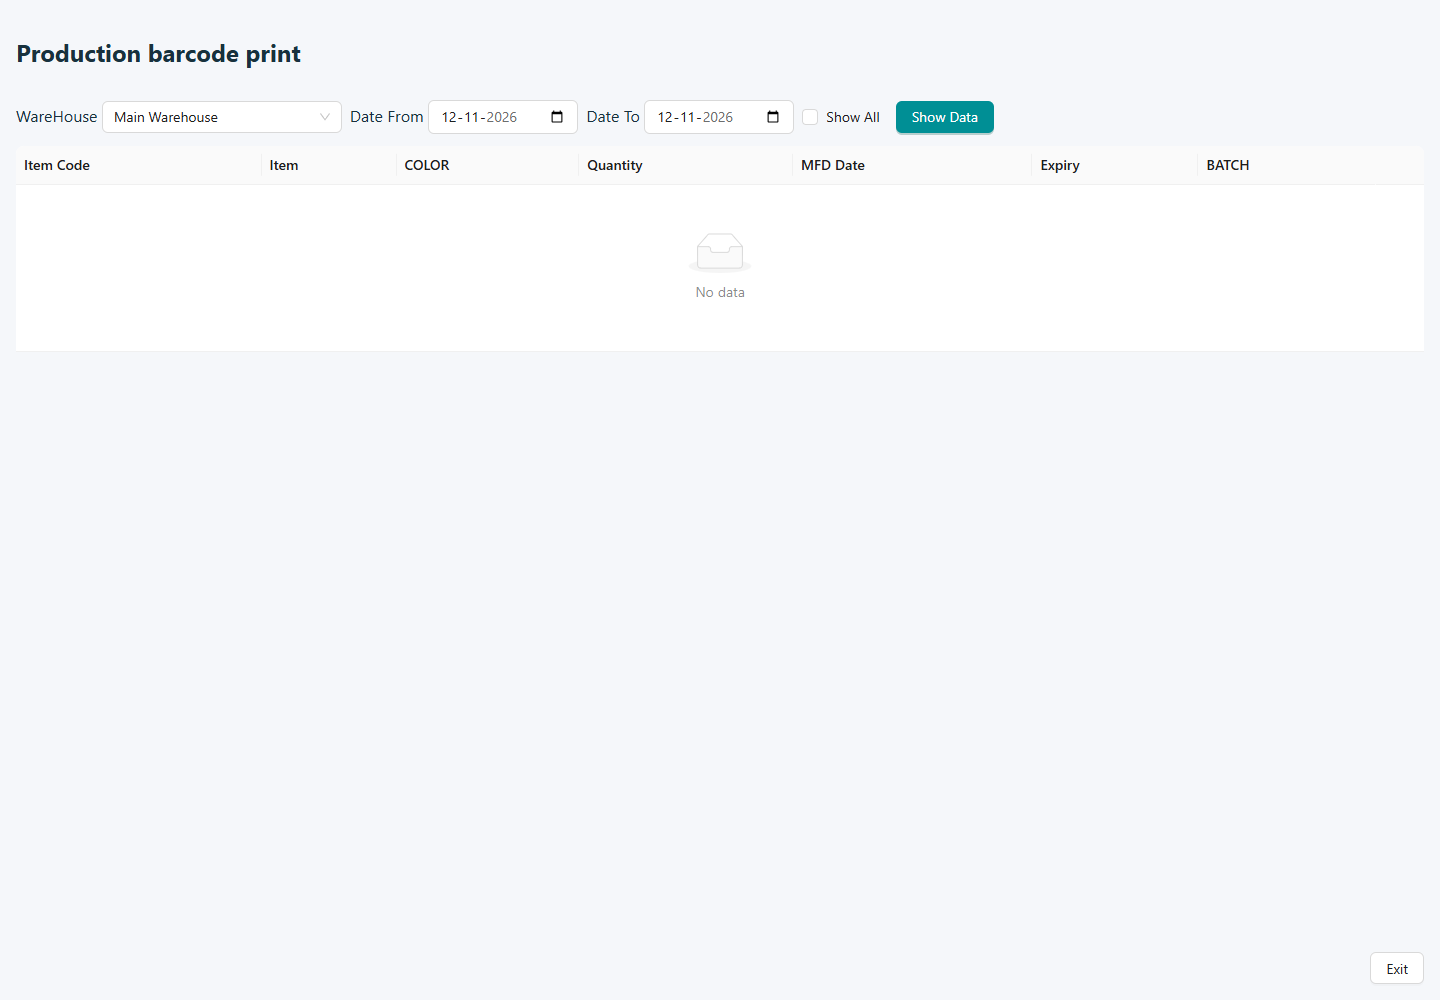
Production barcode printing
Goal
Prepare labels for production items.
Production labels identify the goods being produced or received. Review the selected production scope before generating multiple labels.
Key Rules
Labels use the selected production/item scope.
Quantities control the requested production label output.
Validations
Application checks and checks to make before continuing:
Use a date within the financial year.
Select an item and enter a positive quantity.
Resolve missing QC/warehouse setup where reported.
Open: Production → Production Barcode Print
How to use
Select the production/item scope.
Review the label data and quantities.
Use the available print action and check the preview.
Production barcode printing · Example screen. Click to view full size. Sample data and layout may differ from your company.
Production
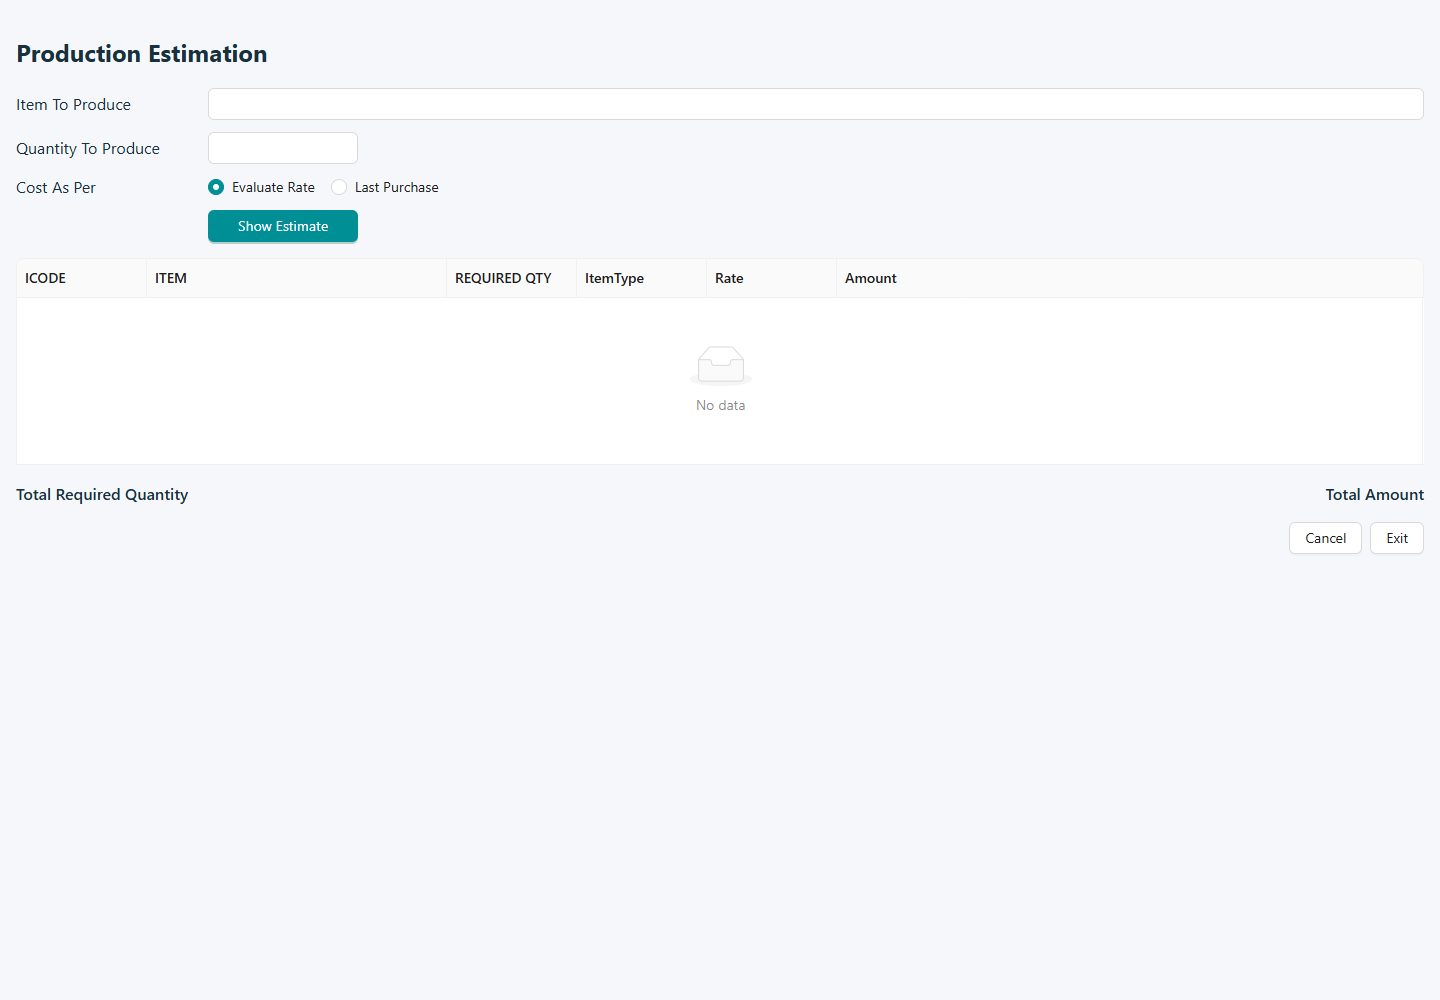
Production estimation
Goal
Estimate production requirements.
An estimate helps review expected requirements before production proceeds. Confirm the production quantity because component requirements depend on it.
Key Rules
Requirements are calculated from the chosen production item and quantity.
Changing quantity changes the estimate.
Validations
Application checks and checks to make before continuing:
The production item must exist.
Enter the quantity to produce before requesting an estimate.
Resolve missing estimate feedback before using the result.
Open: Production → Production Estimation
How to use
Select the production item and applicable quantity/reference.
Review the displayed component requirements and estimates.
Save or output the estimate using the offered actions.
Production estimation · Example screen. Click to view full size. Sample data and layout may differ from your company.
Inventory
Inventory
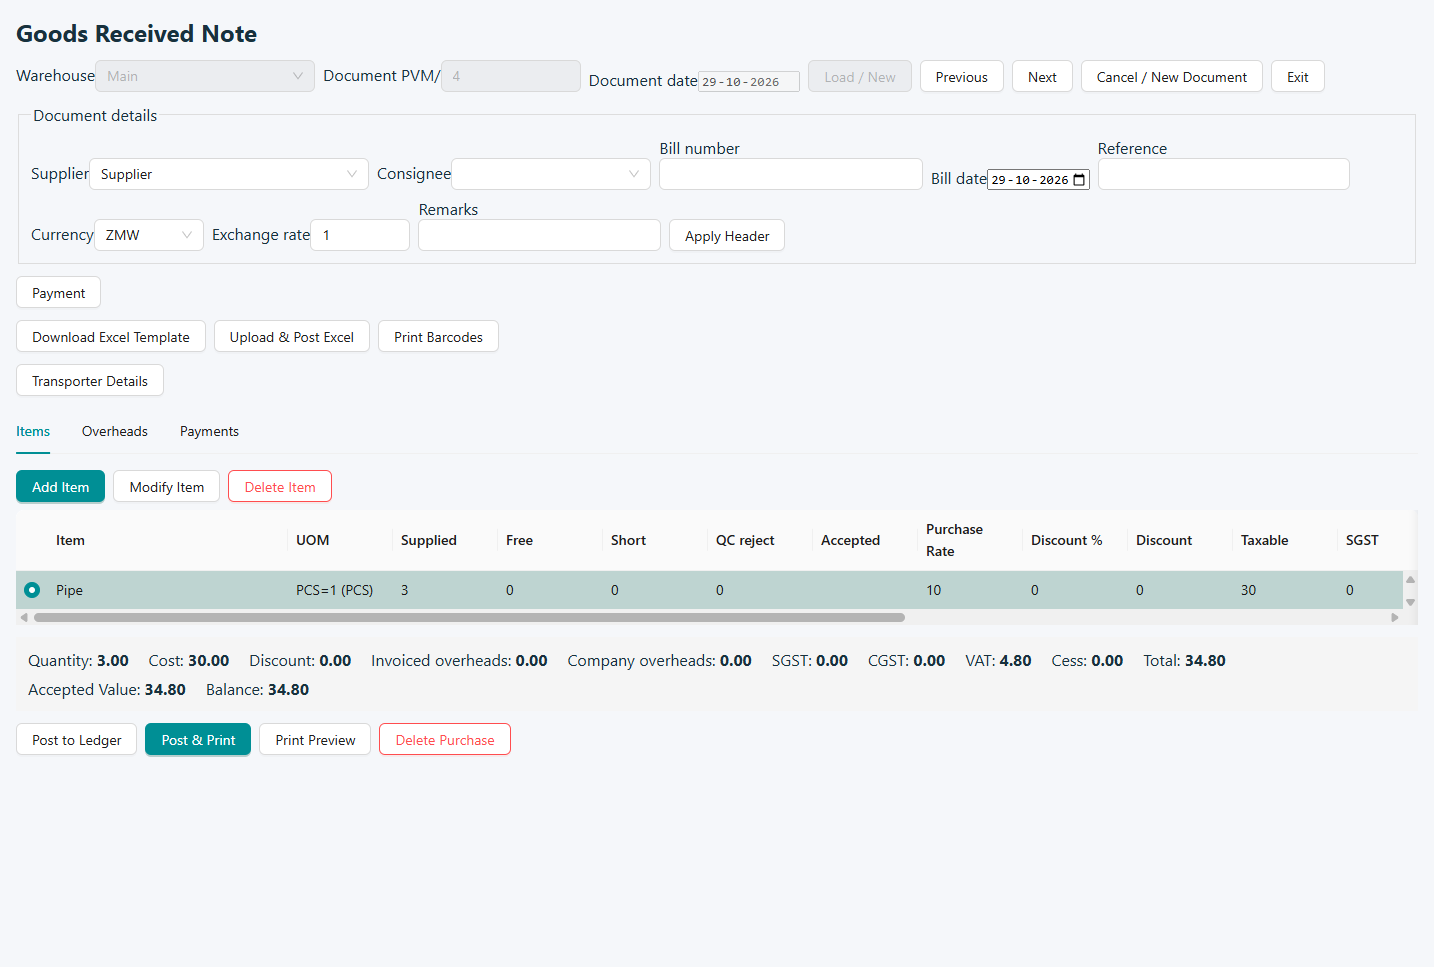
Goods purchased
Goal
Record received purchases and associated charges.
A purchase receipt records goods received from a supplier. Compare entered quantities and costs with the supplier document and the related order, where used.
Key Rules
The mode distinguishes receipts from purchase returns.
A GRN already quality-checked cannot be altered through ordinary editing.
Review batch details and charges before finishing.
Validations
Application checks and checks to make before continuing:
Select a warehouse and a permitted financial-year/current date.
Correct missing batches identified in red.
Check supplier, item quantities and document references before posting.
Select the supplier and document details; load an order when applicable.
Enter received items, quantities, costs and applicable expenses.
Review totals and complete the displayed finish/post and payment actions.
Goods purchased · Example screen. Click to view full size. Sample data and layout may differ from your company.
Inventory
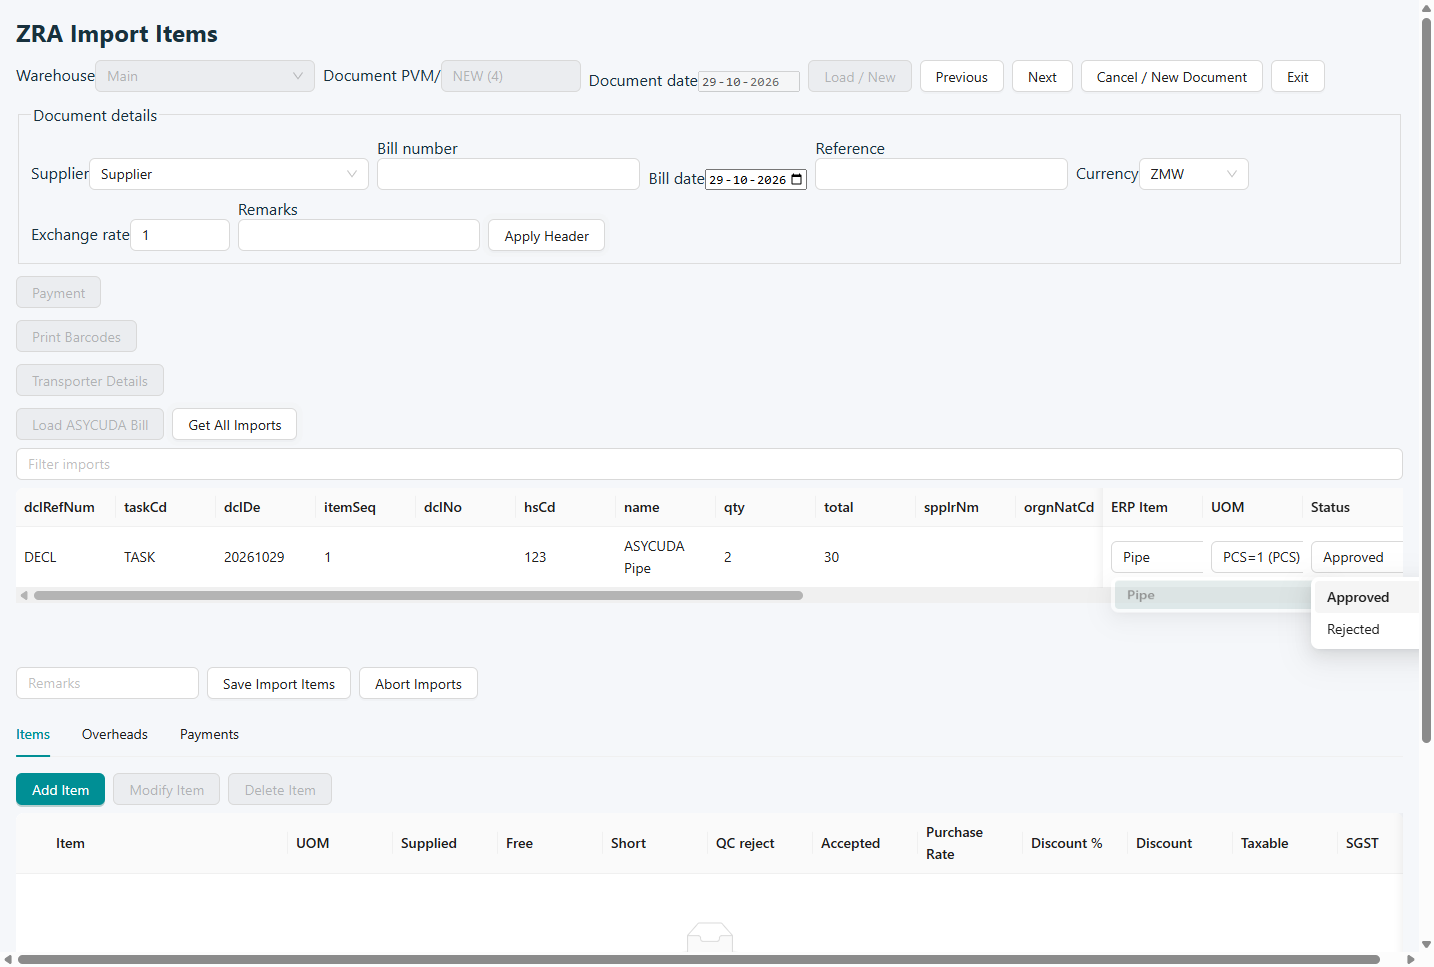
ZRA item import
Goal
Match and import available ZRA purchase items.
Import requires matching external item information to local products. Check every mapping so that imported quantities are assigned to the correct stock item.
Key Rules
Imported external items must map to local products.
Review the selected receipt and quantities before import.
Validations
Application checks and checks to make before continuing:
Check each item mapping and selected source document.
Resolve unmatched or incomplete rows before completing the import.
Open: From the related settings or purchase screen
How to use
Open the import panel from the purchase workflow.
Select the source record and match items to local items.
Review quantities and mappings before importing.
ZRA item import · Example screen. Click to view full size. Sample data and layout may differ from your company.
Inventory
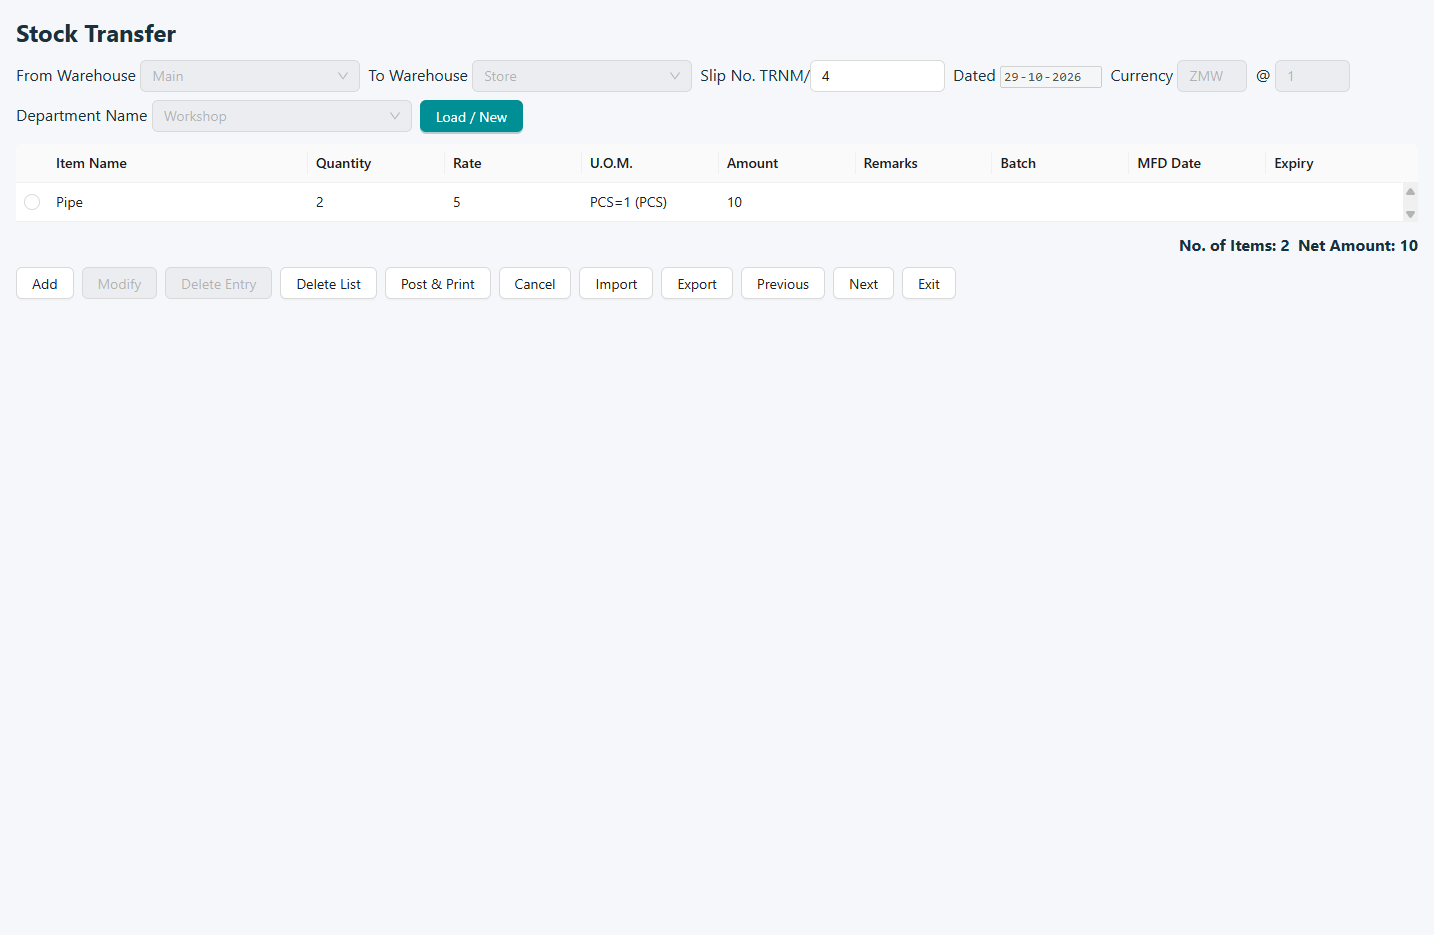
Stock transfer
Goal
Move stock between locations.
A transfer changes where stock is held. The source, destination and item units must match the physical movement being carried out.
Key Rules
The selected transaction mode determines which stock movement is recorded.
Close the item editor before changing the document header.
Source/destination permissions and setup apply.
Validations
Application checks and checks to make before continuing:
Choose valid authorized warehouses.
Check the transaction's date, unit and quantity.
Required opening-stock or production accounts must be configured for modes that use them.
Open: Route Sale → Load Out · Route Sale → Load In · Production → Material Issue · Production → Material Return · Inventory → General Issue · Additional shortcuts may be available.
How to use
Select the source and destination and enter the document details.
Add the items and transfer quantities.
Review availability and complete the save/approval actions shown.
Stock transfer · Example screen. Click to view full size. Sample data and layout may differ from your company.
Inventory
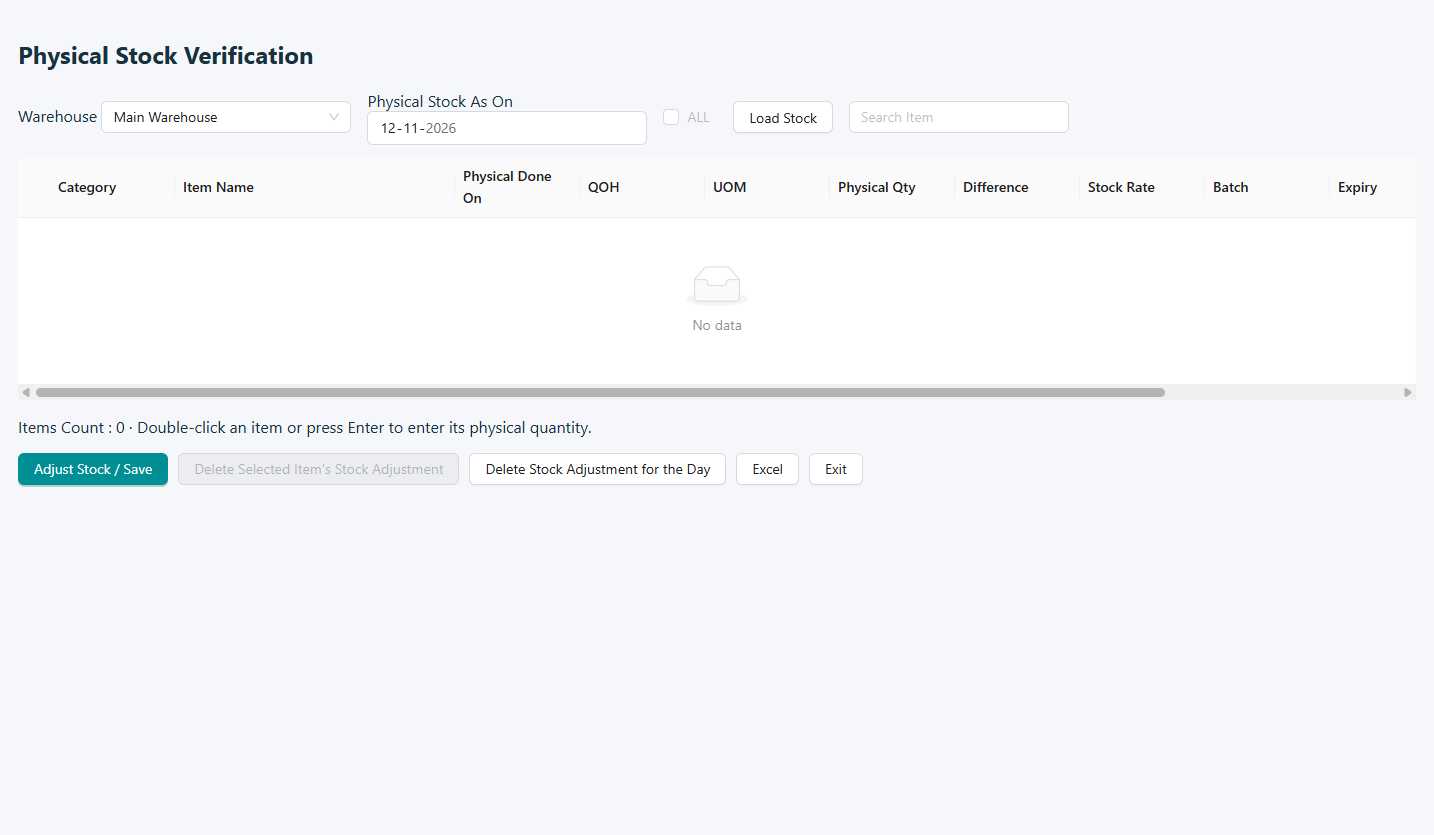
Physical stock
Goal
Record physical inventory counts.
Physical counts compare actual stock with recorded stock. Confirm the count scope and units before applying any adjustment through the screen.
Key Rules
Counts are recorded for the selected warehouse and stock date.
Physical adjustment uses the configured adjustment account.
Zero physical stock may prompt for confirmation.
Validations
Application checks and checks to make before continuing:
Choose a valid warehouse, date, category and item.
The screen checks that rate is not zero.
Check batch, production and expiry dates before saving.
Open: Inventory → Physical Stock Verification
How to use
Select the stock scope and count date.
Load or enter items and counted quantities.
Review differences before saving or posting through the available actions.
Physical stock · Example screen. Click to view full size. Sample data and layout may differ from your company.
Inventory
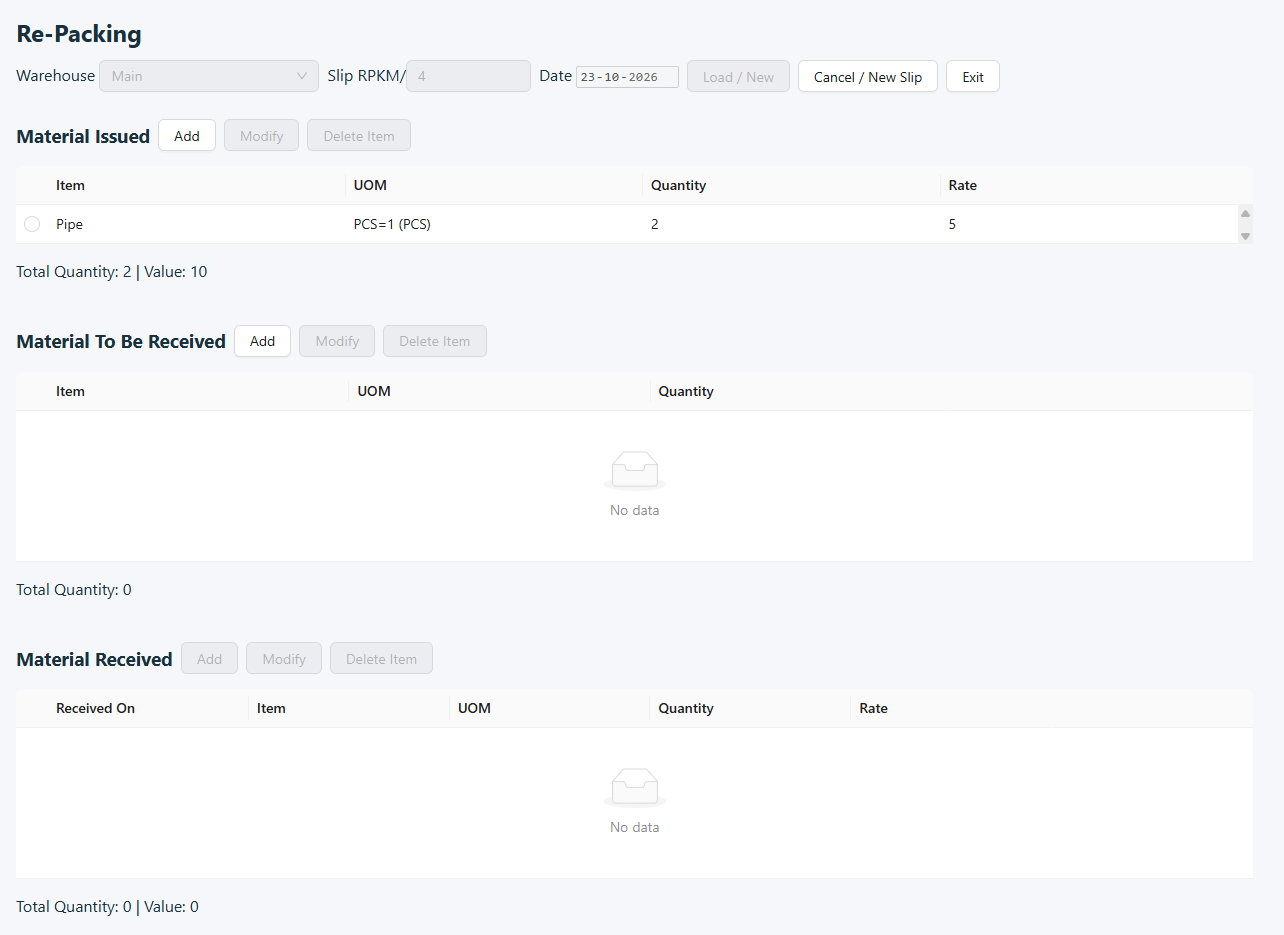
Repacking
Goal
Record stock converted between packing arrangements.
Repacking records a change in the stock's packing arrangement. Review source consumption and resulting quantities together so that the conversion represents the physical operation.
Key Rules
A closed repacking order cannot be changed.
An item cannot be changed in place while modifying its line.
Avoid selecting the same repacking item twice.
Validations
Application checks and checks to make before continuing:
Select a warehouse and a permitted date.
Slip number must be numeric where entered.
Select a valid item/UOM and enter a valid quantity.
Open: Inventory → Re-Packing
How to use
Select the source item and quantity.
Enter the resulting packed items and quantities.
Check units and totals before completing the transaction.
Repacking · Example screen. Click to view full size. Sample data and layout may differ from your company.
Inventory
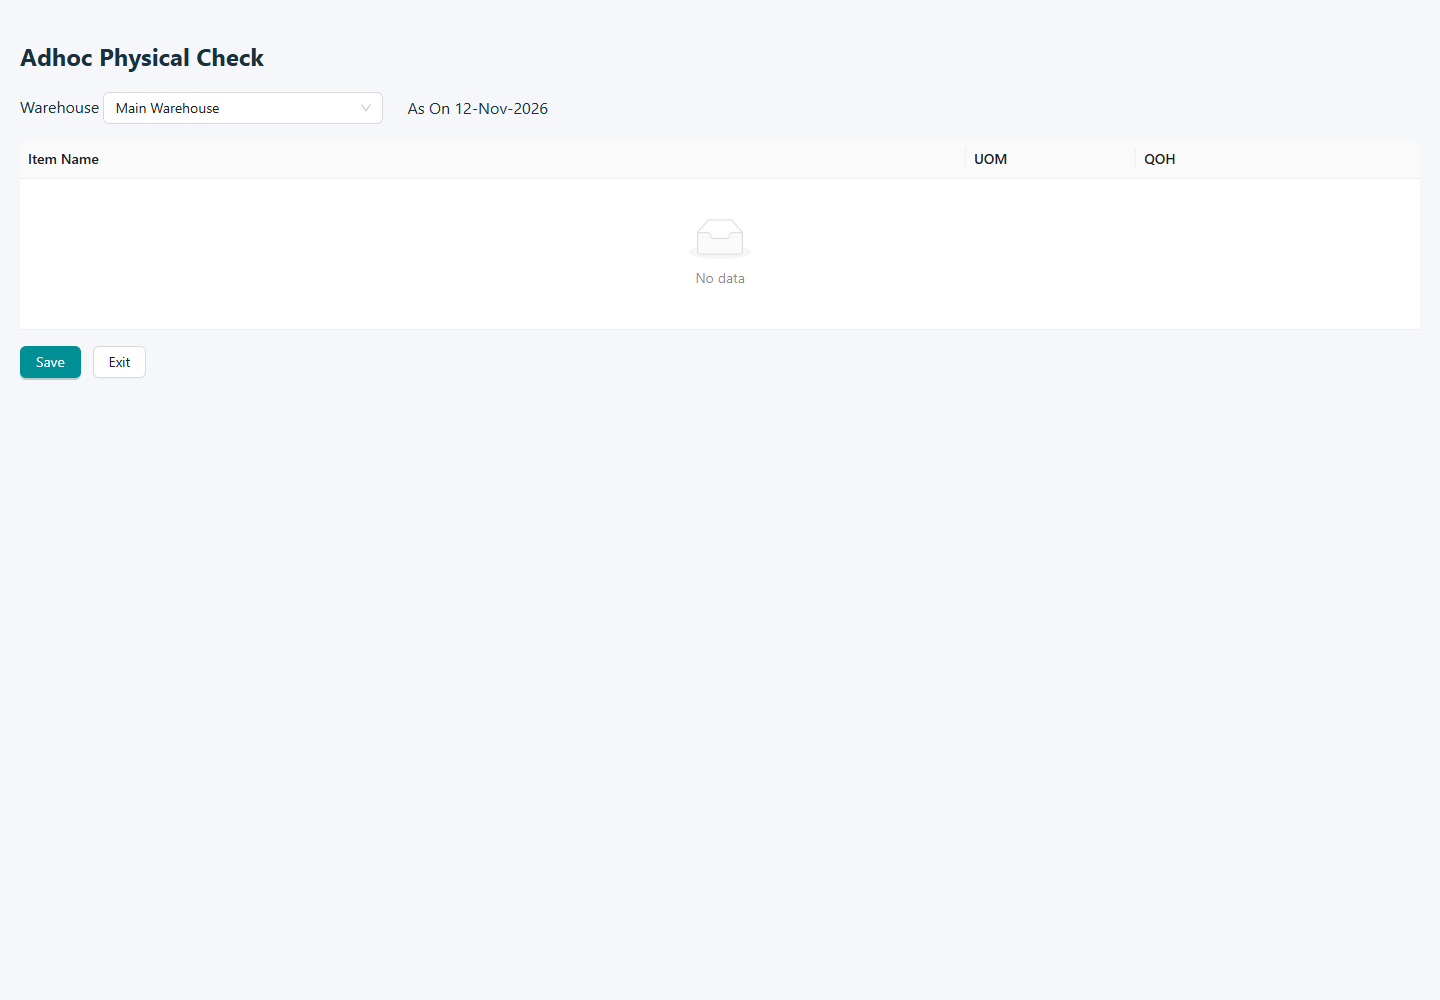
Ad hoc physical check
Goal
Check selected items against physical quantities.
Use this screen for focused checks rather than a complete inventory count. It helps investigate a particular item or location when a discrepancy is noticed.
Key Rules
Only items in the selected check scope should receive counts.
Use an assigned warehouse.
Validations
Application checks and checks to make before continuing:
Physical quantities must match the selected item rows.
Enter valid numeric quantities.
At least one item must be available to save.
Open: Inventory → Adhoc Physical Check
How to use
Select the item and applicable warehouse/filter.
Enter or review the physical quantity.
Complete the check and review the displayed difference.
Ad hoc physical check · Example screen. Click to view full size. Sample data and layout may differ from your company.
Finance
Finance
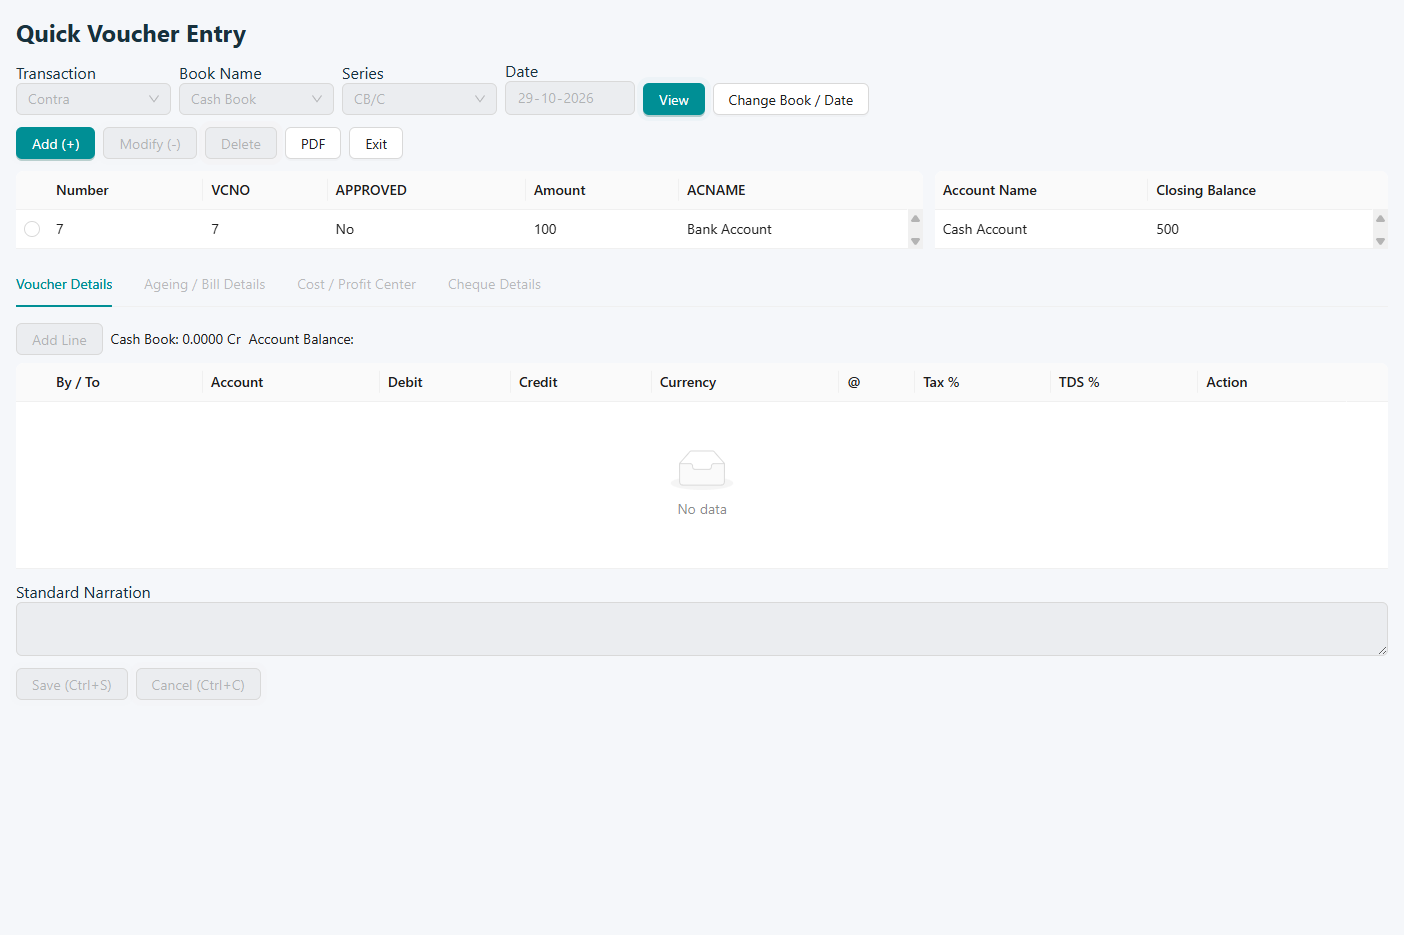
Quick voucher entry
Goal
Enter accounting vouchers.
Voucher lines record the accounting effect of a transaction. Review the selected accounts and debit/credit totals before saving.
Key Rules
The selected book determines voucher type and numbering series.
Cancel an active voucher before switching its working context.
Validations
Application checks and checks to make before continuing:
Select a configured book and valid voucher type.
Use a date within the financial year.
Check numeric amounts, currency rate and balanced posting lines before saving.
Open: Finance → Quick Voucher Entry
How to use
Choose the voucher type and date.
Add account lines, amounts and narration.
Check the totals and save the voucher.
Quick voucher entry · Example screen. Click to view full size. Sample data and layout may differ from your company.
Finance
Cash and bank
Goal
Enter cash or bank transactions.
Use the appropriate transaction type to record cash and bank activity. Check both the account and amount so that the entry reflects the intended receipt or payment.
Key Rules
The entry type determines the cash/bank or contra workflow.
Contra modification and deletion have their own permission checks.
Validations
Application checks and checks to make before continuing:
Use a date within the financial year.
Review the selected accounts and amounts.
Resolve Invalid Data feedback before saving.
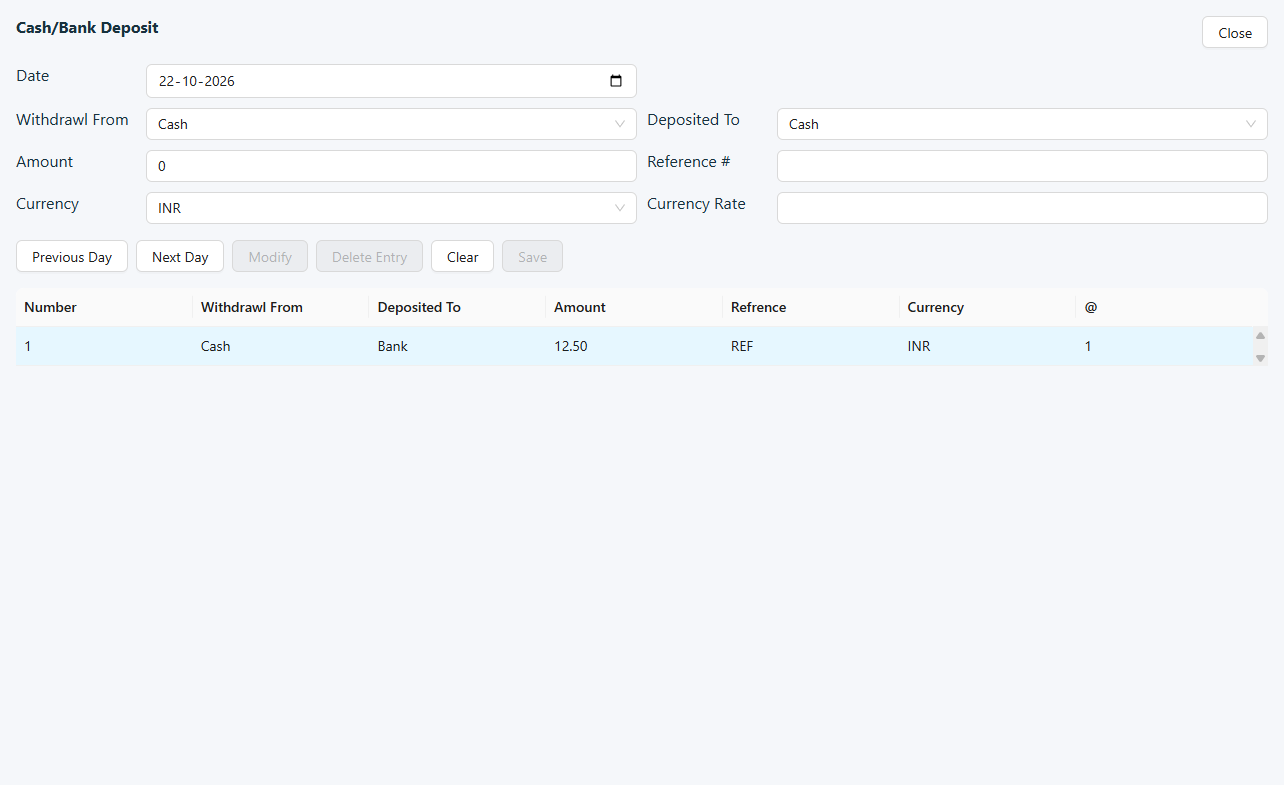
Open: Finance → Cash/Bank Deposit · Finance → Contra
How to use
Choose the transaction type, account and date.
Enter the amount, reference and narration.
Review the posting details before saving.
Cash and bank · Example screen. Click to view full size. Sample data and layout may differ from your company.
Finance
Expense entry
Goal
Record business expenses.
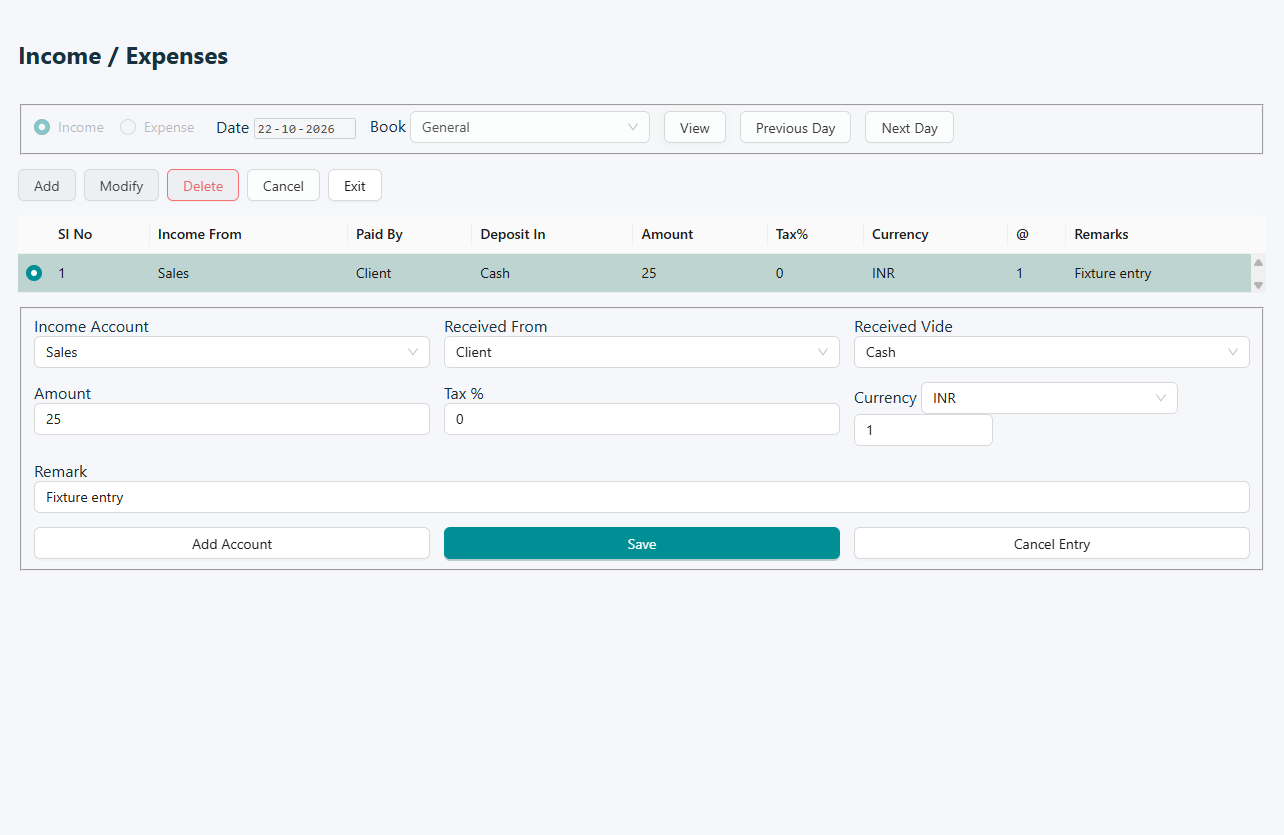
An expense entry identifies the cost and the account used for payment. A useful narration and reference make the entry easier to trace during review.
Key Rules
Books must be configured before expense entry.
Close the active entry panel before changing the parent selection.
Validations
Application checks and checks to make before continuing:
Use a financial-year date and valid entry type/accounts.
At least two accounts are required by the posting workflow.
Check line amounts before saving.
Open: Finance → Income/Expenses
How to use
Select the expense and payment accounts and document date.
Enter the amount, narration and applicable details.
Review and save the expense.
Expense entry · Example screen. Click to view full size. Sample data and layout may differ from your company.
Finance
Journal book
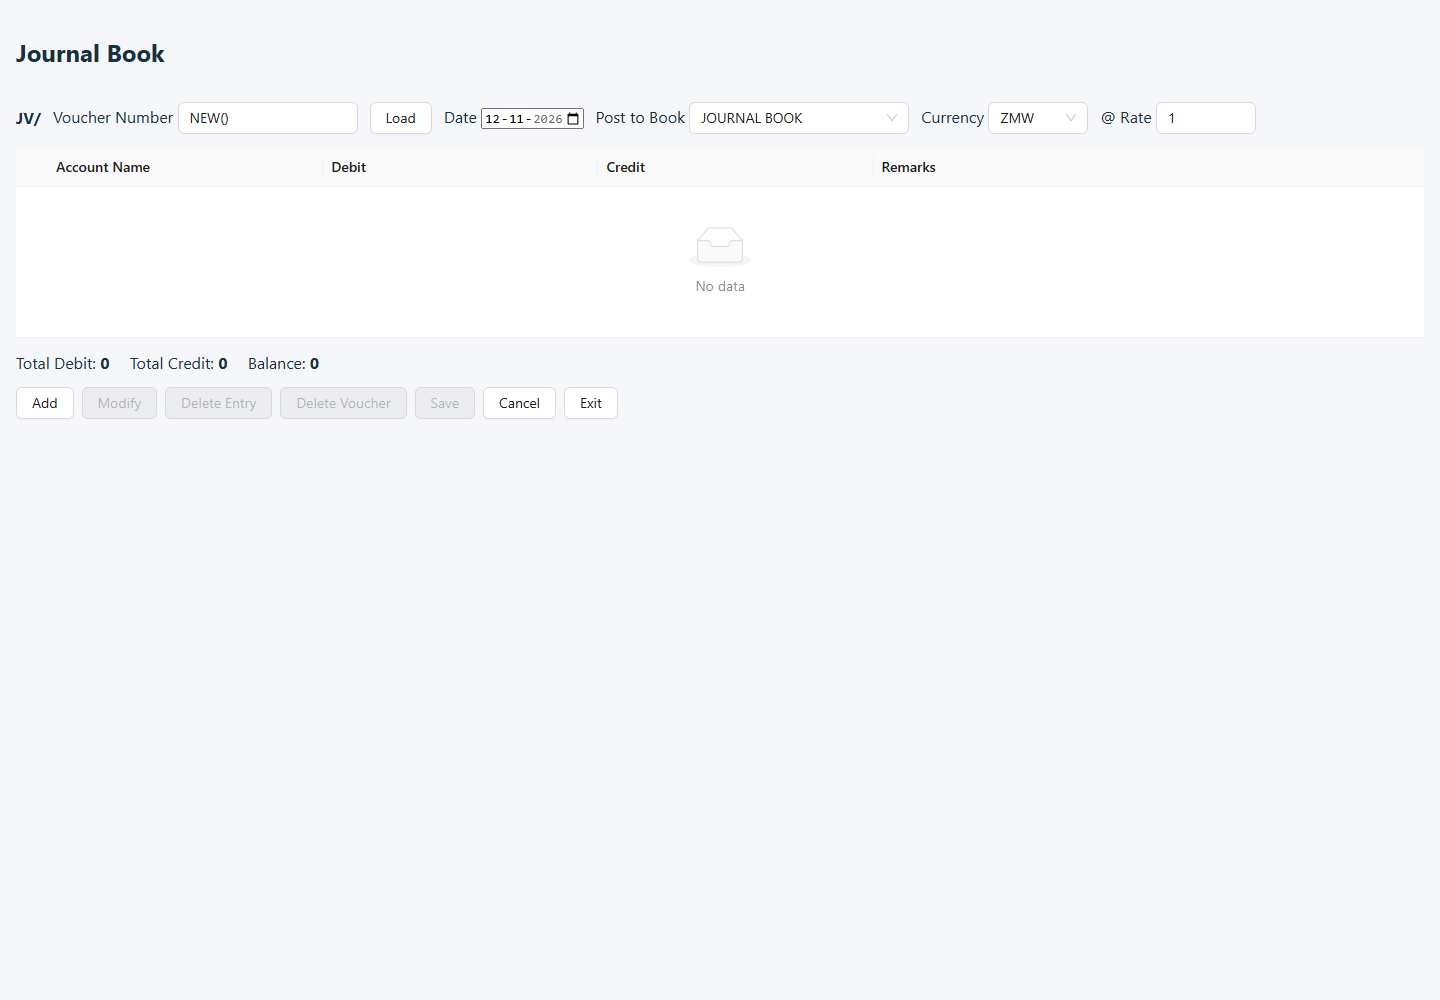
Goal
Review journal entries.
The journal book provides a period-based view of accounting entries. Use references and narration to locate the transaction behind a posting.
Key Rules
Journal entries are reviewed within the chosen period.
Use document references and narration to locate a posting.
Validations
Application checks and checks to make before continuing:
Check the period and account filters.
Review the selected entry before using a detail or output action.
Open: Finance → Journal Book
How to use
Set the date range and available account filters.
Load and review the entries.
Use the supplied detail or output actions as needed.
Journal book · Example screen. Click to view full size. Sample data and layout may differ from your company.
Finance
Bank settlement
Goal
Review and settle applicable bank entries.
Settlement supports review of the bank entries within the chosen scope. Verify entries against the relevant bank information before completing the action.
Key Rules
Review bank entries in the selected period before posting a settlement.
The clearing panel is separate from the search list.
Validations
Application checks and checks to make before continuing:
Check the selected bank, date filters and clearing details.
Resolve missing-record or amount feedback before posting.
Open: Finance → Bank Settlement
How to use
Select the bank and available date scope.
Load and review the relevant entries.
Complete the settlement action after verifying the details.
Bank settlement · Example screen. Click to view full size. Sample data and layout may differ from your company.
Finance
Voucher master
Goal
Manage issued vouchers and their redemption information.
The voucher list shows voucher values and redemption information. Confirm the voucher identifier and status before making changes or handling a customer enquiry.
Key Rules
Voucher generation uses the selected customer, currency, amount and quantity.
Redemption status distinguishes used vouchers from available ones.
Validations
Application checks and checks to make before continuing:
Select the customer and configured currency before generating.
Check the amount and quantity and resolve payment validation before completion.
Use the voucher ID to verify the intended record.
Open: Finance → Vouchers
How to use
Filter the voucher list.
Select a voucher or use the available creation action.
Review amount, account and redemption details before confirming changes.
Field-wise description
Fields may be hidden or read-only according to company settings, the selected record and your permissions. Percentage values are entered as percentages; verify the selected unit for rates and quantities.
Search and generation
Search and generation field descriptions
Field
Description
From
Start date of the search period.
To
End date of the search period.
All / Client Name / Voucher ID
Choose whether to list all records or search by customer or voucher identifier.
Client Name
Customer account used to filter the list or assign newly generated vouchers.
Currency
Currency selected for new voucher values.
Amount
Value entered for the vouchers being generated.
Quantity
Number of vouchers to generate.
Voucher grid
Voucher grid field descriptions
Field
Description
Voucher ID
Identifier used to find the voucher; double-click to copy it.
Amount
Value recorded for the voucher.
Created By
User recorded as the voucher creator.
Redeemed By
User recorded for redemption, where redeemed.
Redemption Time
Recorded redemption date/time.
Creation Time
Recorded voucher creation date/time.
Currency
Currency of the voucher value.
Redemption Status
Current redemption status shown for the voucher.
Voucher master · Example screen. Click to view full size. Sample data and layout may differ from your company.
Reports
Reports
Stock status
Goal
Check item stock availability.
The stock view helps users check availability before sales or movement. Read the warehouse and other selected filters together with the quantity shown.
Key Rules
Availability depends on the selected stock/account view and filters.
Use the relevant location when making commitments.
Validations
Application checks and checks to make before continuing:
Check the selected item/account scope and date.
Review missing-selection or no-data feedback before interpreting an empty view.
Open: Reports → Inventory → Stock Status · Reports → Account → Account Status
How to use
Select the available item, location and date filters.
Load the stock view.
Review quantities before making stock commitments.
Stock status · Example screen. Click to view full size. Sample data and layout may differ from your company.
Reports
Stock statement
Goal
Review stock movement and balances.
A stock statement explains how stock changes over a period. Compare opening quantity, movement entries and closing quantity when investigating a difference.
Key Rules
The statement covers the chosen stock period and warehouse.
Different report options change the movement view.
Validations
Application checks and checks to make before continuing:
From date must precede To date as required by the report.
Select a warehouse and valid report options.
Check date values before loading.
Open: Reports → Inventory → Stock Statement
How to use
Set the period and stock filters.
Load the statement and review opening, movement and closing figures.
Use the available output action for a copy.
Stock statement · Example screen. Click to view full size. Sample data and layout may differ from your company.
Reports
All warehouse stock
Goal
Compare stock across warehouses.
This grid places warehouse quantities together for comparison. It can help identify where an item is held before arranging a stock transfer.
Key Rules
Warehouse columns show the stock distribution for the selected item/category scope.
Export follows the loaded grid.
Validations
Application checks and checks to make before continuing:
Select the intended category/filter and run View.
Check no-data feedback before exporting or concluding there is no stock.
Open: Reports → Inventory → All Warehouse Stock
How to use
Select the available item filters.
Load the stock grid.
Compare warehouse quantities and export when required.
All warehouse stock · Example screen. Click to view full size. Sample data and layout may differ from your company.
Reports
Party stock
Goal
Review stock associated with a party.
This view focuses on stock associated with a selected party. Confirm the party selection before interpreting the quantities.
Key Rules
Party stock is scoped by warehouse, party range and item selection.
Keep the same scope when reconciling quantities.
Validations
Application checks and checks to make before continuing:
Select the warehouse and both party endpoints.
Select a valid item where required.
Check From/To dates and their order.
Open: Reports → Inventory → Party Stock Ledger
How to use
Select the party and available scope filters.
Load the report.
Review quantities and use the output options provided.
Party stock · Example screen. Click to view full size. Sample data and layout may differ from your company.
Reports
Price stock
Goal
Review stock with its displayed prices/values.
The report combines stock information with the prices or values supplied by its selected view. Check the filter scope before using the figures for a stock review.
Key Rules
Stock values belong to the selected reporting period and scope.
Use the same filters when comparing reports.
Validations
Application checks and checks to make before continuing:
Use valid dates and the report's required From/To ordering.
Load a populated view before preparing the Excel output.
Open: Reports → Inventory → Priced Stock Ledger
How to use
Set the available stock filters.
Choose View.
Review the grid and export to Excel if needed.
Price stock · Example screen. Click to view full size. Sample data and layout may differ from your company.
Reports
Item sale analysis
Goal
Analyze sales by item.
Item analysis helps compare product sales across the selected period. Review both quantity and value when identifying fast-moving or low-selling items.
Key Rules
The analysis reflects the selected grouping and filters.
Generate the report before export.
Validations
Application checks and checks to make before continuing:
Use a supported analysis selection.
An export requires a generated report.
Check the reporting period before comparing results.
Open: Reports → Inventory → Item Analysis
How to use
Select the period and applicable item/customer filters.
Load the analysis.
Review quantities and values; export or print when offered.
Item sale analysis · Example screen. Click to view full size. Sample data and layout may differ from your company.
Reports
Item price list
Goal
Review item selling prices.
Use the list to answer price enquiries or review selling prices. Check the chosen price scope before comparing it with a customer document.
Key Rules
The list reflects the selected pricing scope.
Review prices in the same unit/currency context as the customer document.
Validations
Application checks and checks to make before continuing:
Check filters before loading/exporting.
Confirm the result contains the intended products and price columns.
Open: Reports → Inventory → Item Price List
How to use
Choose the available item and price filters.
Load and review the list.
Export or print when offered.
Item price list · Example screen. Click to view full size. Sample data and layout may differ from your company.
Reports
Indent status
Goal
Track requested and outstanding indent quantities.
The status view helps track the portion of an indent still awaiting action. Use the pending figures to follow up on incomplete requests.
Key Rules
Status reports show required, processed and remaining quantities for the chosen scope.
Review the reference document before following up.
Validations
Application checks and checks to make before continuing:
Check report filters and period.
Confirm the selected document/item before interpreting pending quantity.
Open: Reports → Inventory → Indent Status · Reports → Sale && Purchase → Purchase Order Status · Reports → Sale && Purchase → Sale Order Status
How to use
Set the available indent filters.
Load the status list.
Review required, processed and pending quantities.
Indent status · Example screen. Click to view full size. Sample data and layout may differ from your company.
Reports
Blocked loyalty report
Goal
Review blocked loyalty records.
Use this report to identify loyalty records that are blocked. Review the member and card identity before referring an access issue to the responsible operator.
Key Rules
This is a review of blocked loyalty records.
Changing a card's status belongs to the authorized membership workflow.
Validations
Application checks and checks to make before continuing:
Check the search/filter scope and card identity.
Treat an empty result as no match for the current filters.
Open: Reports → Account → Loyalty Blocked Cards
How to use
Open the report and set the available filters.
Review the matching cards or members.
Use the available output action if a copy is needed.
Blocked loyalty report · Example screen. Click to view full size. Sample data and layout may differ from your company.
Reports
Ageing report
Goal
Review outstanding amounts by age.
Ageing groups outstanding amounts by how long they have remained unsettled. The selected reporting date is essential when assessing overdue balances.
Key Rules
Outstanding amounts are grouped by age at the selected report date.
Check customer/supplier scope before following up balances.
Validations
Application checks and checks to make before continuing:
Both From Account and To Account are required.
The report date must be valid.
Review no-data feedback for the chosen scope.
Open: Reports → Account → Ageing Analysis
How to use
Select the date, party/account and available ageing options.
Load the report.
Review overdue buckets and balances before following up.
Ageing report · Example screen. Click to view full size. Sample data and layout may differ from your company.
Reports
General ledger
Goal
Review an account's ledger movements.
A ledger explains the movement in one account over time. Check the opening balance and individual entries when reconciling its closing balance.
Key Rules
Account-to-account and selected-account modes use different selection scopes.
Optional ageing/item/currency views change the detail displayed.
Validations
Application checks and checks to make before continuing:
Select the required account(s) and valid report dates.
A narration selection is required for actions that request it.
Review no-data feedback before output.
Open: Reports → Account → General Ledger
How to use
Select the account and period.
Load the ledger and check opening, transactions and closing balance.
Print or export through the available controls.
General ledger · Example screen. Click to view full size. Sample data and layout may differ from your company.
Reports
Trial balance
Goal
Review debit and credit balances.
The trial balance summarizes account balances for accounting review. Unexpected account balances should be investigated in the supporting ledger entries.
Key Rules
The trial balance summarizes account balances for the selected period.
Use ledger entries to investigate unexpected balances.
Validations
Application checks and checks to make before continuing:
Check the reporting period and selected scope.
Review totals before using the statement in financial review.
Open: Reports → Account → Trial Balance
How to use
Choose the reporting period and available scope.
Load the trial balance.
Review totals and investigate unexpected balances through the ledger.
Trial balance · Example screen. Click to view full size. Sample data and layout may differ from your company.
Reports
Balance sheet / profit and loss
Goal
Review financial statements in the selected report mode.
The selected menu opens either the balance sheet or profit-and-loss view. Check the report title and period before interpreting or sharing its figures.
Key Rules
The menu selects Balance Sheet or Profit and Loss.
Required opening/closing stock accounts must be configured for the statement.
Use a consistent reporting period for comparison.
Validations
Application checks and checks to make before continuing:
Select a valid report type and valid period dates.
Select a report row before row-specific actions.
Resolve missing stock-account setup before generating the statement.
Open Balance Sheet or Profit and Loss from the relevant menu.
Select the reporting period and available options.
Load and review the statement, then use the supplied output action.
Balance sheet / profit and loss · Example screen. Click to view full size. Sample data and layout may differ from your company.
Reports
Account budget
Goal
Maintain or review account budgets.
Budget records provide planned figures for the selected account and period. Confirm the period before entering or revising an amount.
Key Rules
Budget values belong to the selected account/statement scope and period.
Only use actions enabled in this build.
Validations
Application checks and checks to make before continuing:
Use valid dates with the required From/To order.
Choose valid group and statement sequence values.
Review permissions or unavailable-action feedback.
Open: Reports → Account → Budget
How to use
Select the account and budget period.
Enter or review the displayed budget values.
Save changes through the available action.
Account budget · Example screen. Click to view full size. Sample data and layout may differ from your company.
Reports
Report collection
Goal
Access the configured collection of reports.
This screen provides access to a collection of configured reports. Each report may ask for different inputs, so review its parameters before running it.
Key Rules
Each report uses its own parameter selection.
Output should be based on the report just generated.
Validations
Application checks and checks to make before continuing:
Use valid dates and complete the chosen report's required filters.
Check no-data feedback before saving or printing.
Open: Reports → Sale && Purchase → Collection Report · Reports → Sale Settlement
How to use
Choose a report and fill its available parameters.
Run the selected report.
Review the result and use its supplied output controls.
Report collection · Example screen. Click to view full size. Sample data and layout may differ from your company.
Reports
Sale issue book
Goal
Review sales and issue entries.
The book provides a chronological review of sales or issue documents within its scope. Check document references when reconciling movement with another report.
Key Rules
The menu determines the sale/purchase register mode.
Warehouse and order type affect which documents are included.
Validations
Application checks and checks to make before continuing:
Select the required warehouse and order type.
Use valid report dates and options.
Resolve account-selection messages before loading.
Open: Reports → Sale && Purchase → Sale Register · Reports → Sale && Purchase → Purchase Register
How to use
Choose the period and document filters.
Load the book.
Review the listed entries and use the available output actions.
Sale issue book · Example screen. Click to view full size. Sample data and layout may differ from your company.
Reports
Bill-wise profit report
Goal
Review profitability by bill.
This report presents profitability at bill level. Use the document details to investigate unusual results rather than relying on the total alone.
Key Rules
Detail and Summary are separate report views.
Profit figures must be interpreted with their supporting bill/cost details.
Validations
Application checks and checks to make before continuing:
Choose a valid reporting date scope and view.
Review filters when a result is empty.
Open: Reports → Sale && Purchase → BillWise Profit Report
How to use
Set the reporting period and available filters.
Load the report.
Review bill values, costs and profit before exporting or printing.
Bill-wise profit report · Example screen. Click to view full size. Sample data and layout may differ from your company.
Reports
Settlement report
Goal
Review settlement activity.
Settlement figures help review how recorded receipts are distributed across the selected payment scope. Use consistent dates and till filters when comparing them with cash-up records.
Key Rules
Settlement totals depend on the selected date and payment scope.
Compare only reports with matching filters.
Validations
Application checks and checks to make before continuing:
Use valid dates and supported report/sort selections.
Review no-data or numeric-value messages before output.
Open: Reports → Sale && Purchase → Settlement Report
How to use
Select the date range and applicable till/user filters.
Load the settlement report.
Review payment totals and differences before taking a copy.
Settlement report · Example screen. Click to view full size. Sample data and layout may differ from your company.
Reports
Account date report
Goal
Review account activity for a selected date scope.
This report focuses account activity on the selected date scope. Keep the account and period consistent when comparing with ledger results.
Key Rules
The selected report focuses account activity by its date context.
Use the same account/date scope as the ledger when comparing.
Validations
Application checks and checks to make before continuing:
Check the account and date filters.
There must be data available before export.
Open: From the related menu, list or parent workflow
How to use
Select the account/date filters shown.
Run the report.
Review the entries and output when offered.
Account date report · Example screen. Click to view full size. Sample data and layout may differ from your company.
System Setup
System Setup
Project setup
Goal
Maintain project configuration.
Project details provide configuration and references used by project-related work. Keep identifiers and descriptions consistent with the records staff will select.
Key Rules
This screen maintains printer/output setup by location.
Review the selected layout and printer assignment before saving.
Validations
Application checks and checks to make before continuing:
Select a location; duplicate printer assignment for that location is checked.
Choose a supported print type/font.
Check barcode patterns and images when changing output assets.
Open: System Setup → Printer Settings
How to use
Select or create the relevant project record.
Enter the displayed project details.
Review and save the configuration.
Project setup · Example screen. Click to view full size. Sample data and layout may differ from your company.
System Setup
Application settings
Goal
Configure application behaviour.
Application settings affect the behaviour of enabled workflows. Read the relevant section carefully and change only the options needed for your company's process.
Key Rules
Settings are grouped by functional area.
Import formats and available actions depend on the selected settings section.
Use the company's approved configuration values.
Validations
Application checks and checks to make before continuing:
Complete fields required by the selected action; serial number and description are both required where requested.
Use the matching workbook/template for imports.
Resolve unsupported or unavailable-action feedback rather than repeating a save.
Open: System Setup → Company Settings
How to use
Open the relevant settings section.
Review and change the required options.
Save and follow any displayed restart or refresh instructions.
Application settings · Example screen. Click to view full size. Sample data and layout may differ from your company.
System Setup
Loyalty settings
Goal
Configure loyalty options within settings.
Loyalty settings define the options used by member and card workflows. Review the intended customer rules before saving a change.
Key Rules
These options affect the company loyalty workflow.
Review existing membership rules before changing a setting.
Validations
Application checks and checks to make before continuing:
Check required values in the selected settings action.
Review save feedback before using the new rules.
Open: From the related settings or purchase screen
How to use
Open the loyalty section in settings.
Review the displayed card and loyalty rules.
Save the required changes.
Loyalty settings · Example screen. Click to view full size. Sample data and layout may differ from your company.
System Setup
Voucher settings
Goal
Configure voucher options within settings.
Voucher settings influence how the enabled voucher workflow operates. Review the business rules with the staff who issue and handle vouchers.
Key Rules
These options affect voucher issue and handling.
Coordinate changes with the users who generate vouchers.
Validations
Application checks and checks to make before continuing:
Check the selected voucher options and required values.
Read validation/save messages before generating further vouchers.
Open: From the related settings or purchase screen
How to use
Open the voucher section in settings.
Review the available voucher options.
Save the required changes.
Voucher settings · Example screen. Click to view full size. Sample data and layout may differ from your company.
System Setup
ZIMRA settings
Goal
Configure the displayed ZIMRA integration options.
These settings support the company's ZIMRA integration. Enter the approved configuration and read the application feedback before proceeding with related transactions.
Key Rules
The integration operates against the active company's device/fiscal setup.
Register, Open Day, Close Day and Status are distinct actions.
Validations
Application checks and checks to make before continuing:
Check the approved device/company values before each action.
Read the returned status; resolve errors before continuing the fiscal workflow.
Open: From the related settings or purchase screen
How to use
Open the ZIMRA section in settings.
Enter or review the company integration values.
Save and read the result message.
ZIMRA settings · Example screen. Click to view full size. Sample data and layout may differ from your company.
System Setup
ZRA parameters
Goal
Maintain the displayed ZRA integration parameters.
These values support the company's ZRA integration workflow. Use the approved company values and check any validation feedback after saving.
Key Rules
Integration parameters belong to the active company.
Fetching VSDC codes may be disabled by company configuration.
Validations
Application checks and checks to make before continuing:
Company configuration must be available.
Use the approved integration values and resolve disabled-fetch feedback with the administrator.
Open: System Setup → ZRA Parameter
How to use
Open the required parameter section.
Review or enter the values supplied for your company.
Save and read any validation/result message.
ZRA parameters · Example screen. Click to view full size. Sample data and layout may differ from your company.
System Setup
Change financial year
Goal
Switch the working financial period.
The working year determines the period in which you view and enter records. Check it when reviewing historical documents or beginning a new accounting year.
Key Rules
Changing the year changes the working financial period.
Review the new period before entering further documents.
Validations
Application checks and checks to make before continuing:
Select an available financial year.
Confirm that the resulting period is the one required for the work.
Open: System Setup → Change FY
How to use
Open Change Financial Year.
Select the required year and confirm.
Check the active period before entering a document.
Change financial year · Example screen. Click to view full size. Sample data and layout may differ from your company.
System Setup
Feature setup
Goal
Choose features available for the company.
Feature selection controls which areas are available for the company. Review the business requirement before enabling or disabling an option.
Key Rules
Feature selections determine which company functions are enabled.
Review dependencies in the company's workflow before changing them.
Validations
Application checks and checks to make before continuing:
Check the company and selected features.
Read the save result before refreshing the dashboard.
Open: System Setup → Feature Setup
How to use
Open the feature selection screen.
Review and change the required feature selections.
Save and review the resulting available features.
Feature setup · Example screen. Click to view full size. Sample data and layout may differ from your company.
Maintainance
Maintainance
Merge data
Goal
Combine records using the available merge workflow.
Merging combines the selected records through a dedicated workflow. Carefully distinguish the record being merged from the destination that should remain in use.
Key Rules
The source record and destination have different roles.
Read the merge confirmation before completing it.
Validations
Application checks and checks to make before continuing:
Verify both selected records and the direction of the merge.
Resolve the screen's selection or permission message before retrying.
Select the source and destination offered by the screen.
Review the records carefully.
Run Merge and read the result before continuing.
Merge data · Example screen. Click to view full size. Sample data and layout may differ from your company.
Manage Contract
Manage Contract
Contract master
Goal
Maintain customer contract details.
The contract holds the agreed customer details and billing context. Check dates and contract terms before using the record to prepare bills.
Key Rules
A contract belongs to a customer and validity period.
Contract Type and Finished Goods definitions must exist.
Open the BOM workflow before changing contract components.
Validations
Application checks and checks to make before continuing:
Select valid contract/customer/item choices.
Enter Add or Modify before saving header changes.
Select a component before editing or deleting it.
Open: Manage Contract → Contract Master
How to use
Select or create a contract.
Enter the customer, period and applicable contract terms/items.
Review and save before billing the contract.
Field-wise description
Fields may be hidden or read-only according to company settings, the selected record and your permissions. Percentage values are entered as percentages; verify the selected unit for rates and quantities.
Contract details
Contract details field descriptions
Field
Description
Select Contract
Choose an existing contract for review or editing.
Contract No.
Contract identifier displayed by the editor.
Contract Type
Category of contract selected from the configured types.
Customer Name
Customer account to which the contract belongs.
Location
Service location for the contract.
Pool Size
Size recorded for the pool/service site in this contract workflow.
Distance
Distance recorded for the service location.
Visit Per Month
Number of scheduled visits per month.
Assign To
User assigned to the contract.
Contract Item
Item used to identify the contracted service or product.
Contract Amount
Value recorded for the contract.
Valid from
Beginning of the contract validity period.
Valid to
End of the contract validity period.
Geo Location
Geographic location reference for the service site.
BOM Item
Material associated with the contract's bill of materials.
Average per Unit
Material requirement per unit in the contract BOM.
Item Name / Average
Material description and requirement shown in the BOM grid.
Contract master · Example screen. Click to view full size. Sample data and layout may differ from your company.
Manage Contract
Contract billing
Goal
Prepare billing against contracts.
Contract billing turns the selected contract's billable details into a billing document. Review the period to avoid billing the wrong stage or interval.
Key Rules
Billing uses the selected customer and contract scope.
A bill reference must match its warehouse and permitted period.
Validations
Application checks and checks to make before continuing:
Select the customer before changing bill details.
Use an allowed date.
Resolve invalid bill number/warehouse or selection messages before billing.
Open: Manage Contract → Contract Billing
How to use
Select the contract and billing period.
Review the billable details and amounts.
Complete the available billing and print actions.
Contract billing · Example screen. Click to view full size. Sample data and layout may differ from your company.
Work Shop
Work Shop
Workshop booking
Goal
Record workshop appointments or work bookings.
A booking identifies the vehicle, customer and requested work. Check the vehicle identity before recording appointment or job information.
Key Rules
The booking ties the customer and vehicle to the requested work.
Verify the vehicle identity before adding jobs.
Validations
Application checks and checks to make before continuing:
Check customer/vehicle details and booking date.
Resolve job-selection and required-field messages before saving.
Open: Work Shop → Job Card Booking
How to use
Select or enter the customer and vehicle details.
Enter the requested work and booking information.
Review and save the booking.
Workshop booking · Example screen. Click to view full size. Sample data and layout may differ from your company.
Work Shop
Jobwork master
Goal
Maintain jobwork records.
Jobwork records identify the work and related parties/items used by the enabled workflow. Keep references clear so later entries can be matched to the right job.
Key Rules
Group and job codes identify the jobwork record and are locked during modification.
Reporting mode does not allow jobwork changes.
Validations
Application checks and checks to make before continuing:
Group code is required and limited to 4 characters.
Job code must be a positive number up to 7 digits; description is required and limited to 150 characters.
Man-hour must be positive and nature must be valid.
Open: Work Shop → Jobwork Master
How to use
Select an existing record or start a new one.
Enter the displayed party, job and item details.
Review and save using the available actions.
Field-wise description
Fields may be hidden or read-only according to company settings, the selected record and your permissions. Percentage values are entered as percentages; verify the selected unit for rates and quantities.
Jobwork details
Jobwork details field descriptions
Field
Description
Search Jobwork
Find a jobwork record in the list.
Group Code
Group identifier for the jobwork; locked when modifying an existing record.
Job Code
Job identifier within the group; locked when modifying an existing record.
Job Description
Description of the work to perform.
Man Hour
Labour-hour value recorded for the job.
Nature
Configured nature/category assigned to the jobwork.
Jobwork master · Example screen. Click to view full size. Sample data and layout may differ from your company.
Work Shop
Workshop bill details
Goal
Inspect workshop bill information.
The detail view provides a closer look at an individual workshop bill. Use it to answer charge enquiries and check the supporting line items.
Key Rules
A bill is identified by its series, number and warehouse.
Resolve conflicting duplicate bill dates before export.
Validations
Application checks and checks to make before continuing:
Select an authorized warehouse, valid series and bill number.
There must be bill details to export.
Open: Work Shop → Workshop Bill Details
How to use
Select or open the relevant bill.
Review its line items and charges.
Use the available follow-up or output controls.
Workshop bill details · Example screen. Click to view full size. Sample data and layout may differ from your company.
Work Shop
Workshop bill
Goal
Prepare a workshop bill.
Workshop billing collects the charges associated with the selected work. Review labour and material charges against the job before completion.
Key Rules
Billing requires a valid job card, customer and authorized warehouse.
Reload the job card if it has changed since loading.
Bill details must belong to the working financial year.
Validations
Application checks and checks to make before continuing:
Use valid date/time values and a valid insurer where selected.
Check numeric bill amounts and mileage.
Vehicle and remarks are subject to the screen's length limits.
Open: Work Shop → Workshop Bill
How to use
Select the customer, vehicle and applicable job.
Review labour, materials and charges.
Complete the displayed billing and output actions.
Workshop bill · Example screen. Click to view full size. Sample data and layout may differ from your company.
Work Shop
Workshop material issue
Goal
Record materials issued for workshop work.
A material issue connects consumed stock to workshop work. Check the job reference and quantities before recording the issue.
Key Rules
Materials are assigned to the selected workshop job.
Check stock units and quantities against the physical issue.
Validations
Application checks and checks to make before continuing:
Select the correct job/vehicle and item.
Resolve quantity, warehouse and date feedback before saving.
Open: Work Shop → Material Issue
How to use
Select the job/vehicle reference.
Add materials and issue quantities.
Review and save the issue.
Workshop material issue · Example screen. Click to view full size. Sample data and layout may differ from your company.
Work Shop
Vehicle history
Goal
Review a vehicle's workshop history.
Vehicle history provides context from previous workshop visits. Confirm the vehicle identifier before using earlier work to inform a new job.
Key Rules
History belongs to the selected vehicle.
Use prior jobs as reference for the new service visit.
Validations
Application checks and checks to make before continuing:
Check the vehicle identifier before loading.
Verify that the returned history belongs to the intended vehicle.
Open: Work Shop → Vehicle History
How to use
Search or select the vehicle.
Load its history.
Review earlier jobs, materials and billing details.
Vehicle history · Example screen. Click to view full size. Sample data and layout may differ from your company.
Work Shop
Workshop income
Goal
Review workshop income.
The income view summarizes workshop earnings for the chosen period. Review the date scope before comparing figures across periods.
Key Rules
Income totals reflect the selected workshop period and filters.
Use matching dates when comparing with bills.
Validations
Application checks and checks to make before continuing:
Check the date range and report selections.
Review no-data feedback before output.
Open: Work Shop → Workshop Income
How to use
Select the date range and available filters.
Load the report.
Review income totals and output as offered.
Workshop income · Example screen. Click to view full size. Sample data and layout may differ from your company.
Work Shop
Workshop dashboard
Goal
Track workshop work and open job details.
The workshop dashboard brings jobs and their progress into one view. Use job details and status remarks to keep the team informed about current work.
Key Rules
Job details and status remarks describe the work's current progress.
Review the correct job before updating status.
Validations
Application checks and checks to make before continuing:
Select a valid job row.
Check the status and remarks before confirming the change.
Open: From the related menu, list or parent workflow
How to use
Review the job list.
Open a row to see its details.
Use the available status/remarks action to update progress.
Workshop dashboard · Example screen. Click to view full size. Sample data and layout may differ from your company.